Hi Folks,
While intelligence with the use of AI is being embedded into each and every part of the Microsoft ecosystem, it is good to know the features coming in the Power Platform space.
In this blog post, let’s see how we can use Dataverse AI Functions, their usage, advantages which can greatly ease summarizing, classifying, extracting, translating, assessing sentiment, or drafting a reply for common business scenarios.
To illustrate it better, I used a different AI Function for Canvas App, Model Driven App and Power Automate, hope you can follow the same for others as well.
What are Dataverse AI Functions?
Think of Dataverse AI Functions as prebuilt AI Functions which will add intelligence in your Apps and Flows without need to collect, build and train the models. They can be used in many places such as AI Builder, Power Automate, Power Apps, Low Code Plugins. Following are the AI Functions available…
- AIReply – Drafts a reply to the message you provide.
- AISentiment – Detects sentiment for the text you provide
- AISummarize – Summarizes the text you provide
- AIClassify – Classifies the text into one or more categories, you can use this from custom copilot
- AIExtract – Extracts specified entities like Names of people, phone numbers, places etc.
- AITranslate – Translate text from another language
Let’s see their usage in our favorite Canvas Apps first as illustration is easy and later in the post, I will mention how you can call the Dataverse AI Functions from Model Driven Apps, Power Automate so that you can get the real essence of it….
Utilizing ‘Dataverse AI Functions’ in a Canvas App
Create a new Canvas App and add ‘Environment’ Datasource as shown below.

All the ‘Dataverse AI functions’ can be accessed by ‘Environment‘ as shown below.

Let’s try the AIReply function in Canvas Apps
Add a textbox for storing the prompt or input string and a button control.

On the ‘OnSelect‘ event of the button, use the following formula to store the response in the AIResponse context variable, make sure you name the variables appropriately in your formula as per your naming defined in canvas apps.
Now create one more text variable to store the response and change the Default value to AIReplyResponse.PreparedResponse.

Try testing the app by providing inputs as below…

You should get a response from AIReply in the response field, you can try out other functions providing the necessary parameters required.
Utilizing ‘Dataverse AI Functions’ in a Power Automate
In Power Automate, all you can do to call Dataverse AI Functions is call the Unbound Action as below.
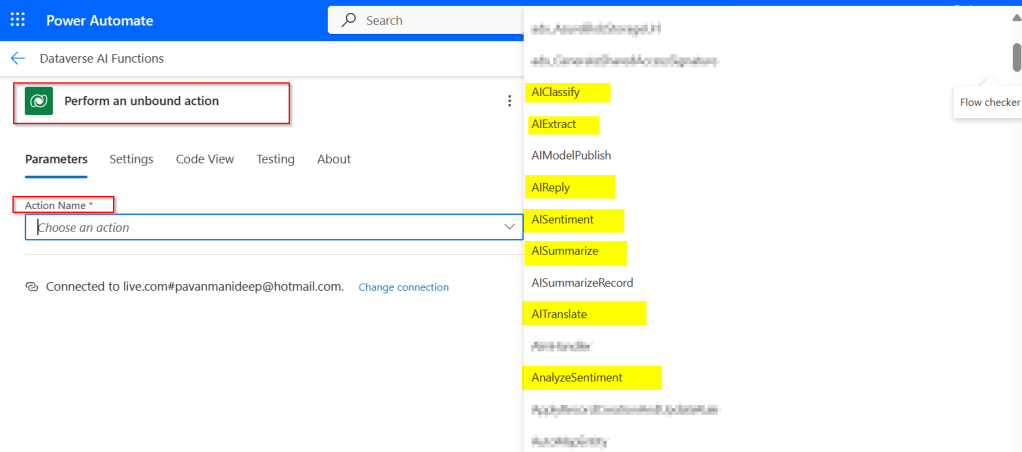
Passing the relevant input parameters is enough to get the output from these functions.
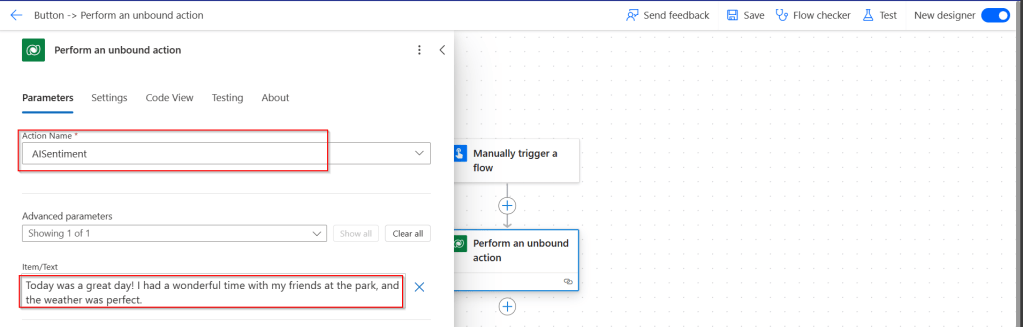
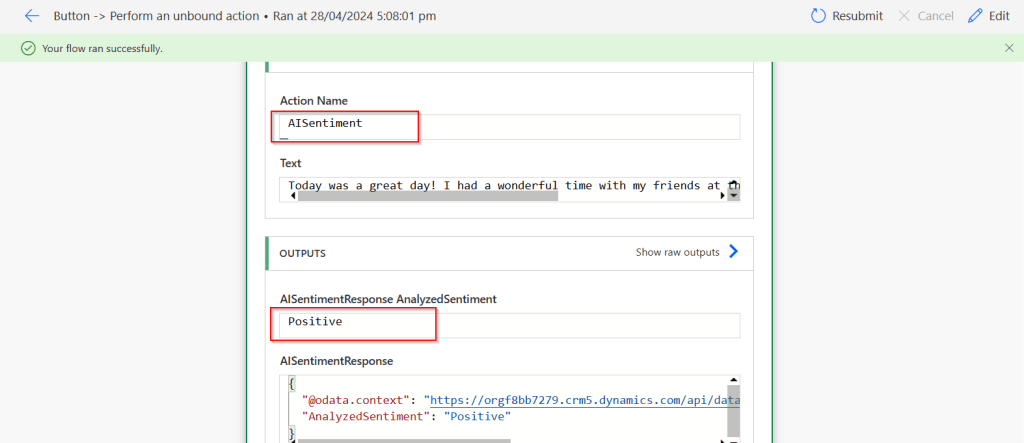
Let’s try AISentiment
Click on test, you should a response from Power Automate with the sentiment
Utilizing ‘Dataverse AI Functions’ in a Model Driven Apps
Do you want to utilize the similar capabilities of Dataverse AI Functions inside your custom code like in Plugins, Actions etc..
Let’s try AIClassify
It was pretty much similar in AIBuilder as well…
Please do note that there are quotas to use these AI Functions at tenant level, else you might get similar error like below, while I didn’t get any information regarding this from Microsoft, so I am unsure about this as of writing this post, I will keep this updated if I get to know.

Using Dataverse AI functions needs a bit of Prompt Engineering knowledge, you were looking to learn more about Prompt engineering, then check it out here.
References:
https://learn.microsoft.com/en-us/power-platform/power-fx/reference/function-ai
Cheers,
PMDY