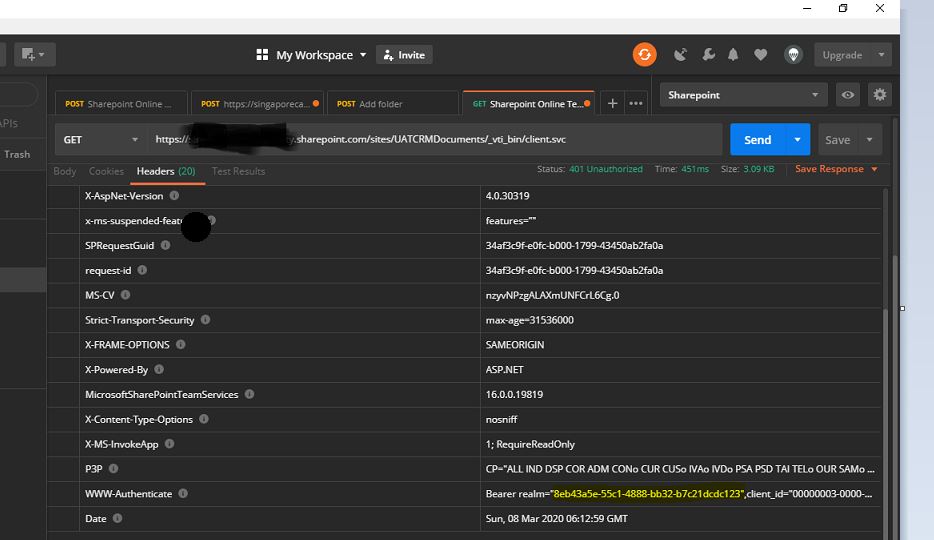
Next step is to get the Access token..from Postman..
Generate the Access Token
In response header, we will get WWW-Authenticate as one of the header and that contains the necessary information required for next step. The realm value contains the tenant id for the SharePoint Online site and clientid value contains the resource information (we’ll use it later).
| Key |
Syntax |
Value |
| Content-Type |
application/x-www-form-urlencoded |
application/x-www-form-urlencoded |
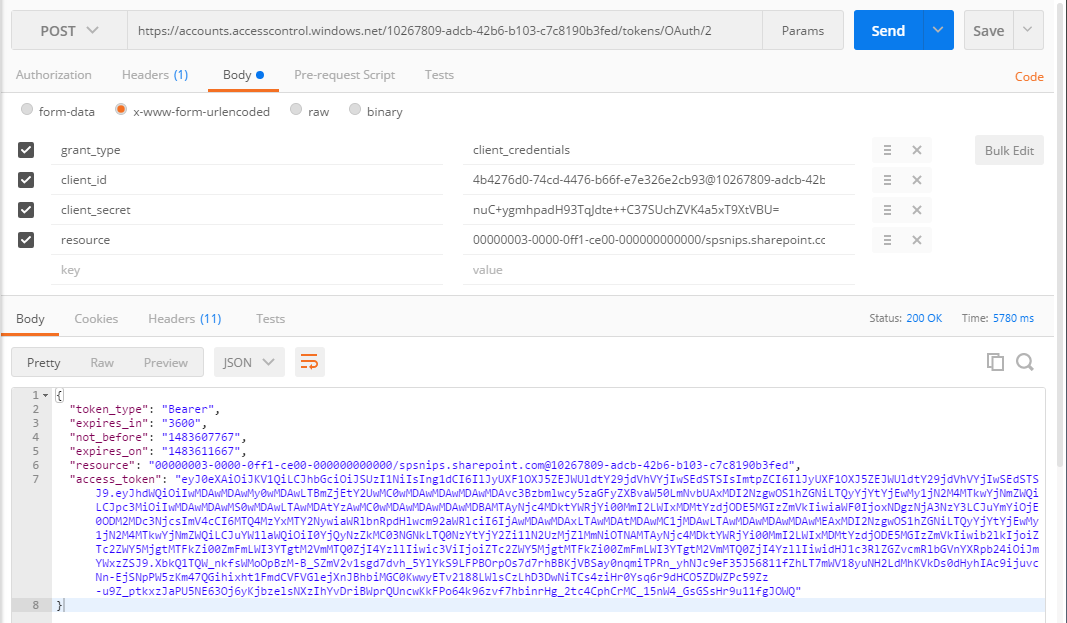
Body
| Key |
Syntax |
Value |
| grant_type |
client_credentials |
client_credentials |
| client_id |
ClientID@TenantID |
4b4276d0-74cd-4476-b66f-e7e326e2cb93@10267809-adcb-42b6-b103-c7c8190b3fed |
| client_secret |
ClientSecret |
nuC+ygmhpadH93TqJdte++C37SUchZVK4a5xT9XtVBU= |
| resource |
resource/SiteDomain@TenantID |
00000003-0000-0ff1-ce00-000000000000/spsnips.sharepoint.com@10267809-adcb-42b6-b103-c7c8190b3fed |
- After applying the configuration, click Send button. That will returns the response with the Access Token.

You can use the below C# code to generate access token
public string GetAuthorisationToken(string stGetAccessTokenUrl, string stSiteDomain, string tenantID, string resourceID, string stClientID, string stClientSecret)
{
string accessToken = string.Empty;
stGetAccessTokenUrl = string.Format(stGetAccessTokenUrl, tenantID);
WebRequest request = WebRequest.Create(stGetAccessTokenUrl);
request.ContentType = “application/x-www-form-urlencoded”;
request.Method = “POST”;
string postData = “grant_type = client_credentials” +
“&client_id =” + WebUtility.UrlEncode(stClientID + “@” + tenantID) +
“&client_secret =” + WebUtility.UrlEncode(stClientSecret) +
“&resource =” + WebUtility.UrlEncode(resourceID + “/” + stSiteDomain + “@” + tenantID);
byte[] byteArray = Encoding.UTF8.GetBytes(postData);
// Set the ContentType property of the WebRequest.
request.ContentType = “application/x-www-form-urlencoded”;
// Set the ContentLength property of the WebRequest.
request.ContentLength = byteArray.Length;
// Get the request stream.
Stream dataStream = request.GetRequestStream();
// Write the data to the request stream.
dataStream.Write(byteArray, 0, byteArray.Length);
// Close the Stream object.
dataStream.Close();
try
{
using (WebResponse response = request.GetResponse())
{
dataStream = response.GetResponseStream();
// Open the stream using a StreamReader for easy access.
StreamReader reader = new StreamReader(dataStream);
// Read the content.
string responseFromServer = reader.ReadToEnd();
// Clean up the streams.
reader.Close();
dataStream.Close();
//Get accesss token
accessToken = “access_token\”:\””;
int clientIndex = responseFromServer.IndexOf(accessToken, StringComparison.Ordinal);
int accessTokenIndex = clientIndex + accessToken.Length;
accessToken = responseFromServer.Substring(accessTokenIndex, (responseFromServer.Length – accessTokenIndex – 2));
return accessToken;
}
}
catch (WebException wex)
{
HttpWebResponse httpResponse = wex.Response as HttpWebResponse;
createlog(_service, “Error occured” + wex.ToString());
throw new InvalidPluginExecutionException(“Exception occured while retrieving Access Token” + wex.ToString());
}
}
Once we are received the access token, you were all set and we got the authorization to access the SharePoint data based on the permission applied in Grant Permission of Add-In .
So now we would implement our logic to create folders in plugin…make sure we should be passing the Access token received while accessing share point.
public void CreateFolder(string sharePointSite, string token, string library, string folder,Guid entityID)
{
string result = string.Empty;
StringBuilder sb = new StringBuilder();
sb.Append(sharePointSite);
sb.Append(“_api/web/GetFolderByServerRelativePath(decodedUrl='”);
sb.Append(library);
sb.Append(“‘)/Folders”);
Uri uri = new Uri(sb.ToString().Replace(“{“, “”).Replace(“}”, “”));
HttpWebRequest wreq = (HttpWebRequest)WebRequest.Create(uri);
wreq.Headers.Add(“Authorization”, “Bearer ” + token);
wreq.Method = “POST”;
wreq.ContentType = “application/json”;
string postData = “{‘ServerRelativeUrl’:’folder’}”;
postData = postData.Replace(“folder”, folder);
byte[] byteArray = Encoding.UTF8.GetBytes(postData);
wreq.ContentLength = postData.Length;
Stream dataStream = wreq.GetRequestStream();
dataStream.Write(byteArray, 0, byteArray.Length);
dataStream.Close();
WebResponse wresp = null;
try
{
wresp = wreq.GetResponse();
using (wresp = wreq.GetResponse())
{
dataStream = wresp.GetResponseStream();
StreamReader reader = new StreamReader(dataStream);
string responseFromServer = reader.ReadToEnd();
reader.Close();
}
}
catch (WebException wex)
{
HttpWebResponse httpResponse = wex.Response as HttpWebResponse;
createlog(_service, “Error occured” + wex.ToString());
throw new InvalidPluginExecutionException(“Exception occured while creating record” + wex.ToString());
}
}


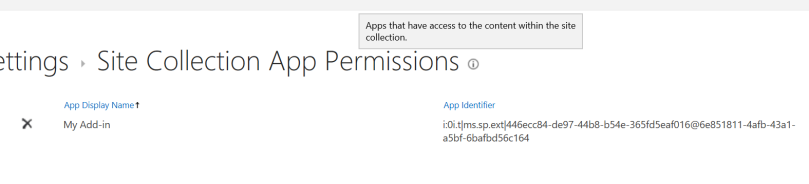
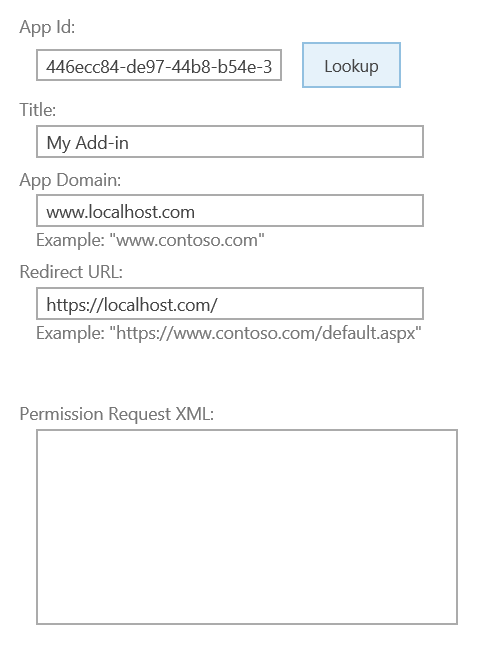
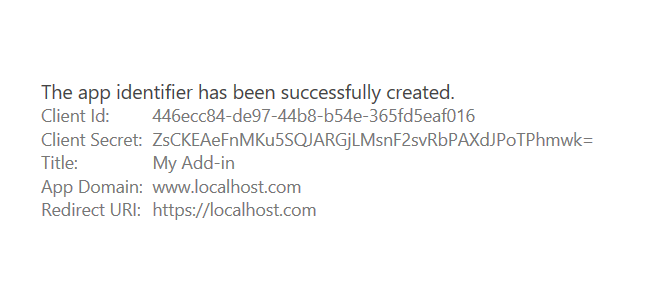 SharePoint Add-in Identifier
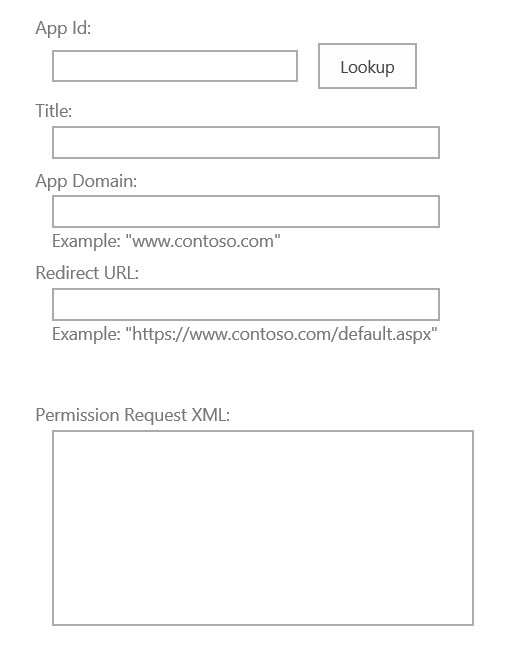

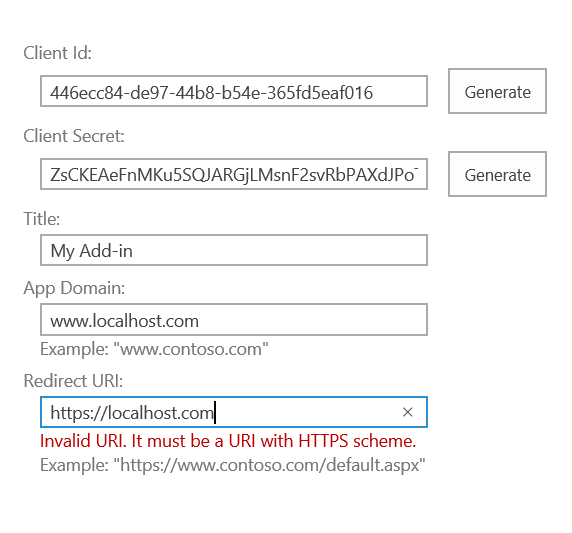
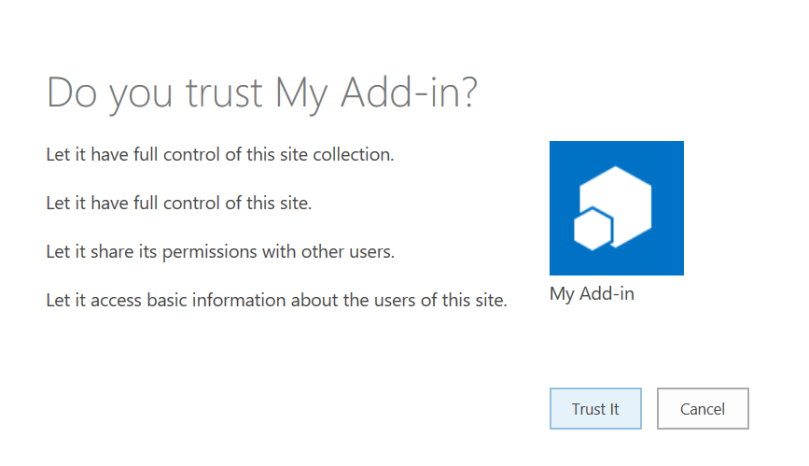 Trust SharePoint Add-In