Hi Folks,
In this blog post, I would detail about how you can you work with Code Components, it just takes only few minutes of your valuable time. Now-a -days everyone is moving from traditional HTML Webresources to PCF Code components. I used to be a pro-HTML Developer where I always want to always know how my code is running in browser. Usually every developer wants to try out how their code is working in local before proceeding further. So here we will see how you can run your component locally…and once tested we can deploy them to Dataverse.
So without any further due, let’s get into it…
Firstly you can download these code components from this link, now let’s see how we can use these components in our Apps. Follow with me with few simple steps as below..
1.Install Microsoft Power Platform CLI.
2. Navigate to the folder and extract the zip file.
3. Open Visual Studio Code and navigate to that folder location(Many people suggest to use Visual Studio Developer Command Prompt, but believe me this is a lot easier)
The component’s run time can be found by navigating to the respective folder of the component..
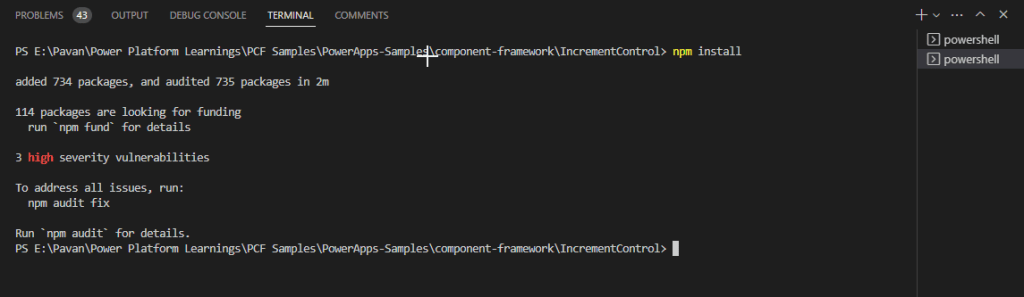
4. Open a new Terminal and execute npm install command(I am assuming that you have node installed in your machine for working with this), this will add all the dependencies to the component folder, it should look something like below..
5. As this control is a prebuilt one, no need to execute build command.
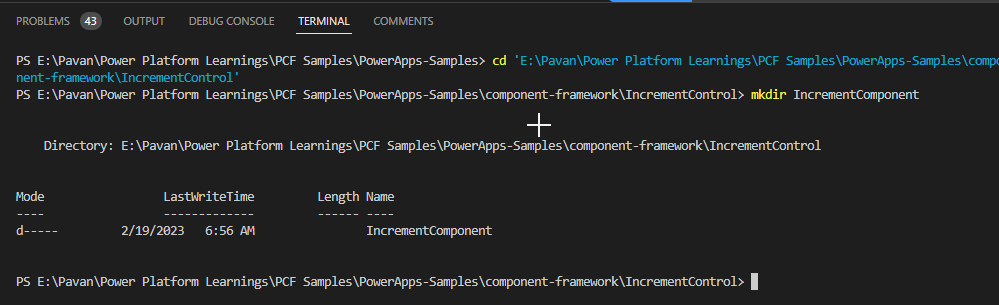
6.Create a new folder using the command mkdir <folder name> inside the sample component folder and navigate into the folder using the command cd <folder name>, something like below…here I have named the component folder as IncrementComponent.
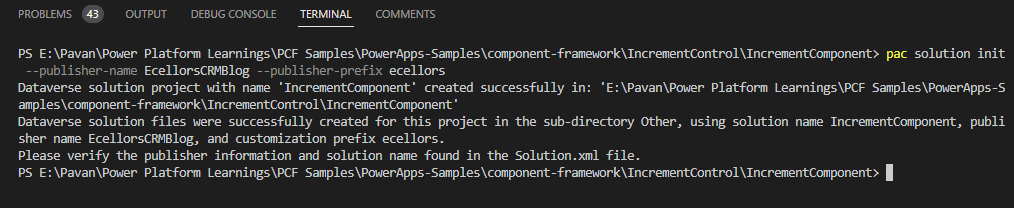
7. Now we will proceed with next steps of creating a new solution project inside the same folder using the following command:pac solution init --publisher-name <Name of the publisher> --publisher-prefix <Publisher prefix>
It should look as below
You should see solution folder components being updated as below

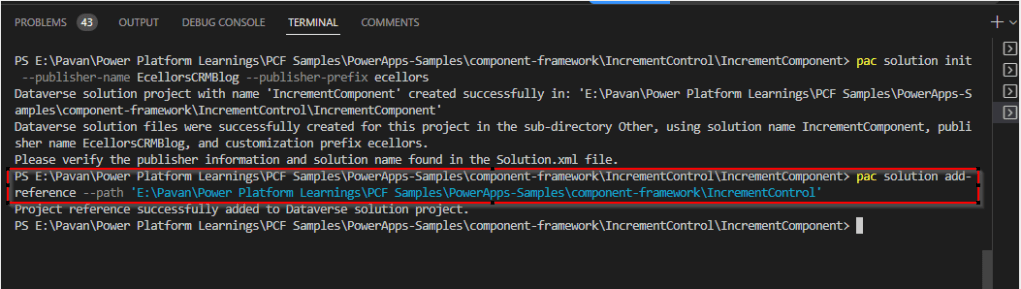
8.After the new solution project is created, refer to the location where the sample component is located. You can add the reference using the following command:pac solution add-reference --path <Path to the root of the sample component>
It should look as below
10. Now you have to generate a zip file from your solution project by building the project using the following command:msbuild /t:restore
Oops, you get an error as below…in order to resolve
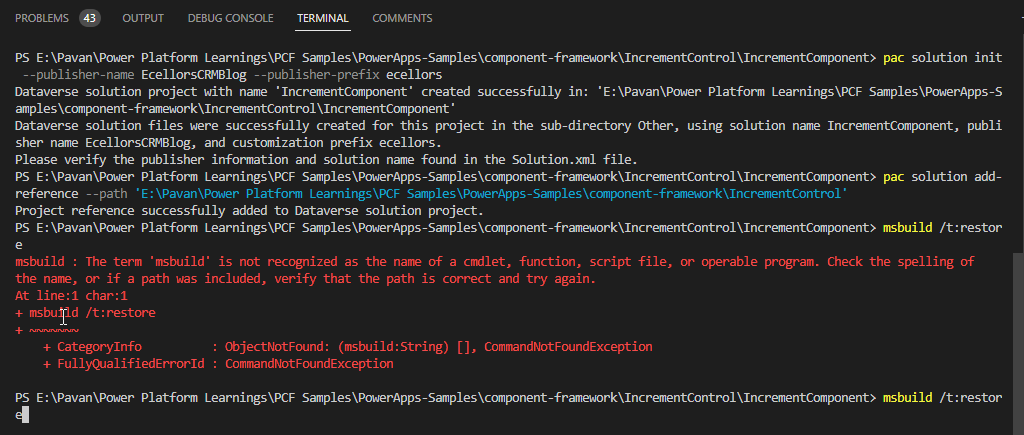
If you just try to reverse engineer, the above error says that ‘msbuild’ is not recognized and instructs to check the path variable.
Inorder to fix this, I have followed blog and with minor tweaks, able to resolve the issue, i.e. if you have 64 bit Visual Studio 2022 version, you have to use the below path for environment variable instead of the one specified in the above blog.
Path: %ProgramFiles%\Microsoft Visual Studio\2022\Community\MSBuild\Current\Bin
Then you should be able to overcome the above error…and you should see a screen something same as below

The next step is to run your Code component in local test harness and see how if behaves before actually pushing to dataverse…so use the following command npm start while making sure terminal points to the exact folder location…
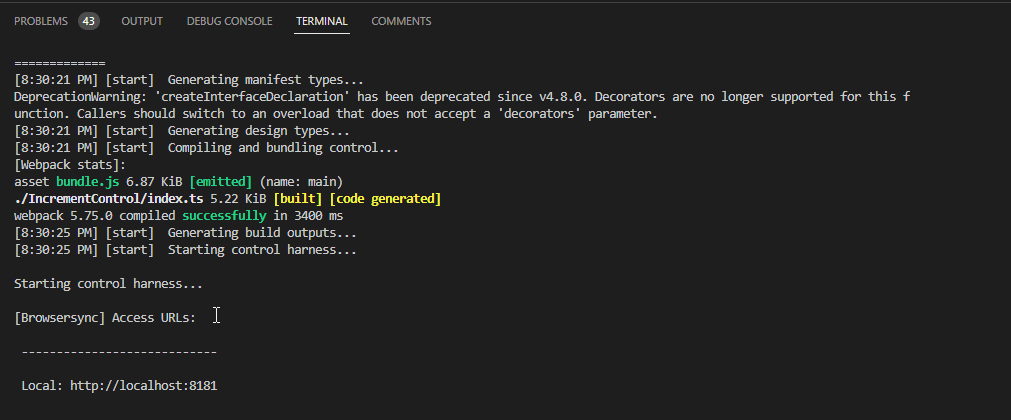
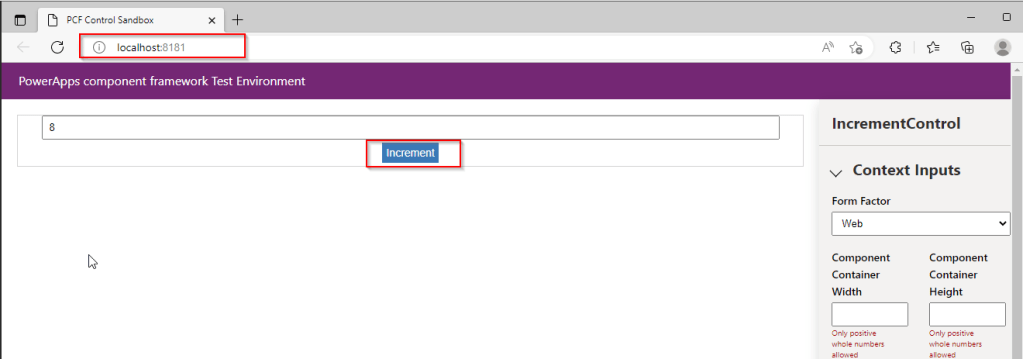
Now the code has been run in your browser, you just need to verify by going to the mentioned URL in the local machine.
There it was, you can see your component running in your local browser window….
These code components can be used in Canvas Apps, Model Driven Apps, Power Portals and adds much more flexibility than customizing with HTML Webresources.
Now you can use msbuild /t:restore command to create a zip file, we are good to use the PCF control by importing it to CDS.
Limitations:
- Microsoft Dataverse dependent APIs, including WebAPI, are not available for Power Apps canvas applications yet.
- Code components should bundle all the code including external library content into the primary code bundle. To see an example of how the Power Apps command line interface can help with bundling your external library content into a component-specific bundle, see Angular flip component example.
- Code components should not use the HTML web storage objects, like
window.localStorageandwindow.sessionStorage, to store data. Data stored locally on the user’s browser or mobile client is not secure and not guaranteed to be available reliably.
You can learn more about PCF Here…hope this helps….
Additional Resources to try out Code Components
Cheers,
PMDY