When coming to Power Automate, I see lots of articles regarding Pagination for retrieving more than 5000 records from Dataverse with varying complexity. It could be difficult to understand them at once if you were especially don’t much exposure on Power Automate working with functions and variables.
This post will give you a very easy way to retrieve more than 5k + records from Dataverse using PageNumber variable.
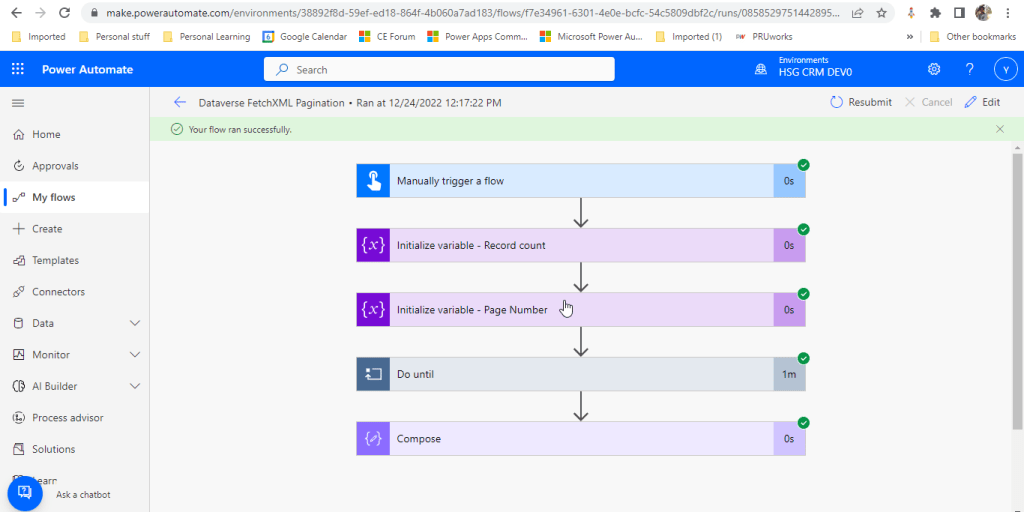
The Flow looks like below..
You just need two variables..
Record count
Page number
Lets create it…
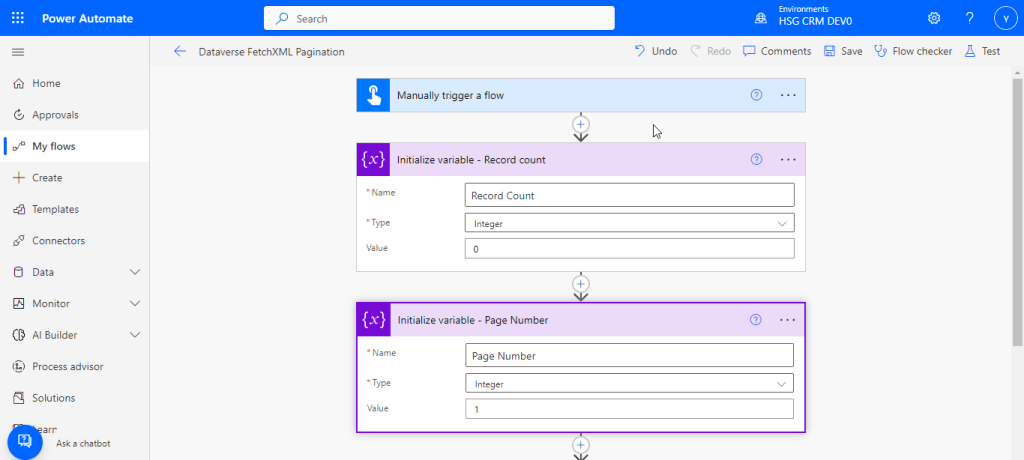
For simplicity, create a manual trigger and initialize the two variables which we need.
Now create a do until loop to run until Page Number is 0.
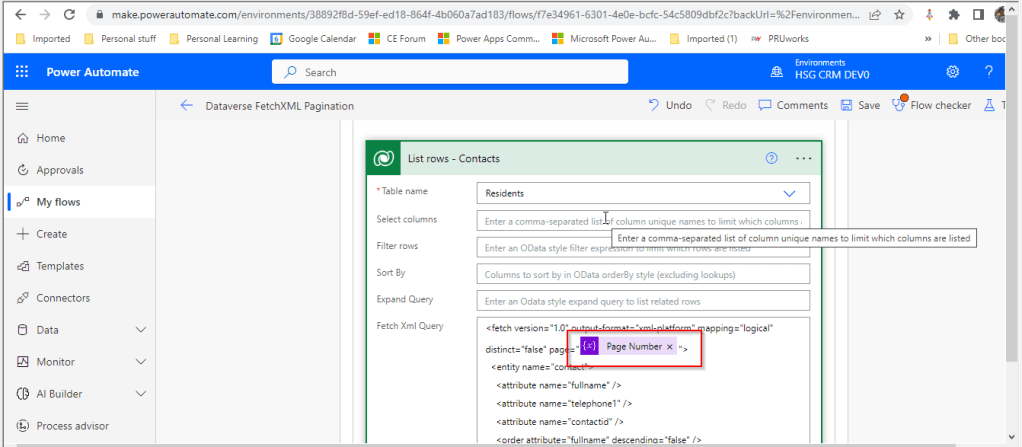
Now define a Scope action as above to define your fetch criteria to retrieve the records from dataverse with Fetch updated as below
Add the Page Number variable created
Add a condition as above to check if List Rows Length is still greater than zero.
If yes, increment the length of Page Number, else set Page Number as 0.
In each iteration, increment the length variable. Here Residents entity is nothing but contacts.
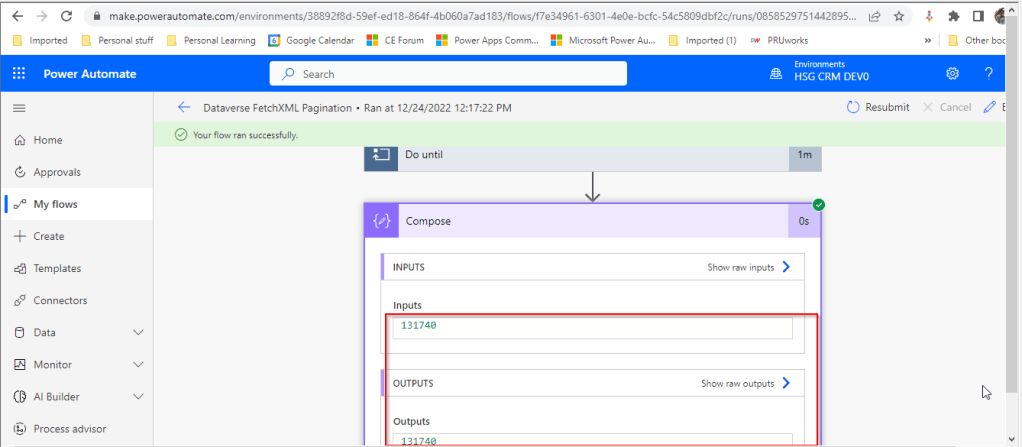
Just save the flow, run it..you will find the number of records in the table(contact/resident) as below
In today’s world, all the modern software applications use API for the front end to communicate with the backend systems, so lets see as it is very important for every developer working on Azure and API’s. Basically this is a PAAS Service from Azure. Follow along if you would like to know more details on this.
In short APIIM is a hybrid and multi cloud platform used to manage complete API life cycle. Azure API Management is made up of an API gateway, a management plane, and a developer portal.
Caching response to improve performance
Limit the number of API Calls
Security API and providing access
Interface to test API calls
API Analytics
Package related API Services
Transforms your API’s without
API Gateway is the first point of contact for any requests for your API which will route your requests to the appropriate backends. Imposes additional security restrictions with the help of JWT tokens and other certificates. Responses can be cached so that the API response could be faster.
Emits logs, metrics, and traces for monitoring, reporting, and troubleshooting
API Management are highly configurable, with control over URL mapping, query and path parameters, request and response content, and operation response caching.
Groups helps to provide conditional viewing capabilities.
Policy can help to change the behavior of an API without any code changes, this is well suited for your production API’s.
Also its easy to integrate API Management with all the other Azure Service available in the market.
Now lets go into the hands on by creating an APIIM simply from Azure.
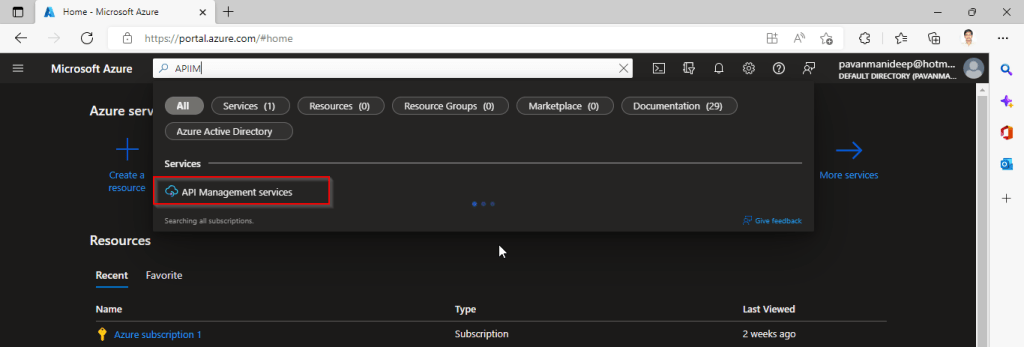
Go to Home – Microsoft Azure and search for APIIM and select API Management services and click on Create.
Input all the details, it was pretty self explanatory, coming to the pricing tier you could select based on your project needs and use case. Click on Review and Create and then Create.
It will take few minutes for the deployment to complete and you can use it.
The below Power point slide presentation is complete resource which can help you with all your queries related to Azure API Management.
I hope this gives you a bit of introduction to Azure API Management, now lets see how you can use this in your Power Platform Solutions.
For this, once your API ready, all you have do is to export your API’s from Azure API Management to your Power Platform Environment. With this the citizen developers can unleash the capabilities of Azure where the API’s are developed by professional developers. With this capability, citizen developers can use the Power Platform to create and distribute apps that are based on internal and external APIs managed by API Management.
Steps to follow would be as below:
All you need to do is to create a custom connector for your API which can be used in Power Platform like Power Apps, Power Automate etc.
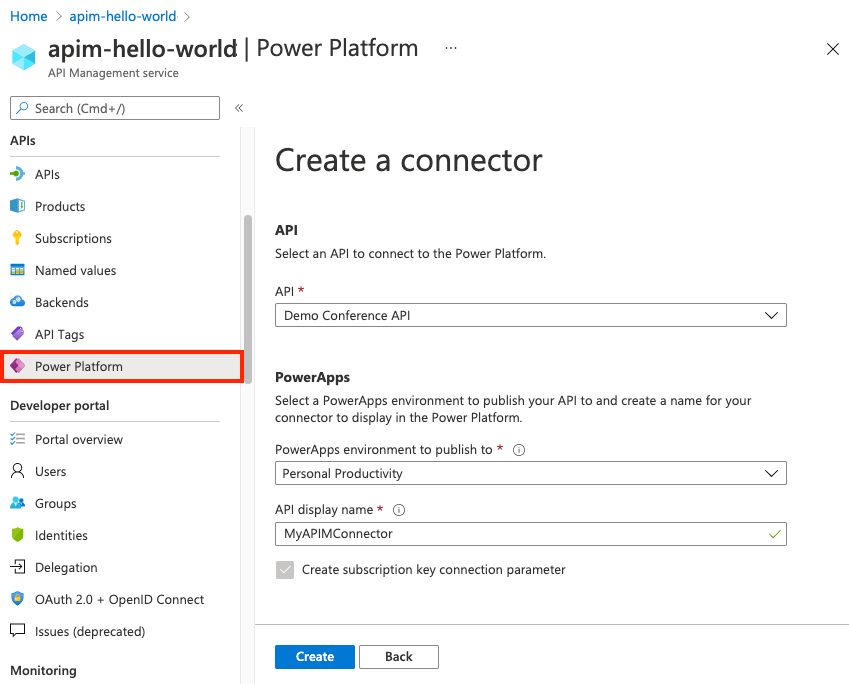
Navigate to your API Management service in the Azure portal.
In the menu, under APIs, select Power Platform.
Select Create a connector.
In the Create a connector window, do the following:
Select an API to publish to the Power Platform.
Select a Power Platform environment to publish the API to.
Enter a display name, which will be used as the name of the custom connector.
Optionally, if the API doesn’t already require a subscription, select Create subscription key connection parameter.
Optionally, if the API is protected by an OAuth 2.0 server, provide details including Client ID, Client secret, Authorization URL, Token URL, and Refresh URL.
Select Create.
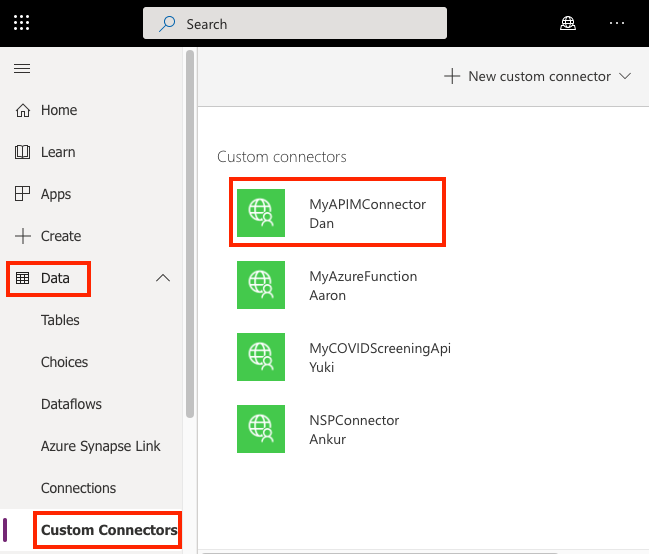
Once the connector is created, navigate to your Power Apps or Power Automate environment. You will see the API listed under Data > Custom Connectors.
I hope this will give you a complete picture about API Management in Azure…if you have any further queries, don’t hesitate to comment here…