Hi Folks,
After a while, I am back with another interesting way to solve this type of problem in Power BI. It took increasingly more amount of time to figure out best approach, this post is to help suggest a way of solving differently. This post is a bit lengthy but I will try to explain it in the best way I can.
Here is the problem, I have date fields from 2 fact tables, I have to filter them using a single date slicer which is connected to a calendar table and show the data when any of dates in a particular row falls in the date slicer range. I initially thought this was an easy one and could be solved by creating a relationship between the two fact tables with calendar table, then slice and dice the data as I was able to filter the data with one fact table when connected to calendar table.
I was unable to do that because there were multiple date fields in one fact table and need to consider dates from two tables. I tried to get the value from the slicer using Calculated field since I have do row by row checking. Later understood that, date slicer values can be obtained using a calculated field but those will not be changing when the dates in date slicer is getting changed, this is because the Calculated fields using row context and will only be updated when data is loaded or user explicitly does the refresh. Instead we have to use measure which is calculated by filter context.
The interesting point here is that, if a measure is added to the visual, it returns same value for each row, so a measure shouldn’t be added to a visual as it calculates values on a table level and not at row level, it is ideal if you want to perform any aggregations.

I tried this approach using the great blog post from legends of Power BI(Marco Russo,Alberto Ferrari), but this looked increasingly complex to my scenario and don’t really need to use this, if you still wish to check this out, below is the link to that.
https://www.sqlbi.com/articles/filtering-and-comparing-different-time-periods-with-power-bi/
So, then I tried to calculate the Maximum and Minimum for each row in my fact table using MAXX; MINX functions
MaxxDate =

VAR Date1 = FactTable[Custom Date1]
VAR Date2 = FactTable[Custom Date2]

RETURN
MAXX(
    {
        Date1,
        Date2

    },
    [Value]
)
MinXDate =
VAR Date1 = FactTable[Custom Date1]
VAR Date2 = FactTable[Custom Date2]
RETURN
MAXX(
{
Date1,
Date2
},
[Value]
)After merging the two tables into a single one, then create two slicers connected to Maximum Date and Minimum Date for each row. I thought my problem is solved, but it isn’t, since I was only able to filter the dates which have a maximum or minimum value selected in the date slicer, any date value within the date range is being missed.
So I am back to the same situation again
This blog post really helped me get this idea
Below is the approach I have used,
- Create a date table, using the DAX below
2. Here I didn’t create any relationship between the fact and dimension tables, you can leave them as disconnected as below

3. All you need is a simple measure which calculates if any of the dates in the fact table fall under the slicer date range, here is the piece of code
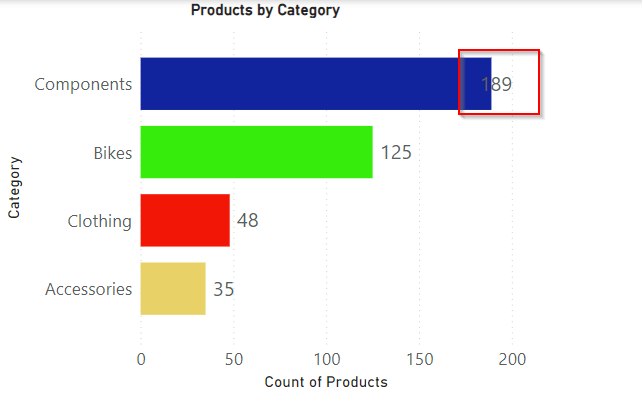
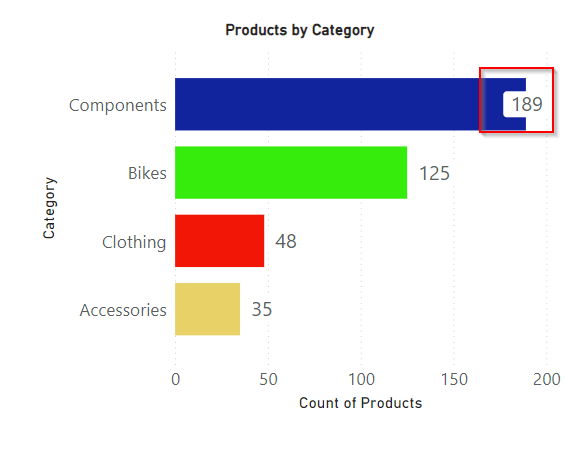
4. Then filtered the table with this measure value

That’s it, you should be able to see the table values changing based on date slicer.
Hope this helps save at least few minutes of your valuable time.
Cheers,
PMDY