Looking to improve your experience developing code using Power Fx. Then try this feature which was in preview…I want to show you how you can execute them. It is actually quite ideal for prototyping, debugging, testing to see the Power-Fx expression behavior. If you were new to Power-Fx, you can check my introductory post here on this which I wrote way back in 2021.
All you can do this is to execute few commands from VS Code, they directly run on your Dataverse environment.
Install PowerShell Module for VS Code (install from here)
Install Power Platform Tools for VS Code (install from here)
Once you have everything installed you were good to go, few more steps required to set up your VS Code to run successfully.
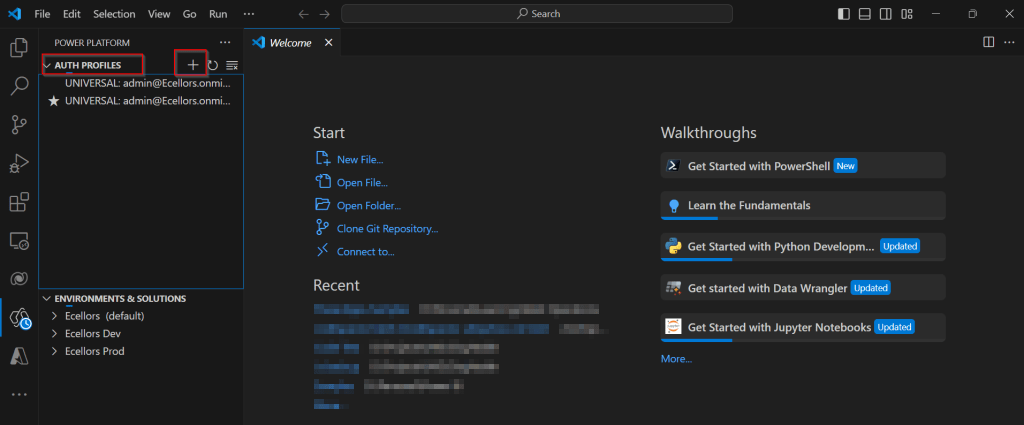
As you have already installed the Power Platform Tools extension above, you should see an icon at the side bar as highlighted below.
Create an authentication profile for your target environment, click on the plus symbol besides the AUTH PROFILES, I have already created few earlier.
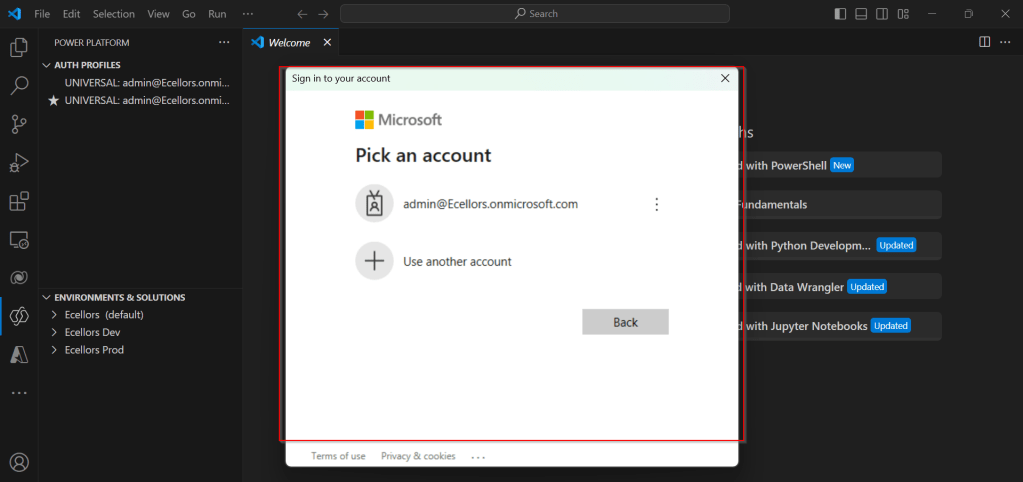
Provide your login credentials using the login prompt.
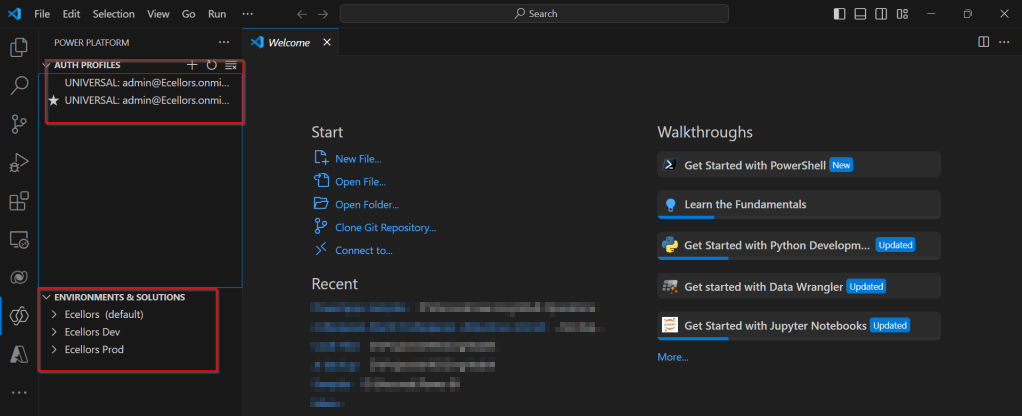
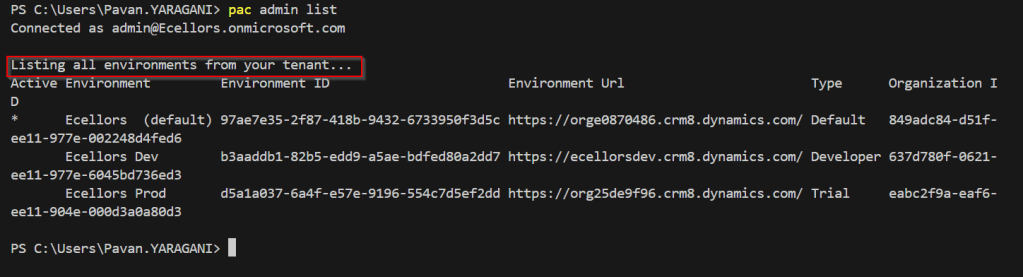
Once authenticated, you should be able to see all your environments in your tenant like below.
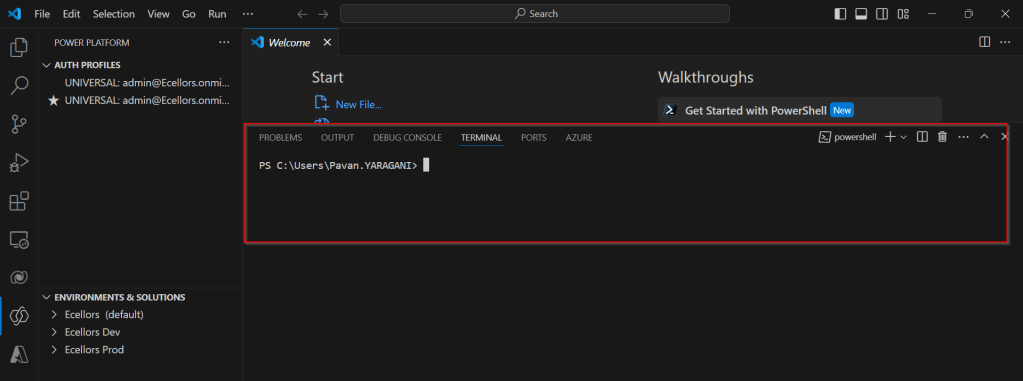
Open a terminal in VS Code
You should see something like below.
Now you were all set to run Power-Fx Commands targeting your envirnment, let’s try it out. In order to interact with Dataverse, use the below commands, thereby reducing the time and complexity of your Dataverse operations by using Power Fx.
1: pac org who: Displays information about your current Dataverse Organization
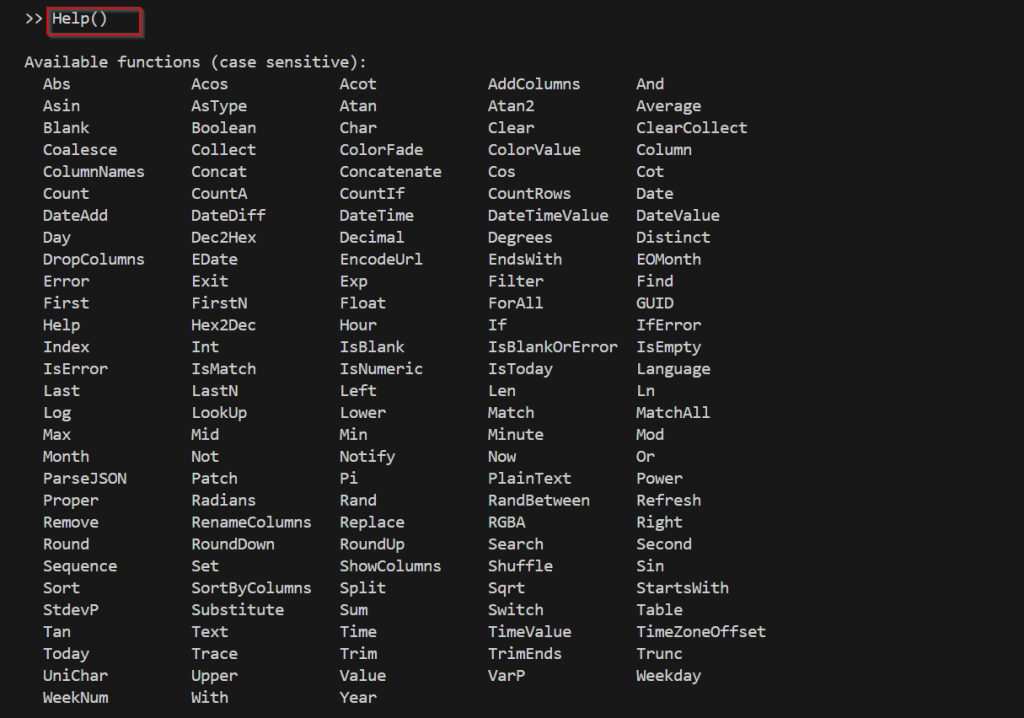
We heard about Read-Eval-Print Loop while working on other languages mainly Python, we now have that included while using Power Fx, to start using if. Enter the below in your Vs Code Terminal, it should show something like below and now you can execute commands and once connected, you can use Dataverse commands.
By the way, we need to use Plural names below.
pac power-fx repl command:
a. Add Rows: Use Collect (Contacts, { firstname: “Pavan”, lastname: “Mani Deep”})
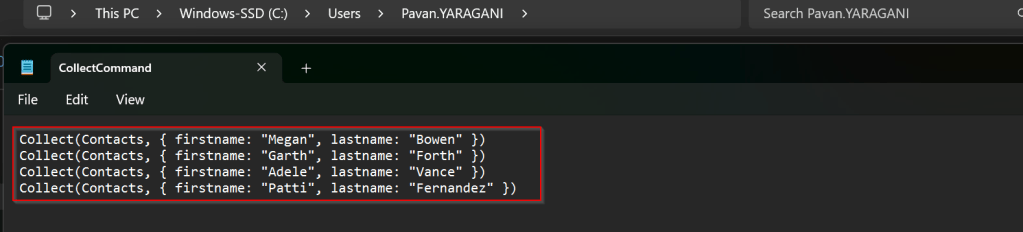
With this command, you can run a file of Power Fx instructions.
a. Create Dataverse records: By using same Collect Command we used above in a file.
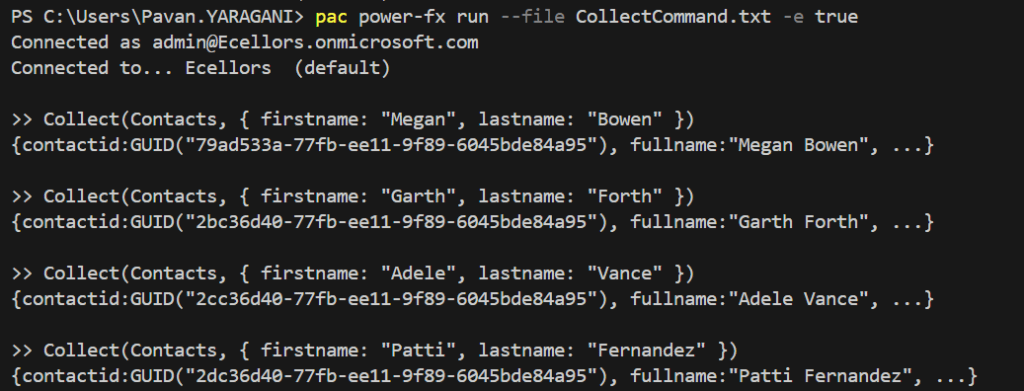
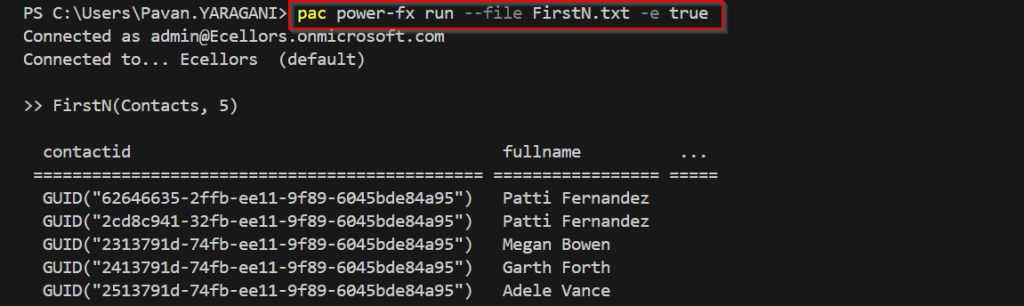
Now execute the command
pac power-fx run –file Name of the file -e true
b. Query a Dataverse table: Save the below command in a file located in the folder path.
Now execute the command
c. Filter a Dataverse table: While I used the filter command, I was not able to filter the data, rather I was getting null. I hope Microsoft will be fixing this when these features are out of preview.
I hope this gives you an idea of how you can execute Power-Fx commands within your favorite IDE(Vs Code).
This post is continuation to my previous post on COE Starter Kit, if in case you have just landed on this page. I would suggest go here and check out my blog post on introduction to COE Starter Kit.
Important:
Do test out each and every component, rolling out to production without testing as you need to keep in mind that there were many flows which can trigger emails to users which may keep them annoyed.
You need to install the components present in the COE Starter Kit extracted folder in the dedicated environment, preferably Sandbox environment (not in Default environment, so that you can test it out first before moving changes to Production), make sure you have Dataverse installed in the environment. First let’s install the Solutions and later we can proceed to customize them.
Install CenterofExcellenceCoreComponents managed solution from your extracted folder, the exact version may be different and differ as the time goes at the time of installing this, the version was as below CenterofExcellenceCoreComponents_4.24_managed
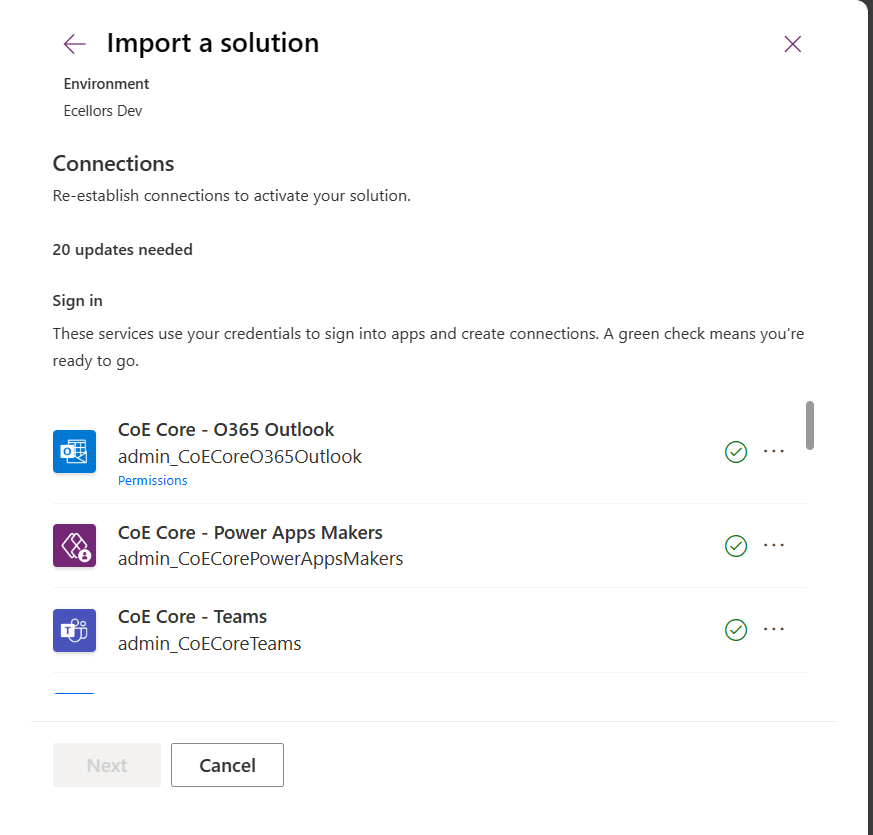
Then proceed to click on Import as we will be configuring these environment variables whenever required later. It takes a couple of seconds to process, it asks to set the connections which I had talked about in previous post, just create new connection if one not available and click next. Make sure you have green checkboxes for each connection, and you are good to click next.
Then you will be presented with the screen to input Environment variables as below, we will configure later so for now, just proceed by clicking on Import button.
The import process may take a while like around 15 minutes, once imported, you should see a notification message on your screen something like below.
Step 1:
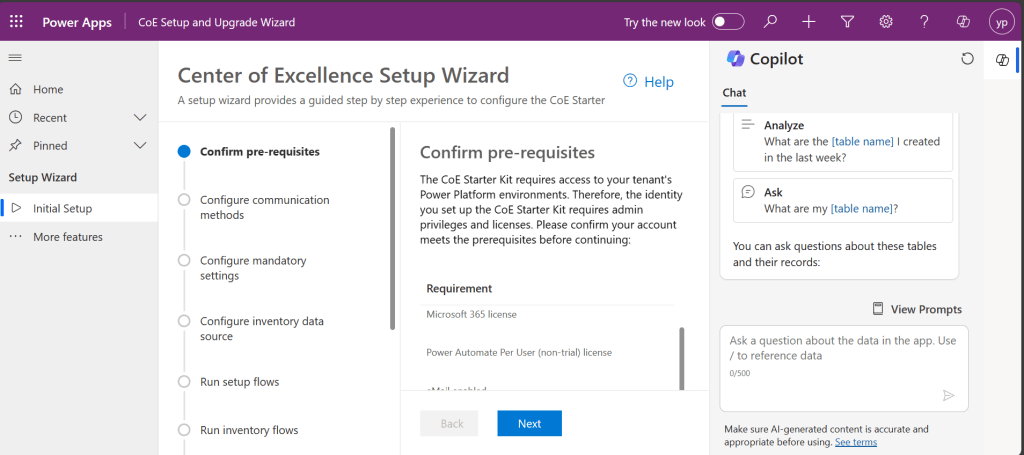
You will have a bunch of Apps, Flows installed in your environment. Configure the COE Settings by opening the Centre of Excellence setup and upgrade wizard from the installed Center of Excellence – Core Components managed solution.
It should look something like below when opened. You will be presented with some prerequisites
Proceed with this step-by-step configuration, you don’t need to change any of the setting, just proceed by clicking on Next.
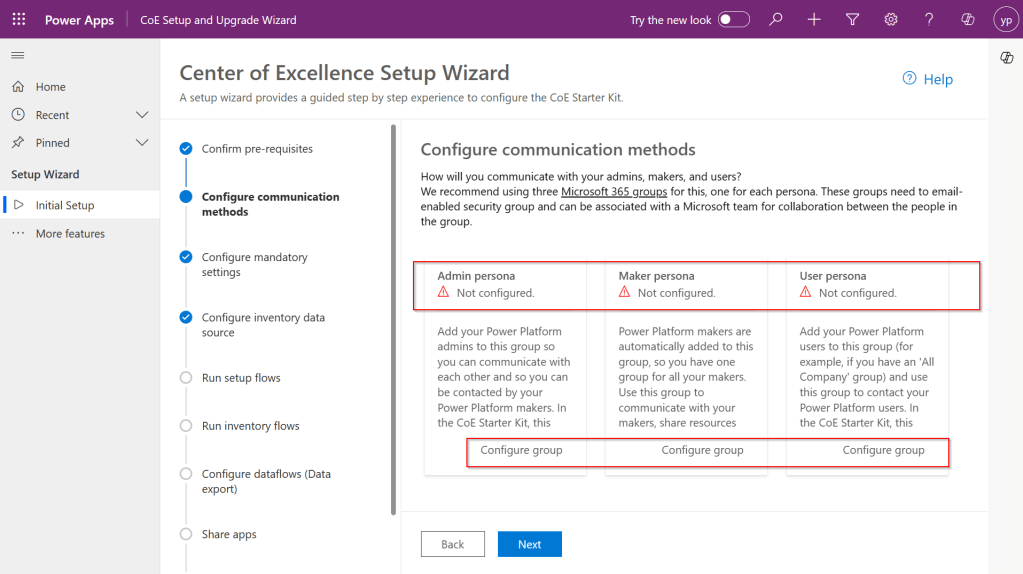
Step 2: In this step, you can configure different communication groups to coordinate by creating different personas
You can click on Configure group, choose the group from the drop down and enter the details and click create a group.
Provide a group name and email address without domain in the next steps and proceed to create a group, these were actually Microsoft 365 groups.
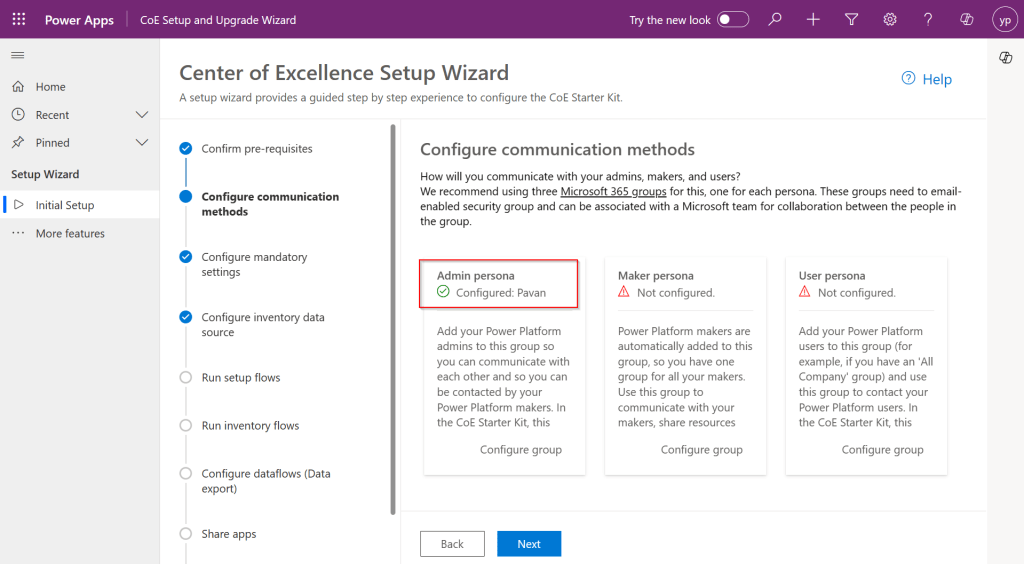
Once you have setup, it should show..
However, this step is optional, but for efficient tracking and maximum benefit of COE, it is recommended to set this up.
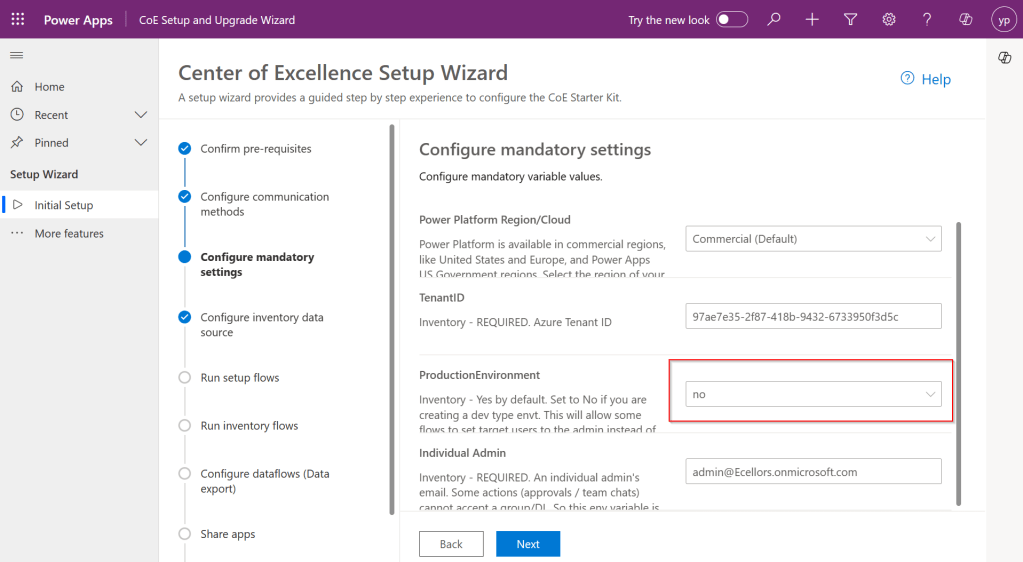
Step 3: While the tenant Id gets populated automatically. Make sure to select no here instead of yes if you were using Sandbox or Production Environment and configure your Admin email and click Next.
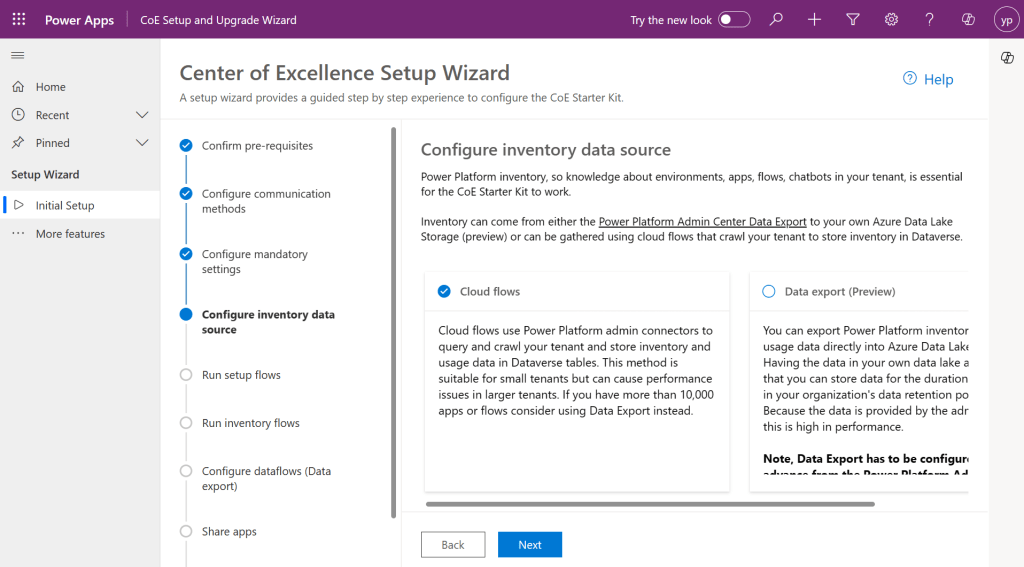
Step 4: Configure the inventory data source.
Tip: In case you were not able to see the entire content in the page, you can minimize the Copilot and press F11 so that entire text in the page would be visible to you.
This is required for the Power Platform Admin Connectors to crawl your tenant data and store them in Dataverse tables. This is similar to how search engines crawl entire internet to show any search results. While Data export is in preview, so we proceed with using Cloud flows.
Click Next.
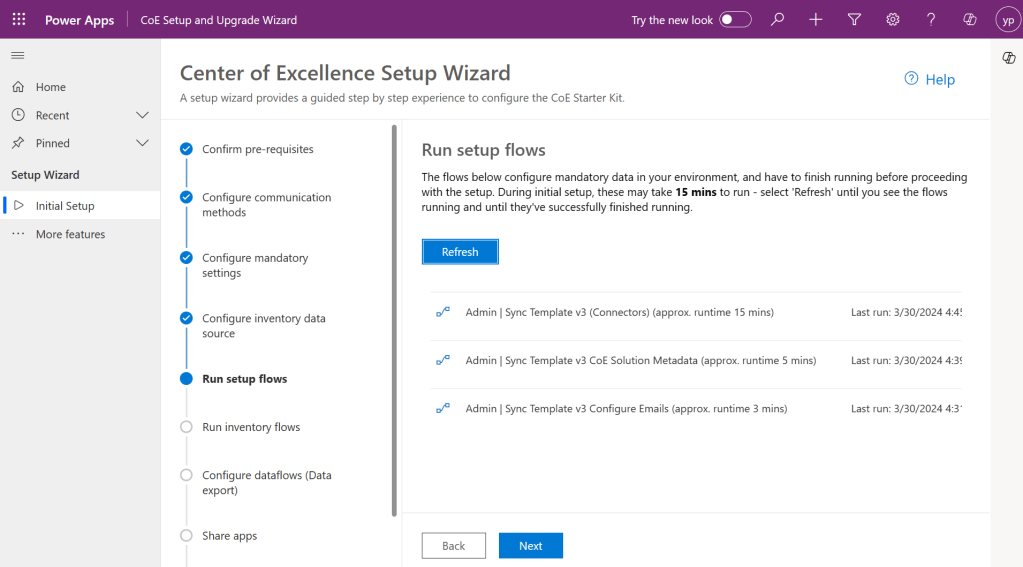
Step 5:
This step is Run the setup flows, click on refresh to start the process. In the background, all the necessary admin flows will be running. Refresh again after 15 minutes to see all the 3 admin flows are running and collecting your tenant data as below and click Next.
Step 6:
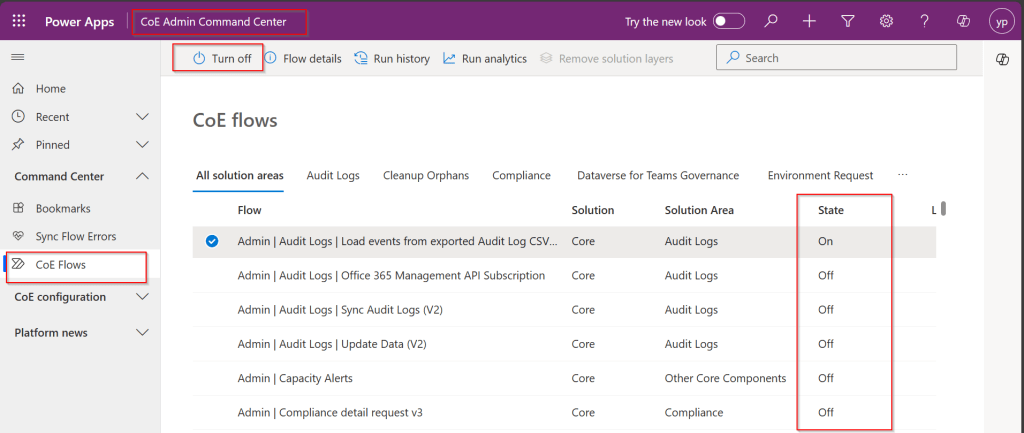
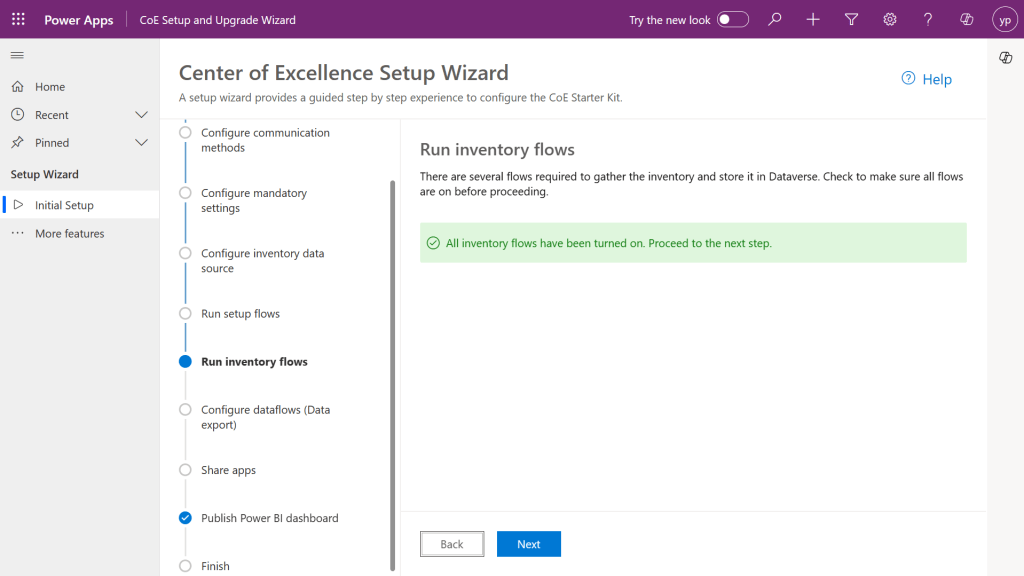
In the next step, make sure you set all the inventory flows to On.
By the way inventory flows are a set of flows that are repeatedly gathering a lot of information about your Power Platform tenant. This includes all Canvas Apps, Model Driven Apps, Power Pages, Cloud Flows, Desktop Flows, Power Virtual Agent Bots, Connectors, Solutions and even more.
To enable them, open the COE Admin Command Center App from Center of Excellence – Core Components Solution. Make sure you turn on all the flows available.
So, after turning on all the flows, come back and check on Center of Excellence Wizard Setup, you should see a message something like below saying all flows have been turned on.
Configure data flows is optional, as we haven’t configured it earlier, this step would be skipped.
Step 7: In the next step, all the Apps came in with Power Platform COE Kit should be shared accordingly based on your actual requirement to different. personas.
Step 8:
This part of the wizard currently consists of a collection of links to resources, helping to configure and use the Power BI Dashboards included in the CoE.
Finish
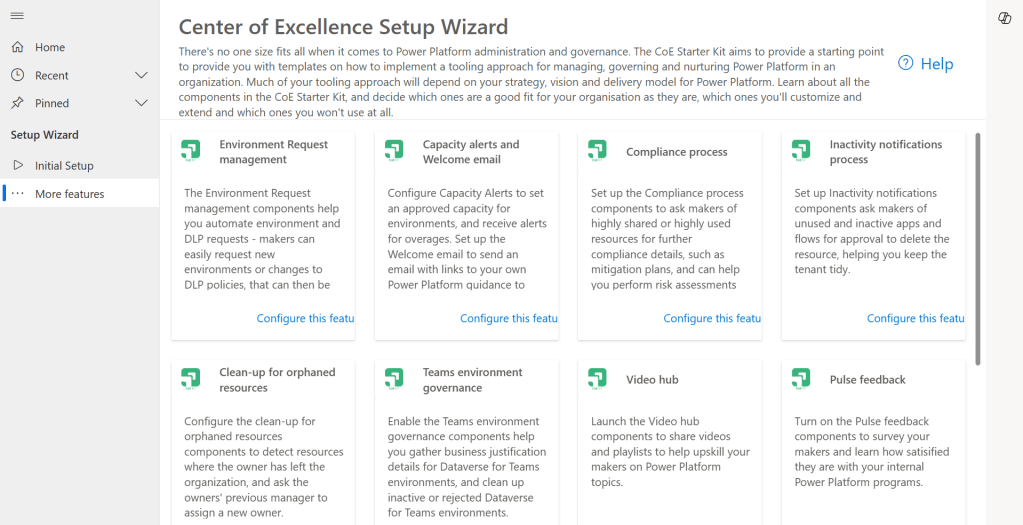
Once you click Done, you will be presented with more features to setup.
These setups have similar structure but varies a bit based on the feature architecture.
As we got started with setting Starter Kit and had set up the Core Components of the Starter Kit which is important one, now you can keep customizing further, in the future posts, we will see how we can set up Center of Excellence – Governance Components, Center of Excellence – Innovation Backlog. These components are required to finally set up the Power BI Dashboard and use effectively to plan your strategy.
Everyone who’s ever installed or updated the CoE knows how time-consuming it can be. Not just the setup procedure, but also the learning process, the evaluation and finally the configuration and adoption of new features. It’s definitely challenging to keep up with all this. Especially since new features are delivered almost every month. This attempt from me is to try my best to keep it concise, yet making you understand the process.
While such setup wizard is clear and handy resource to get an overview of the CoE architecture and a great starting point for finding any documentation. This simplifies administration, operations, maintenance and may be even customizations.