In the earlier blog post, we have seen how to connect to your Azure IOT Hub using Raspberry PI Online Simulator and send telemetry data…
In this post, we will be using Azure IOT Device Client SDK’s for sending the Telemetry data to IOT Hub…
This approach uses .NET Core SDK libraries using a Console application….
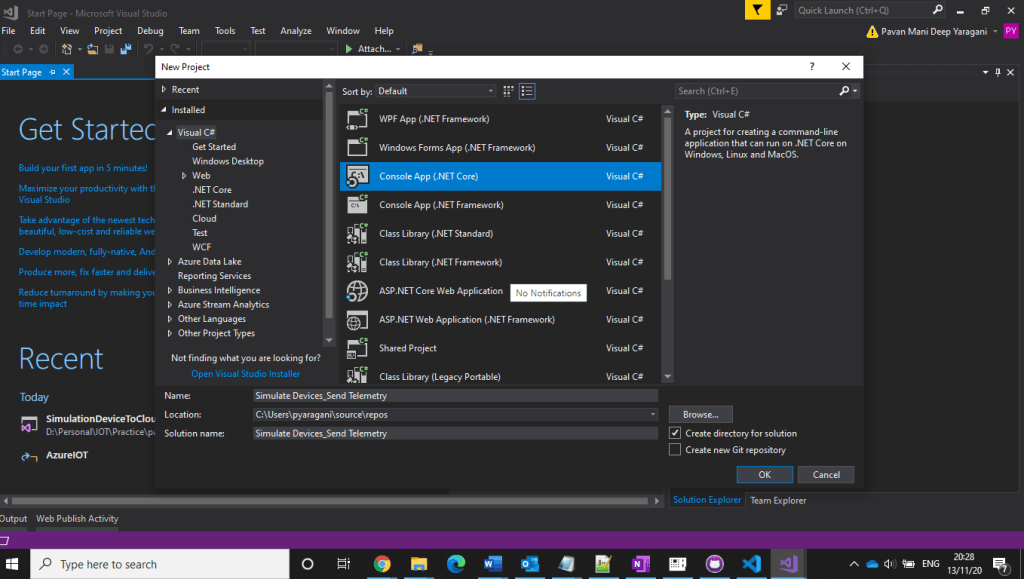
Creating a C# Console Application
Open Visual Studio, go to File -> New -> and select Project.
In Templates, select Visual C#, select Console App (.NET Framework) and give an appropriate name in the ‘Name’ textbox and then click the OK button.
3. Installing Microsoft Azure IOT Device Client SDK…Go to Project -> Manage NuGet Packages.
4. Click Browse tab and search for Microsoft.Azure.Devices.Client. You will see the Microsoft.Azure.Devices.Client device SDK will have listed in the search result and click Install button
5. Now, click the I Accept button to accept the license agreement.
6. It will take a few minutes to install the SDK in our project
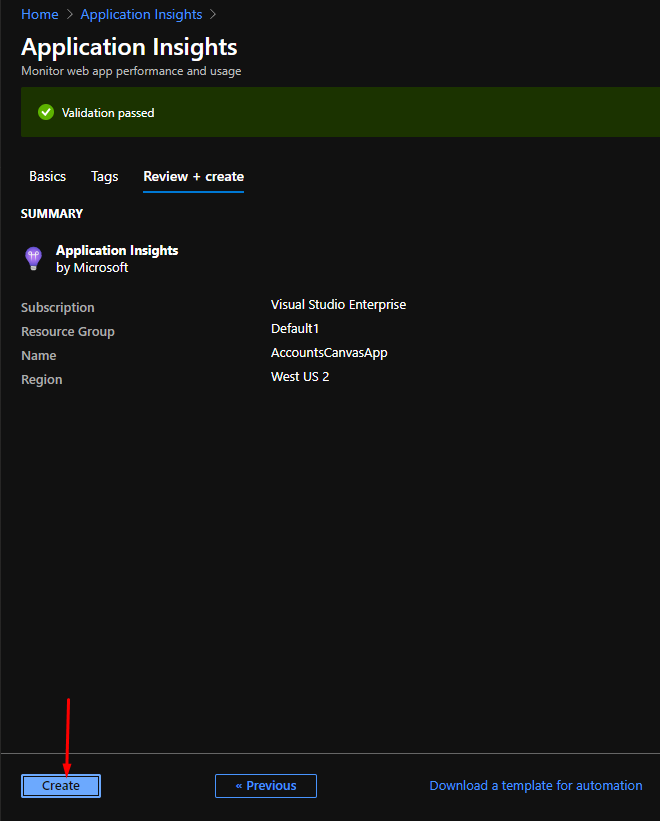
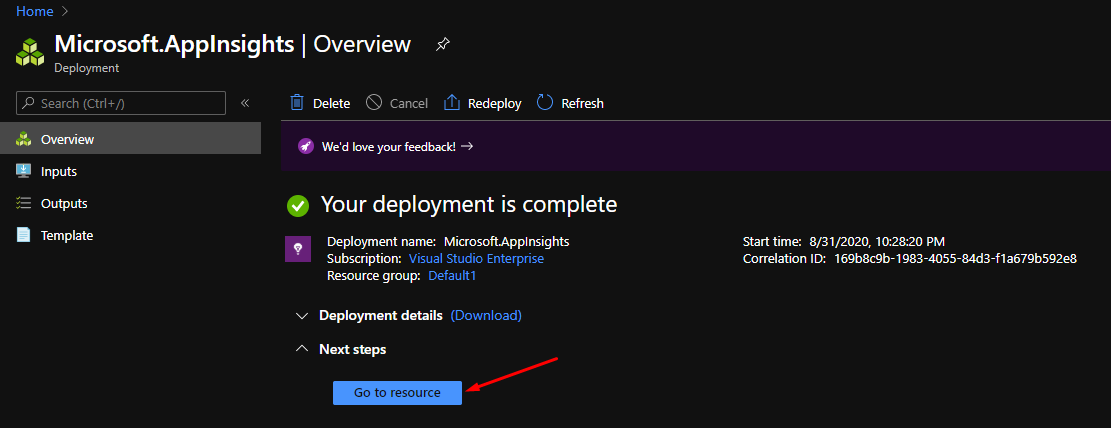
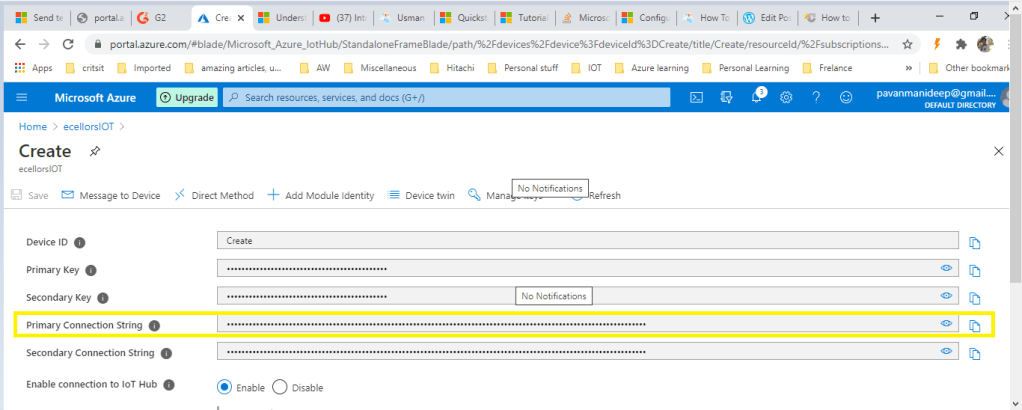
7. Get IoT device connect string from Azure IoT Hub…navigate to Azure Portal –> IOT Hub –> IOT Devices –> Select respective device to be connected.
Using Microsoft.Azure.Devices.Client library we can create device client. The device client has CreateFromConnectionString method which requires device connection string as parameter. Create a read only static string s_connectionString01 and assign the connection string that we copy from Azure Portal.
Here you can create a random temperature and humidity values using Random() method.
This post is to understand the Node.js code used to connect to Azure IOT Hub…the complete code can be found This post is just to explain in detail for beginners to understand this quickly.
Now we will understand the code in the integrated console window as highlighted below…
So let’s understand each piece of it…
Firstly we need to understand about controlling the GPIO pins of the Raspberry PI…for high performance C language should be preferred language used but most developers are more comfortable with JS/Node…node.js is used.
So in order to read the pins, we should be using package require(‘wiring-pi’);
Next we will be requiring Azure IOT Device Client SDK’s to create a client for interaction with the Raspberry PI and to send messages
require(‘azure-iot-device’)
Based on the protocol being used, we need to import the respective package..
The following table provides the high-level recommendations for your choice of protocol:
Protocol
When you should choose this protocol
MQTT MQTT over WebSocket
Use on all devices that do not require to connect multiple devices (each with its own per-device credentials) over the same TLS connection.
AMQP AMQP over WebSocket
Use on field and cloud gateways to take advantage of connection multiplexing across devices.
HTTPS
Use for devices that cannot support other protocols.
MQTT and AMQP are binary protocols, which result in more compact payloads than HTTPS, this sample uses MQTT Protocol for communication, hence below package is used
require(‘azure-iot-device-mqtt’).Mqtt;
For bme280-sensor, a Node.js I2C module for the Bosch BME280 Humidity, Barometric Pressure, Temperature Sensor, used below
require(‘bme280-sensor’);
Regarding the connection string, you can follow my previous post on getting this from Azure Portal, however there is also an alternative to use SDK’s
There is a function in azure-iot-device npm (IoT Hub Device SDK for Node.js) to generate device connection string:
import { ConnectionString as DeviceConnectionString } from "azure-iot-device";
const deviceConnectionString = DeviceConnectionString.createWithSharedAccessKey(hostName, device.deviceId, device.authentication.SymmetricKey.primaryKey);
You could also refer to full code here to see how Azure IoT Toolkit generates the device connection string.
The next part is the custom logic on sending messages based on the temperature sensor to Azure IOT Hub and switching on the LED based conditions which is completely based on the needs…
Recently during an integration scenario with D365 Field services in order to identify if the person making a change to the Customer asset is an employee or not we spinned up an Azure Face API service and on trying to connect it from an Azure function we were getting Invalid key exception.
We were using the Face API client library which defaults to west US endpoint of the service but our service was in EastUS.
The solution is to override the endpoint tohttps://eastus.api.cognitive.microsoft.com/face/v1.0/ which can be done by using another constructor of the FaceServiceClient class
FaceServiceAPIClient = new FaceServiceClient("Face API subscription key", "https://eastus.api.cognitive.microsoft.com/face/v1.0");
Power Apps recently introduced sharing capabilities with Guest Users. Upon sharing users were not able to access app because of error “Unable to obtain access token for resource ‘https://gov.service.powerapps.us/’. A silent sign-in request was sent but no user is signed in. The cookies used to represent the user’s session were not sent in the request to Azure AD”.
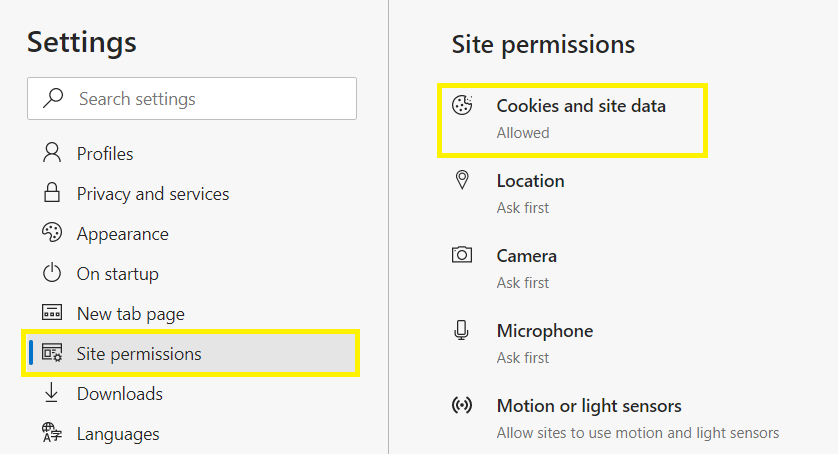
As we were investigating this issue and reaching out to Microsoft support team, we came to know this is not just for Guest users and because of browser cookie settings. Make sure third-party cookies are not blocked and enabled. You can refer below steps to enable third party cookies:
Microsoft Edge:
Go to Settings from right side navigation
Click on Site Permissions in Left side navigation and select Cookies and site data
Make sure options are enabled and disabled as shown below
Requirement: In one of the recent queries that came across to me, Advanced find needed to be disabled for all the users in the Dynamics 365 except for System Administrator.
Solution: There are multiple possible solution one may think and apply. The best practice will be to try to convince the customer against such a customization and utilize Read privileges for restricting access to entities as needed on the basis of Security roles. However, if still there is client requirement like this we can achieve it as below:
1. Add Application ribbon under Client extensions in a solution and then open this solution in XRMToolbox, Ribbon Work bench 2016:
2. Add results_16 and results_32 png images as web resources and keep them ready as follows in the solution:
3. Add a new button into the application ribbon and give it label as Result and under command put the command name…
Users have organization level read access on Competitor entity in CRM.
Competitor and system user entity have N:1 relationship and User lookup (Business Require) available in Competitor entity form
Have a requirement that the User should see “Competitor records” for which the respective user is tagged to and this should be applicable in all CRM areas (like Advanced find, Lockups, Views…)
This can be achieved through Plug in with “RetrieveMultiple” message
Initially when the user logged in the system, he has access to all the Competitor records which are not tagged to him. (advanced find)
Below is the plugin code to achieve the above mentioned requirement.
public void Execute(IServiceProvider serviceProvider)
I was writing Plugins from long time, but this time i had a just a deeper insight into the exact code which we write and came to know that the Plugin’s execute method should be stateless as this code would cached and the same object would be called multiple times based on requirement to improve the CRM Performance.
Today we would be discussing drawbacks in addition to advantages of using Rollup and Calculated fields which were in place from CRM 2015.
It is really good to know these when using these fields for your implementation, else later you might face serious problems caused by increased implementation costs.
So here we go,
Calculated Fields
Pros
Ability to populate a field with simple calculations based on other values and conditions on the form in a real time manner. This alleviates the need for JavaScript in fairly straight forward scenarios such as adding days or months to a date, or adding or subtracting fields on the same entity.
Cons
Missing the kind of complexity you get from Excel formulas
Example: There is no “MAX” function that you can use with dates to get the max of more than one datetime field.
Updates to these fields won’t trigger workflow updates
Fields are only available for retrieve in plugins and are not available as part of create or update plugins
Fields are virtual and not stored at the database level
Many times they are un-sortable in views unless you use all simple field types in your calculation
Not available offline with the Outlook Client
You cannot mix and/or statements. Can only use all OR’s or all AND’s
Rollup Fields
Pros
Allows aggregation of data from related child entities up to a parent entity. This allows for some aggregation scenarios that might have previously required the use of custom code in workflow, plugin, or complex JavaScript to be done much more easily.
Counts, Max, Min, and Sum
Stored in the database as an actual field
You can trigger this via the API in code manually and as an administrator you can postpone rollup calculations from settings.
Cons
Not real time
Currently the default is every 12 hours by default.
Not good for on-demand reporting needs
Rollup re-calculations will not trigger a modify call at the platform level and there is no other good plugin hook to use besides registering a plugin on the related child entities that are part of the recalculation.
Let us wait if Microsoft brings some changes to avoid these limitations..


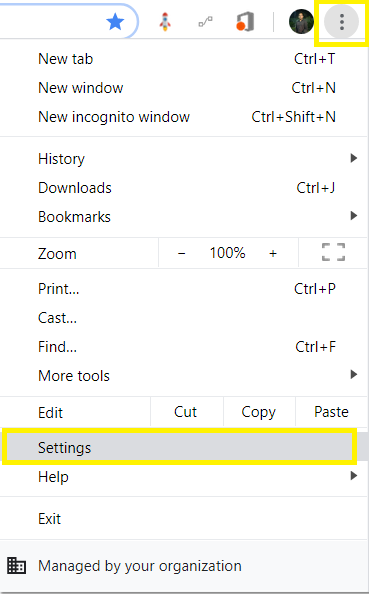
 Chrome: