Hi Folks,
While its been quite sometime since Microsoft shipped the Solution checker and App checker, these tools can help a developer to validate all the solutions that was being built before moving to higher environments. It is always advisable to run solution checker once your solution is developed so this can help you achieve better performance following the Power Platform best practices. Previously we used to send for Code review to senior folks but now with this tool, even the junior developer working at the ground level can easily understand and can make the necessary tweaks in the solution.
Solution Checker serves as a static analysis tool for the developers to check any platform related issues.
The solution checker analyzes these solution components:
- Dataverse custom workflow activities
- Dataverse web resources (HTML and JavaScript)
- Dataverse configurations, such as SDK message steps
Note: Solution checker won’t analyze plugins in solutions. Plugin validations are modernized and will eventually the focus is on the native plugin authoring time, which will help you detect and fix issues earlier. So if you were looking for improvements in Plugin code, this will not help you.
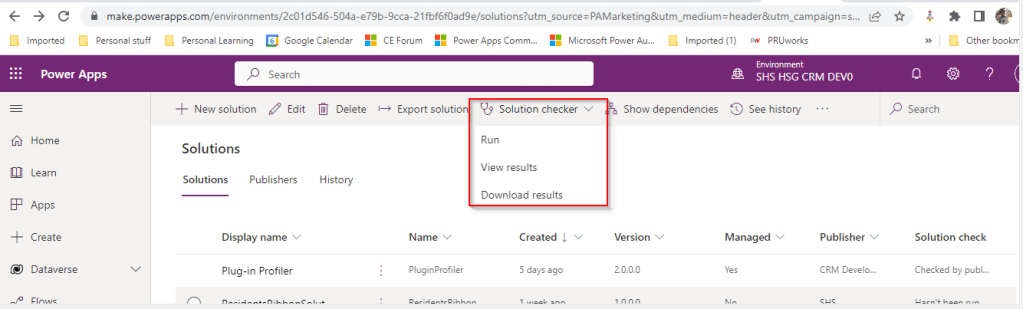
Once solution checker starts running, it will be shown as below with a loading symbol on solution checker

It would take a few minutes to complete the process and will be based on the size of the solution. Once this process is complete, you should be able to download the results or view the results like below
If we open the results file, it shows the potential issues or improvements along with their severity which helps us to prioritize the issues which we need to work upon.
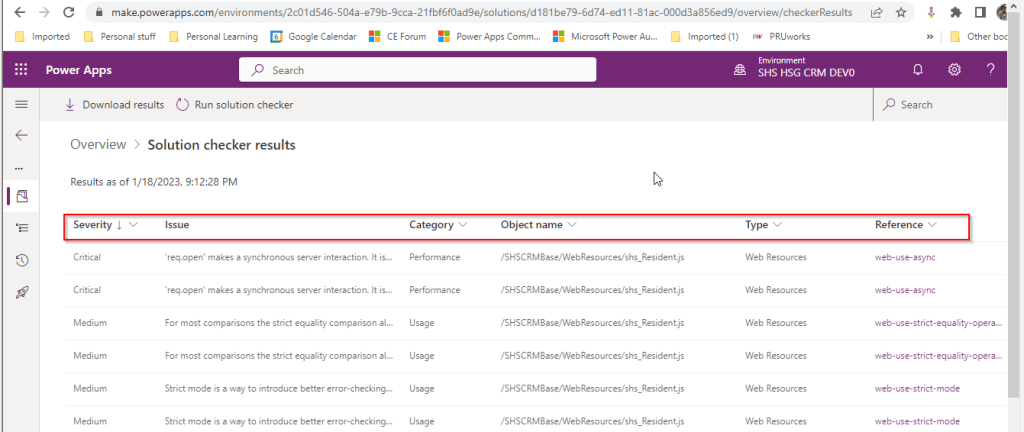
The report can also be downloadable excel file with analysis shipped in Zip format.
Now that we have seen what is solution checker, let’s see what App checker is and its pro’s and con’s.
App Checker:
- The App checker is now available to help provide a clear list of formula issues in your app, and to provide items to fix to make your app accessible
- This helps to make debugging, performance and best practice decisions an easier and more guided experience.
- This is an ideal way to check the formulas you wrote for your Canvas Apps.
- There isn’t any possibility to download the app checker results but you can analyze the results on the fly in canvas apps.
To conclude you can think of Solution checker is a tool to check Model Driven Apps and App checker is a tool for Canvas Apps. Hope you will use this great features to improve your solutions and design according to best practices.
Reference:
Solution checker from MS Learn
Cheers,
PMDY
Top Picks for Power Apps

Top Picks for Power Automate

Top Picks for Microsoft Azure