🚀 You’re Invited to the Global AI Bootcamp 2025 – Singapore Edition!
Are you passionate about AI, Power Platform, and Microsoft technologies? Want to learn how AI is transforming businesses and industries? Then this event is for you!
🎯 What to Expect? ✅ Expert-led sessions on AI, Copilot, Power Platform, and more ✅ Hands-on workshops to apply AI in real-world scenarios ✅ Networking opportunities with industry leaders and AI enthusiasts ✅ Absolutely FREE to attend!
This post is about Dataverse and Git Integration which is the most sought after feature in the todays automation Era. This is a preview feature, you would need to create a new environment with Early Access enabled to test this feature or you can use an existing US Preview environment for testing this out.
While every MDA(Model Driven Application) and it’s components can be safely and moved across the environments using Solutions with the help of Azure DevOps Pipelines. However when coming to integrating Power Platform Solutions to Azure DevOps, we had to manually export the solution and download them each and every time when we would like to commit the Solution Artifacts to Azure DevOps Repo.
With this new Preview feature we can directly integrate the Power Platform Solutions to Azure DevOps.
Let’s see this action…wait a moment, there were some prerequisites to be considered…
Environment should be a Managed Environment to start using this and you need to be an Admin for the environment
Azure DevOps subscription and license should be available to set this up, also permission to read source files and commits(should be a member of contributor group in Azure DevOps) from a Repo
Your email address used for Azure DevOps and Power Platform Solutions should be the same
Setup:
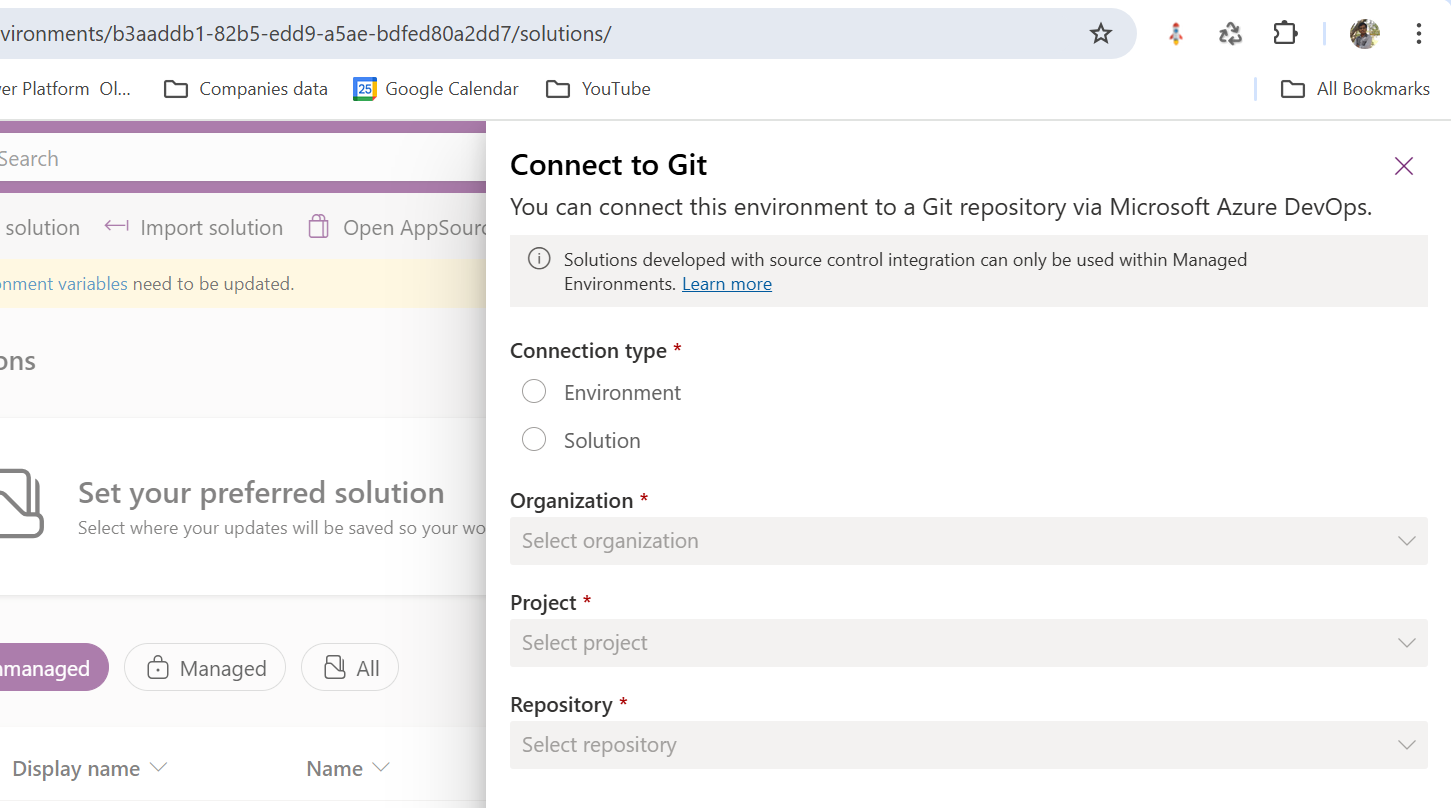
Connecting Dataverse with Azure DevOps is easy but requires a bit of understanding of the Binding options available.
Well, there were two types of Binding options
Environment Binding – Single root folder binds to all the unmanaged solutions in the environment
Solution Binding – Different solutions uses a different root folder in Azure DevOps for binding
Note: Once the binding is setup, there isn’t away to change, so set this up carefully, else you may need to delete the folder and create a new one in Azure DevOps.
Let’s see one by one…for demoing purpose, I have created two projects in Azure DevOps Instance
Solution Binding: When we use this, all the components will be available as pending changes
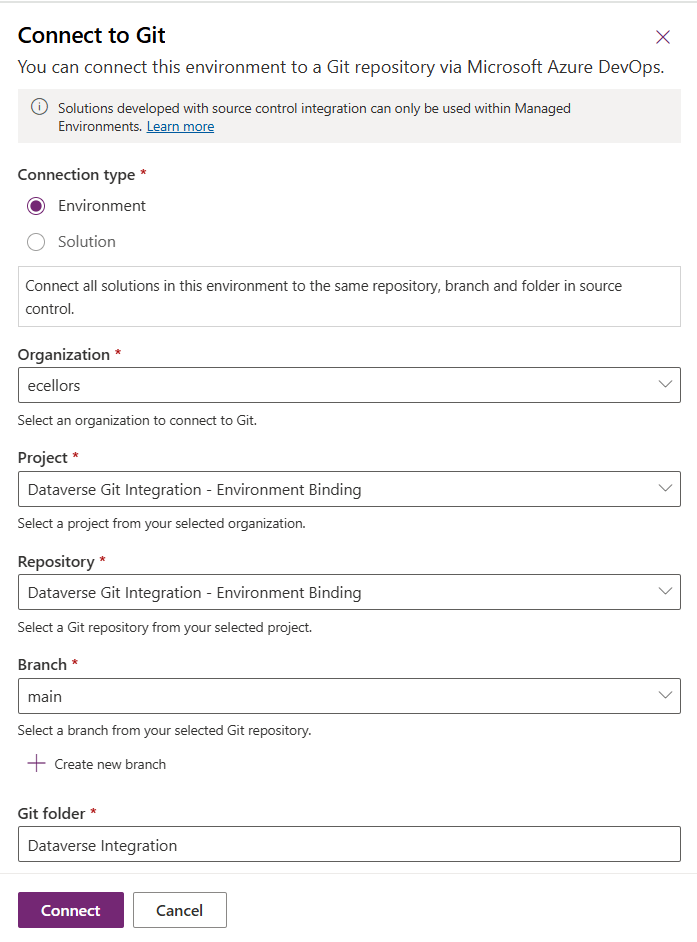
Environment Binding: When we use this, all the unmanaged solution components will be mapped to one Azure DevOps root folder. Let’s set this up.
We are currently able to use only Solution binding, as Environment Binding doesn’t show up any changes to be committed, but there is a catch here.
We can set up for Environment binding and verify if the Solution components are getting marked as pending changes or not. Do note that Setting up the Binding is a one time activity for environment, once setup, it can’t be changed from one type to another.
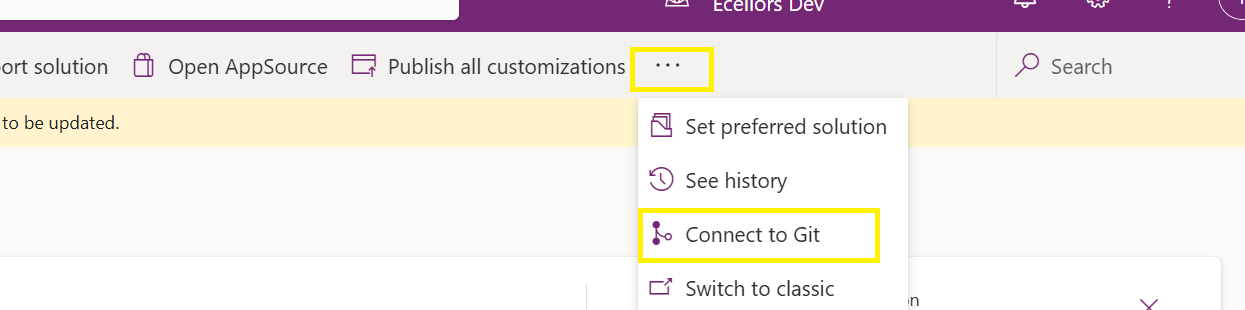
Since we were currently using Environment binding, let’s select the Connection Type as Environment
Then click on Connect, once connected, you should a alert message in power apps maker portal at the top.
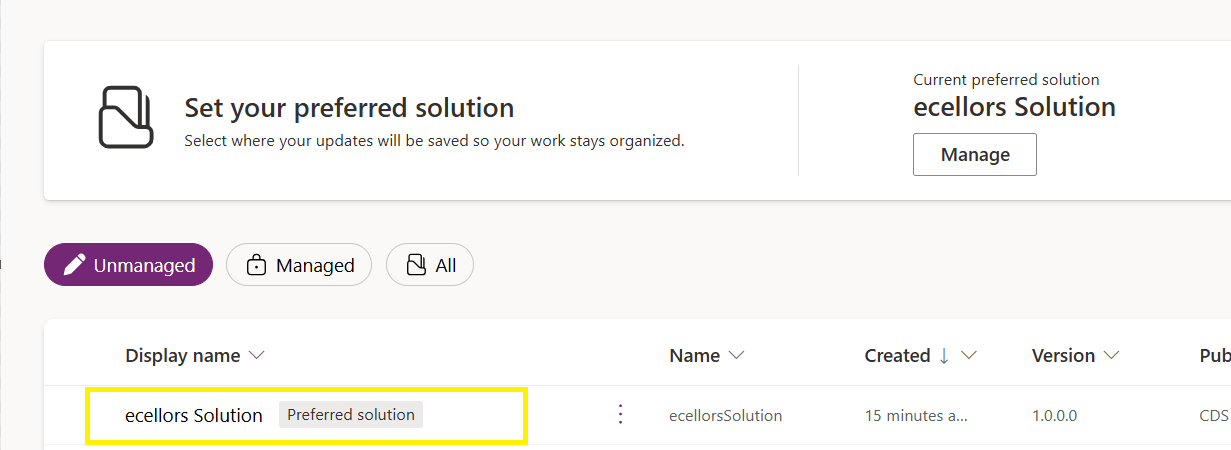
Now create a new solution as below named ecellors Solution
Verify the integration by clicking on Git Integration as below
It should show as below
Now let’s add few components to the solution we created
Once added, let’s publish the unmanaged solution and verify it..
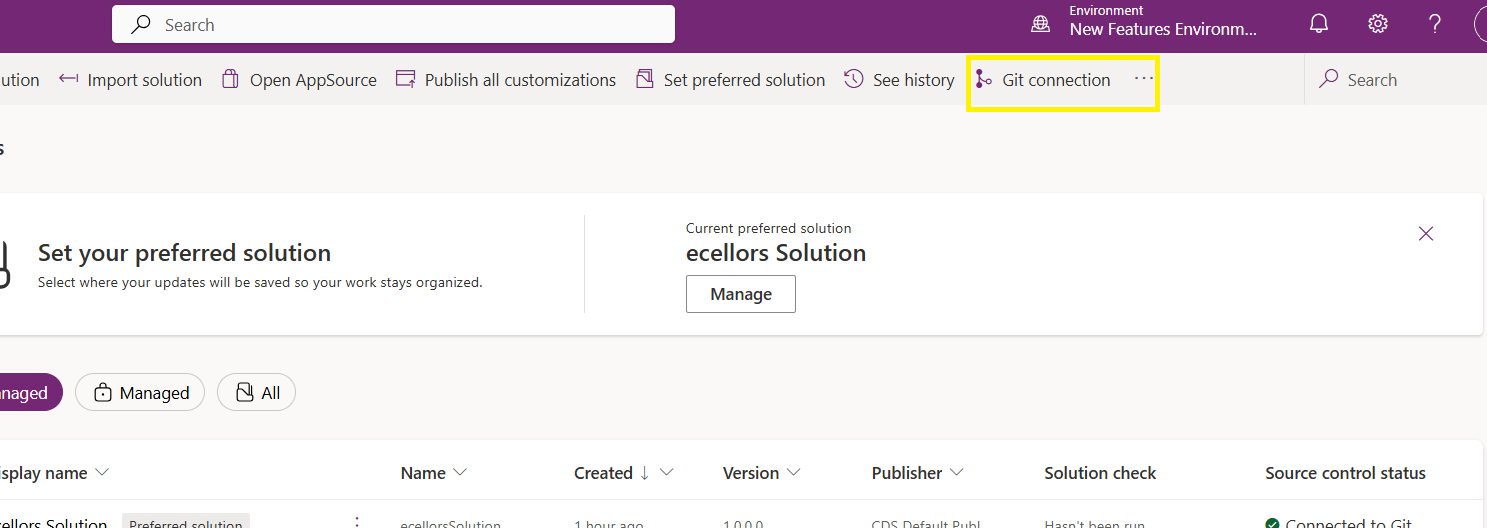
Do look closely, you should see a Source Control icon highlighted in yellow color for illustration.
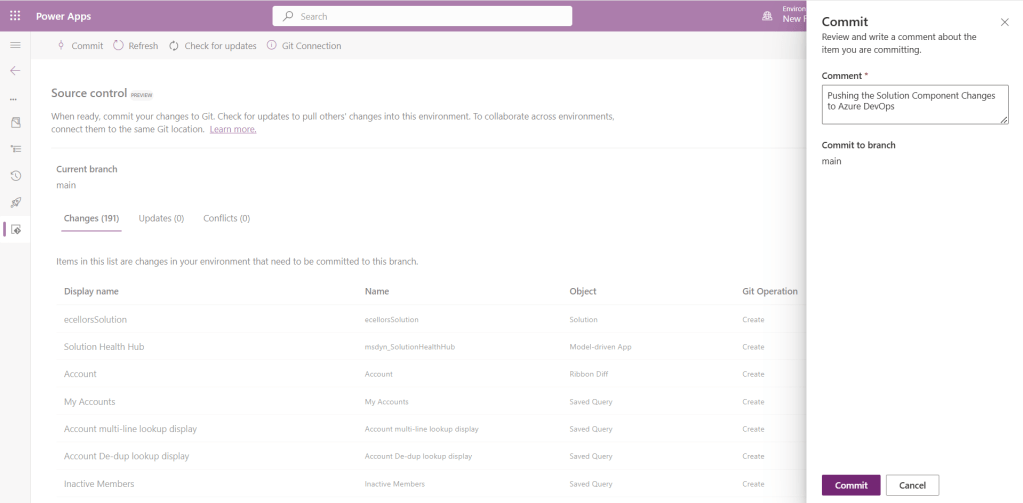
Also, you should see a commit option available at the top
You should now be able to commit the solution components as if you are committing the code changes.
It also specifies the branch to which we were commiting…
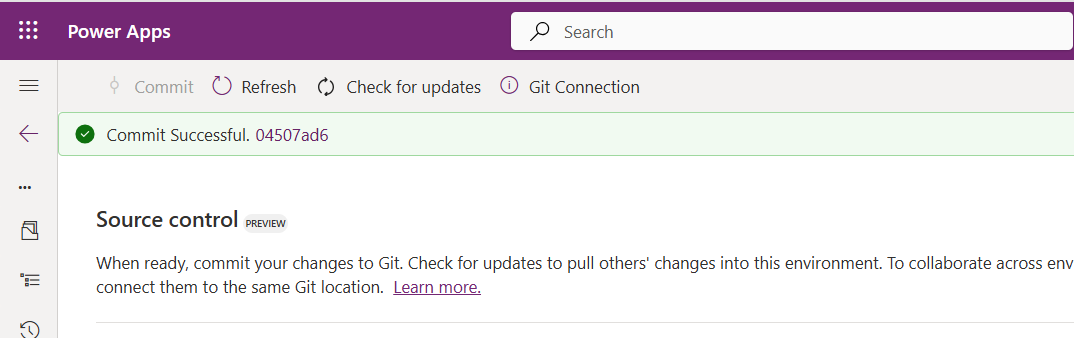
While it takes few minutes unlike pushing the code to Azure DevOps to push the changes, however this would depend based on the number of solution components you were pushing..once it is done, it will show a commit message like below…
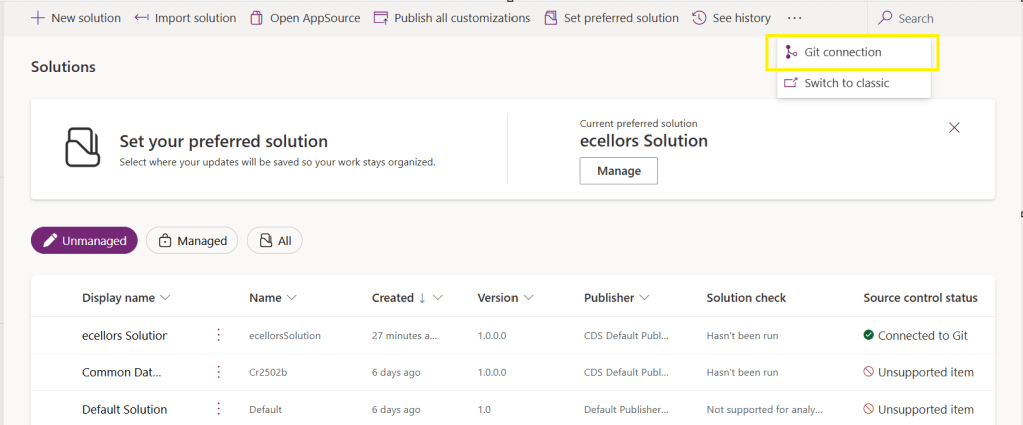
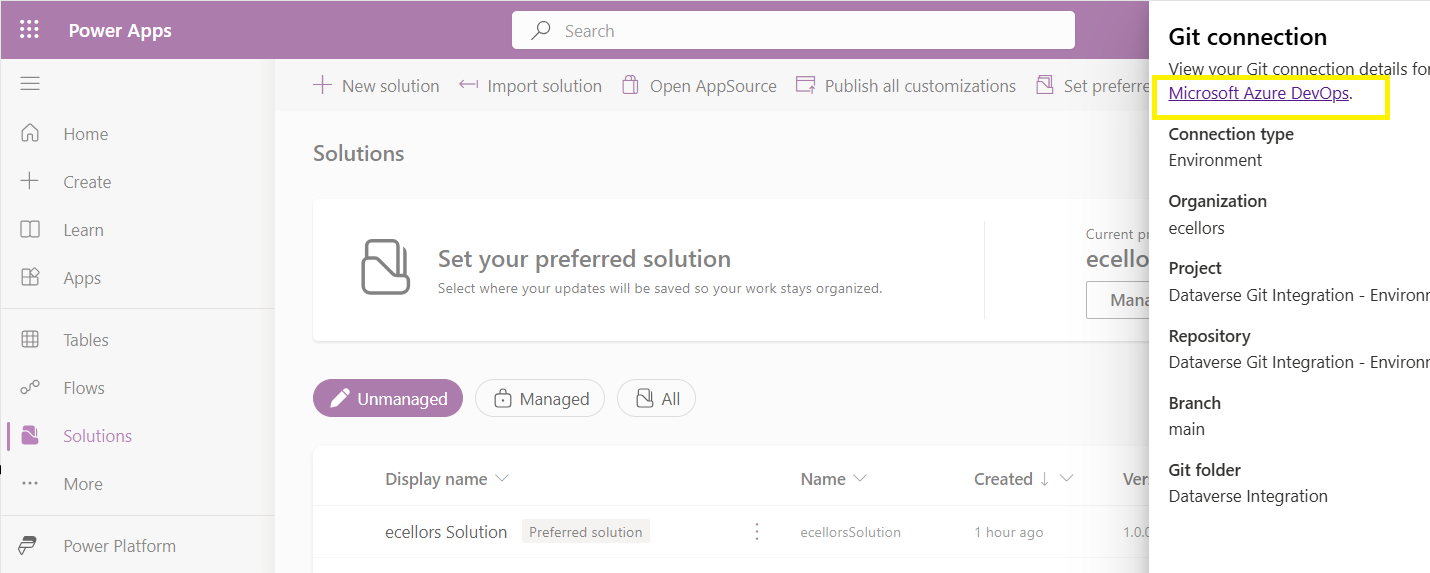
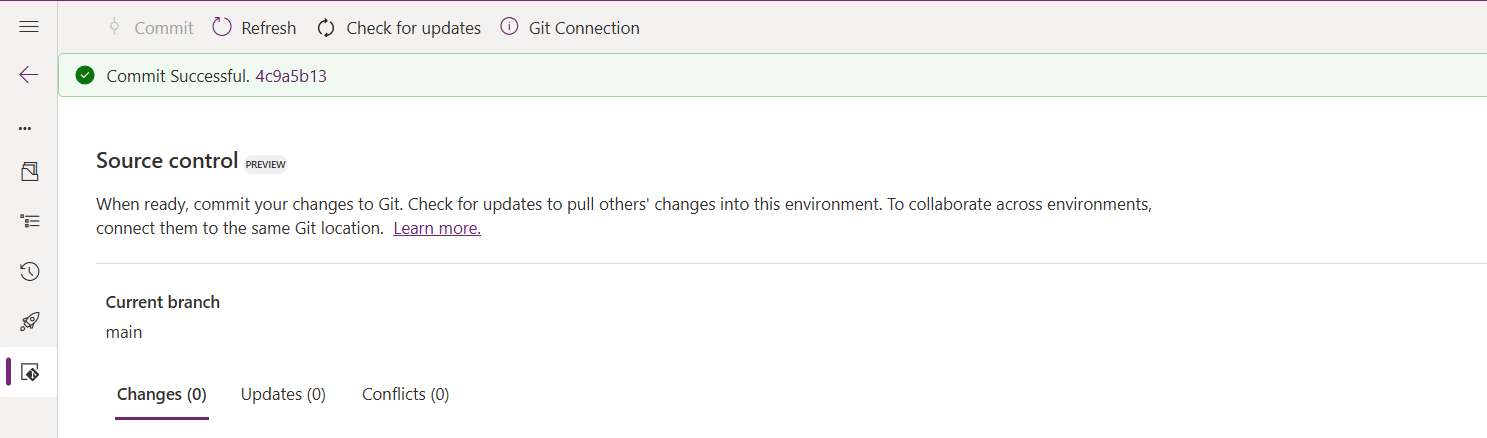
Now let’s verify our Azure DevOps Repo..for this you can go back to the main solutions page, click on Git Connection at the top..
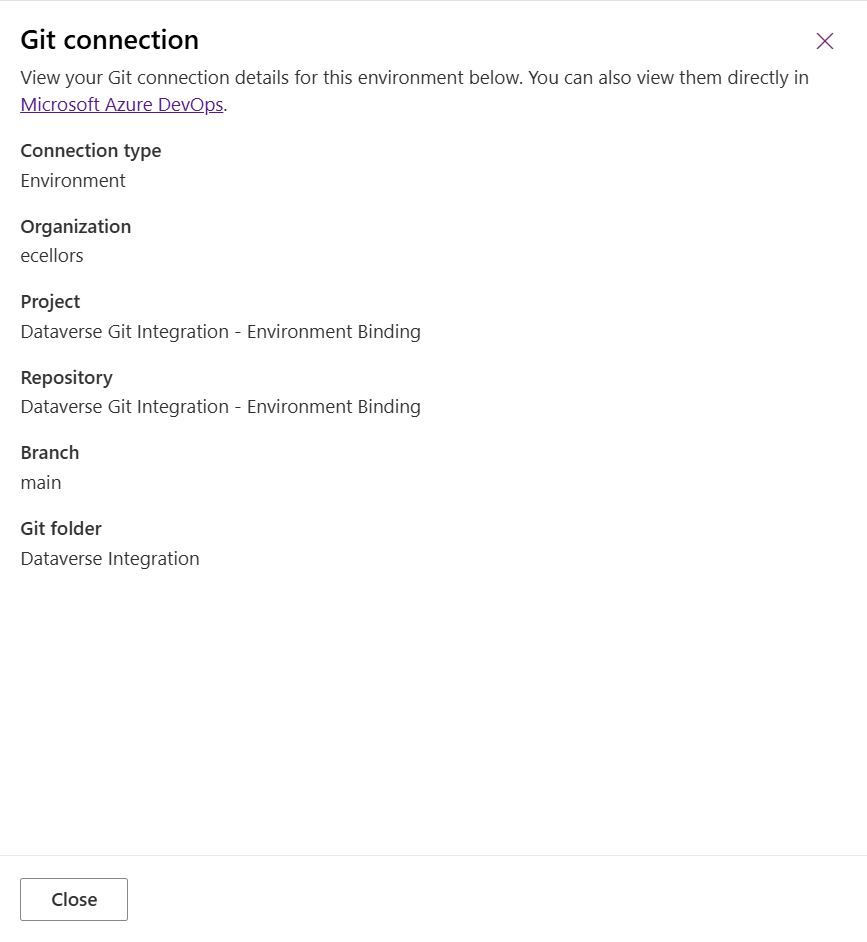
After clicking on Git Connection, click on the link to Microsoft Azure DevOps as below
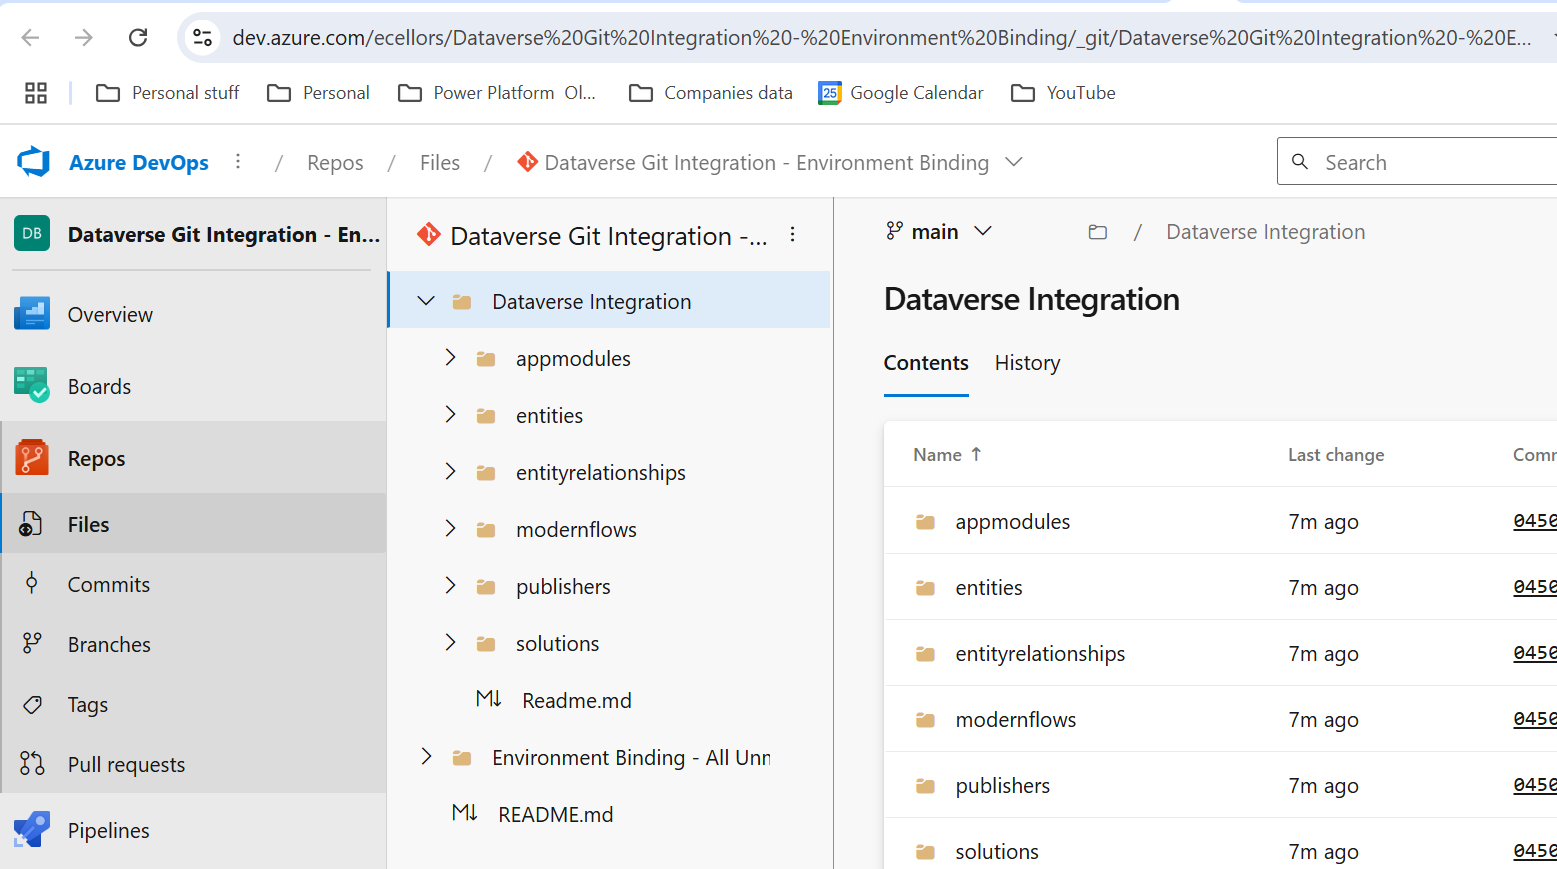
Then you should be navigated to Azure DevOps folder as below where all the solution files will be tracked component wise.
Now we will move back to Power Apps maker portal and make some changes to any of the components inside the solution…
Let’s say, I just edited the flow name and created a new connection reference, saved and published the customizations.
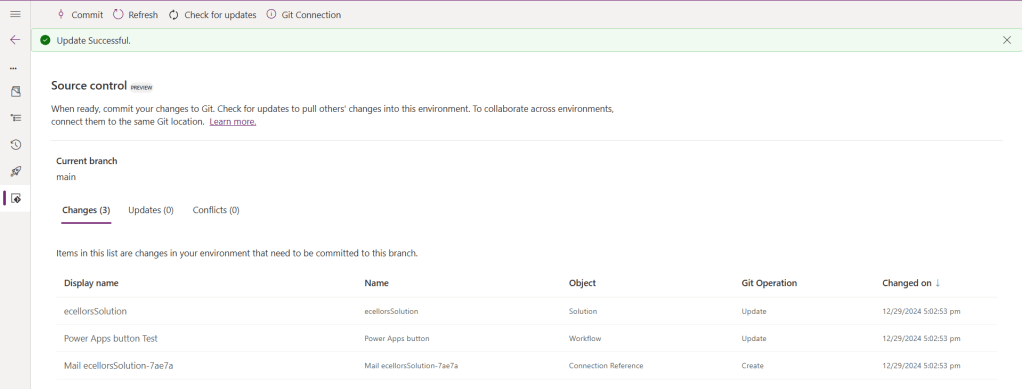
If you did some changes at the Azure DevOps repo level, you can come back and click on Check for updates, if there were any conflicts between changes done in Azure DevOps and component in solution, it will be shown as conflict.
We now have 3 component changes and all were listed here…you can click on Commit.
As soon as the changes are committed, you should see a message saying Commit Successful and 0 Changes, 0 Updates, 0 Conflicts.
Now you successfully integrated Dataverse Solution components with Azure DevOps without any manual intervention required while deploying solutions using Azure DevOps Pipelines.
Hope you learned something new today…while feature is still in Preview and only available for early release, while couple of issues still need to fixed by Microsoft.
I have tested this feature by creating an environment in US Preview region and this feature will be a good value to projects using Automation and this solution repository can be further deployed to other environments using Azure DevOps Pipelines.
This will be rolled out soon next year, hope you learned something new today…
Yesterday I was working with Azure DevOps repository for my project. My local Develop branch is behind the Main branch by few commits, I want to get the latest commits into my local and include those from the Main branch also in to my Develop branch.
It is then I got to know whether to use GIT Merge Command or GIT Rebase Command. And here you go my findings on the same….
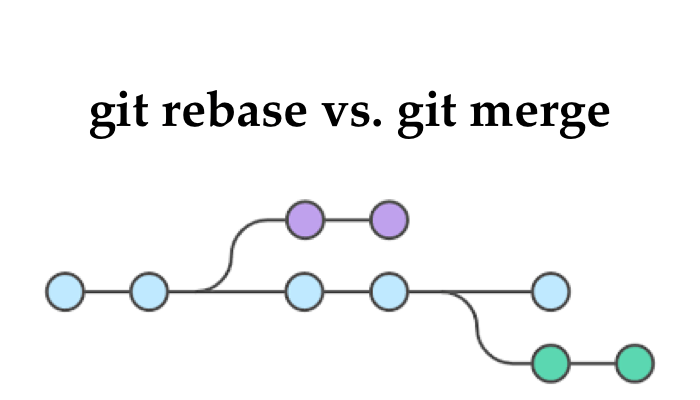
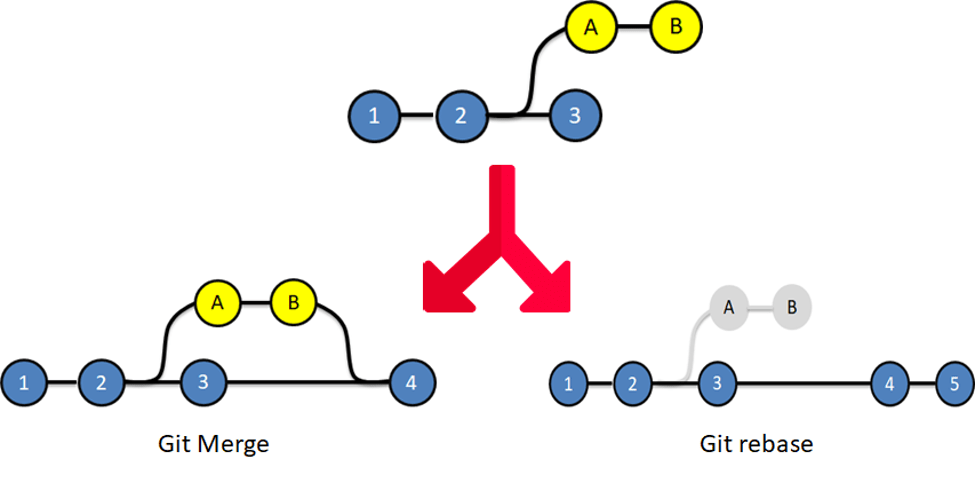
I got to know the details, official Git manual states that rebase “reapplies commits on top of another base branch”, whereas merge “joins two or more development histories together”. In other words, the key difference between merge and rebase is that while merge preserves history as it happened, rebase rewrites it. Let’s start with an illustration…for better understanding…followed by the differences…
Merge
Rebase
Git merge is a command that allows you to merge branches from Git.
Git rebase is a command that allows developers to integrate changes from one branch to another.
In Git Merge logs will be showing the complete history of the merging of commits.
Logs are linear in Git rebase as the commits are rebased
All the commits on the feature branch will be combined as a single commit in the master branch.
All the commits will be rebased and the same number of commits will be added to the master branch.
Git Merge is used when the target branch is shared branch
Git Rebase should be used when the target branch is private branch
Actually talking both do mean the same purpose and have their own uses, but at the end of the day it is completely up to your ALM strategy/methodology. I preferred to use Merge instead of Rebase just that my branch is shared branch and for simplicity.
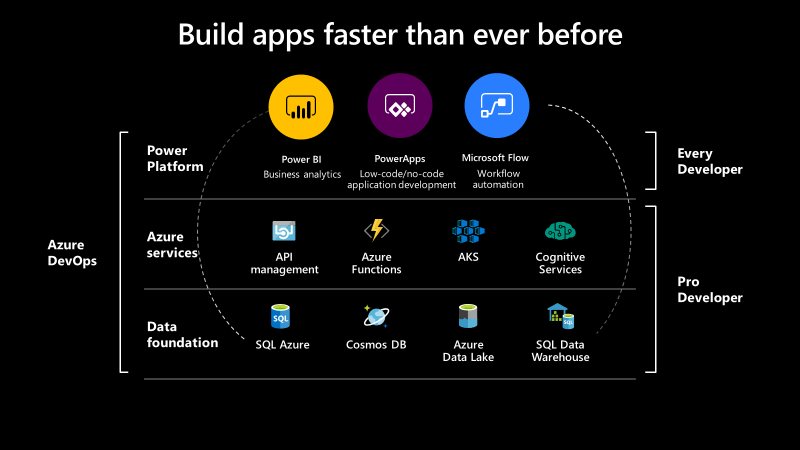
Hope every one should be very much interested in learning the base line for Power Platform which is Azure.
So this blog serves as the introduction in this #PowerfulAloneBetterTogether series.
Basically while designing your solution for your CE Apps, in order to improve the performance you need to make sure that you perform a minimal set of operations in CE and if in cases where you exceed the timeout limit in Dynamics CE and this is where the remote execution context should be passed to Azure Integration and move all your heavy operations outside your Dynamics CE preferably a line of business application.
So this is where we can think of the following possibilities for our integration…please click on respective link to navigate respectively…
I would be detailing about each of this integration with a separate blog post…how each one provides a bunch of alternatives to overcome our current limitations.
Hope this blog series would be of great help and will serve as a reference and your go to guide for your Power Platform and Azure Integrations.
We recently had to spin up a new Azure VM to run some of our Batch jobs where we need to schedule them to run at specific times in Singapore Time Zone.
But surprisingly when when we VM is provisioned and started…we see the default time zone is set to UTC. Usually by default, every time this would be set to UTC.
In our case, we need to change it to SGT(Singapore Time Zone). The usual way of changing the time zone from Settings–> Time & Language was not possible as this is disabled in our case. But even though it is enabled and changed here, it would be reverted back to UTC when we allocate & deallocate the VM.
So you can use Power Shell Scripts to make this thing work for you. Use below to get all time zones.
Get-TimeZone -ListAvailable
If you want to filter the list, you can do so like
Get-TimeZone -ListAvailable | where ({$_.Id -like “Singapore*”})
Finally for setting the timezone, you can use this cmdlet
Recently I was exploring about setting Multi Factor authentication for my Dynamics 365 Instance and connecting to it via code using Console applications. This is when I came know about using an App password for my Console application to work.
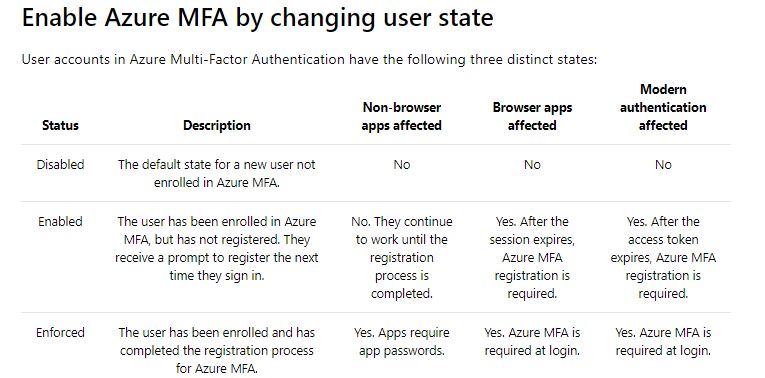
But do you know that based on the user states, MFA setup behaves differently..
Ok..now let’s take a simple console application which just does nothing but connects using a OrganizationServiceProxy. Sample code can be found here.
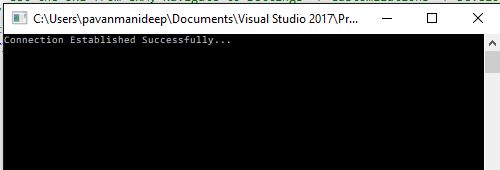
When MFA is disabled, you will be able to connect to the instance without any issues.
2. Now Enable the MFA but don’t enforce it. Don’t sign in and complete the registration process of either providing pin or answering the call. Try to run the same console code above, you would be still able to connect without any issues.
This is because Console application would also behave as non browser app. and will continue to work until the sign up is done exclusively as stated in the table above.
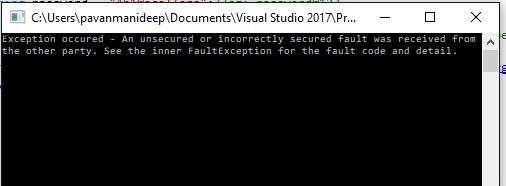
3. After the multifactor authentication is enforced, users will need to create app passwords for working with non browser applications. So now if you try to run the same Console application, you would get an error..
Now sign in to your instance and generate the app password by providing additional security information when signing up. Use the same app password in place of credentials used while connecting to CRM in the console app.
And now you will be able to connect without issues…