Deploy dependent assemblies easily using PAC CLI

Hi Folks,

This is another post related to Plugins in Dynamics 365 CE.

Considering medium to large scale implementations, there isn’t a single Power Platform Project which don’t require merging of external assemblies.

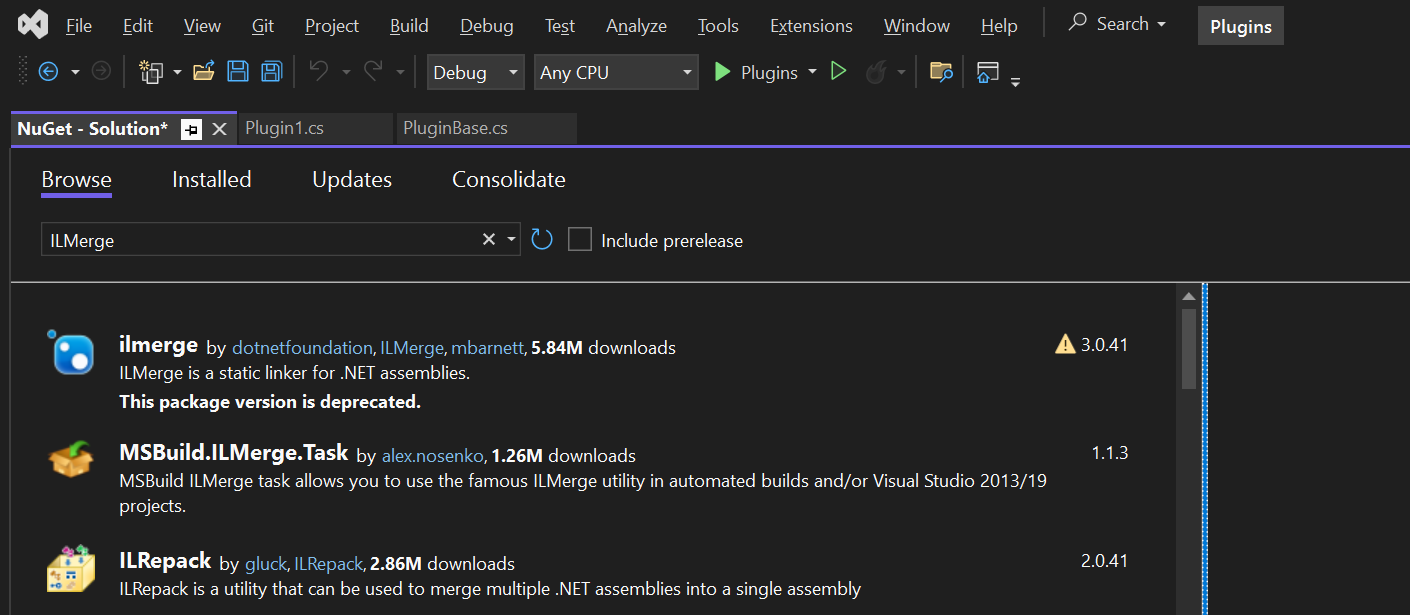
We relied on ILMerge to merge those assemblies into a single DLL. We used to search for ILMerge assemblies in Nuget and installed them for use.

Then the plugins are signed in for several reasons, primarily related to security, assembly integrity, and versioning of the sandbox worker process.

But either of the above are no longer needed with the help of Dependent Assembly feature…with few simple steps, you can build the Plugin…Interesting, isn’t it, read on…

Pre requisites:

  • Download Visual Studio 2022 Community Edition here
  • Download VS Code from here
  • Download Plugin registration tool from here
  • Download PAC CLI from here
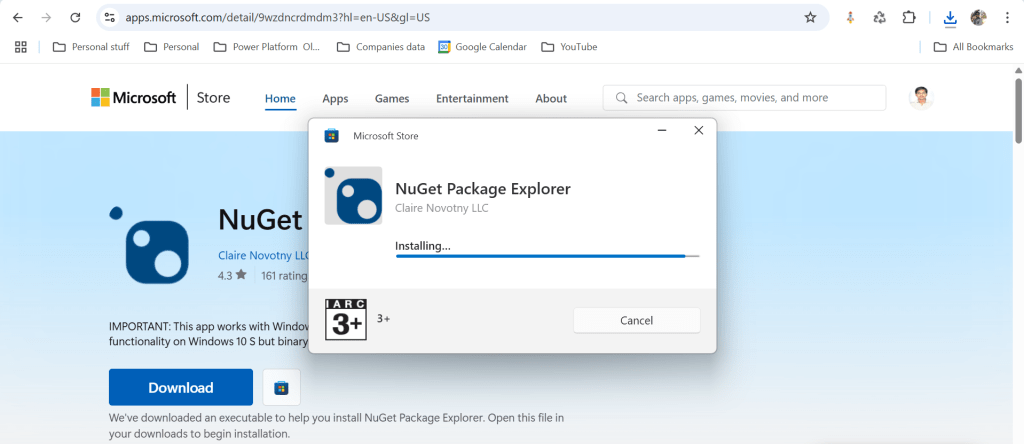
  • Download and install NuGet Package Explorer from this link NuGet Package Explorer open the NuGet Package Explorer

Avoid Direct Plugin Project Creation in Visual Studio

  • Never create a Plugin project directly from Visual Studio or any other IDE here after.
Use Microsoft PowerApps CLI instead
  • Always use Power Apps CLI as it easy and only requires a single command to create the entire Plugin project scaffolding
  • This ensures a standardized and reliable development environment.
  • It automatically creates a Nuget Package file that will be used to avoid ‘Could not load assemblies or its dependencies‘.

Ok, let’s begin.

Once you have downloaded all the prerequisites mentioned, make sure you have installed them in your local machine. Others are straight forward to download, for NuGet Package explorer, you need to search in Windows store to install.

  1. Create a local folder for the Plugins

Navigate to that folder from VS Code

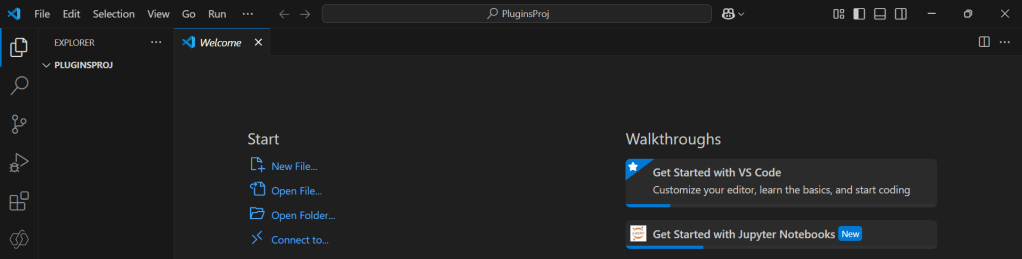
Now open terminal, run the pac command as below

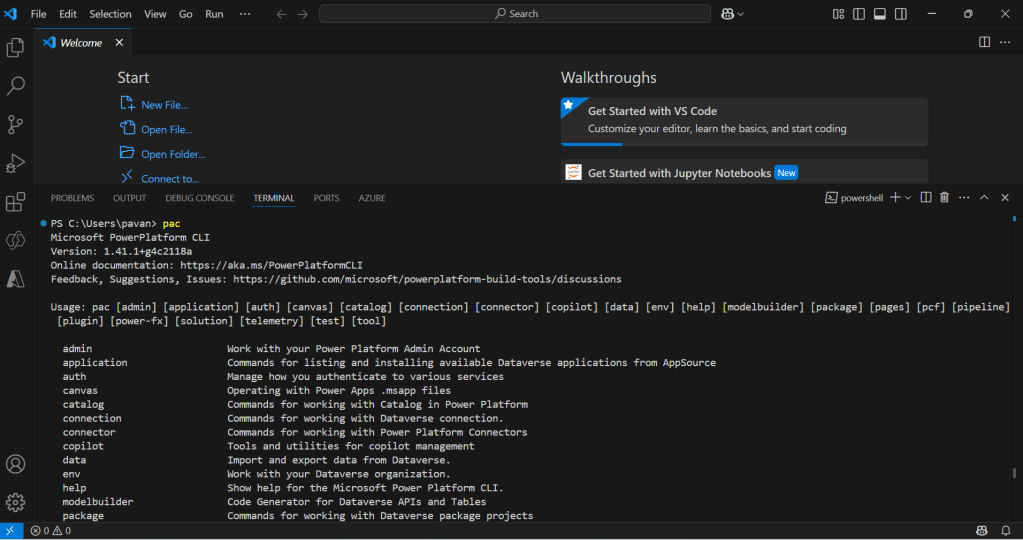
Execute the following command to create plugin project 

  • Browse to the directory where you want to create the plugin project
  • Execute the command on CMD to create plugin project “pac plugin init

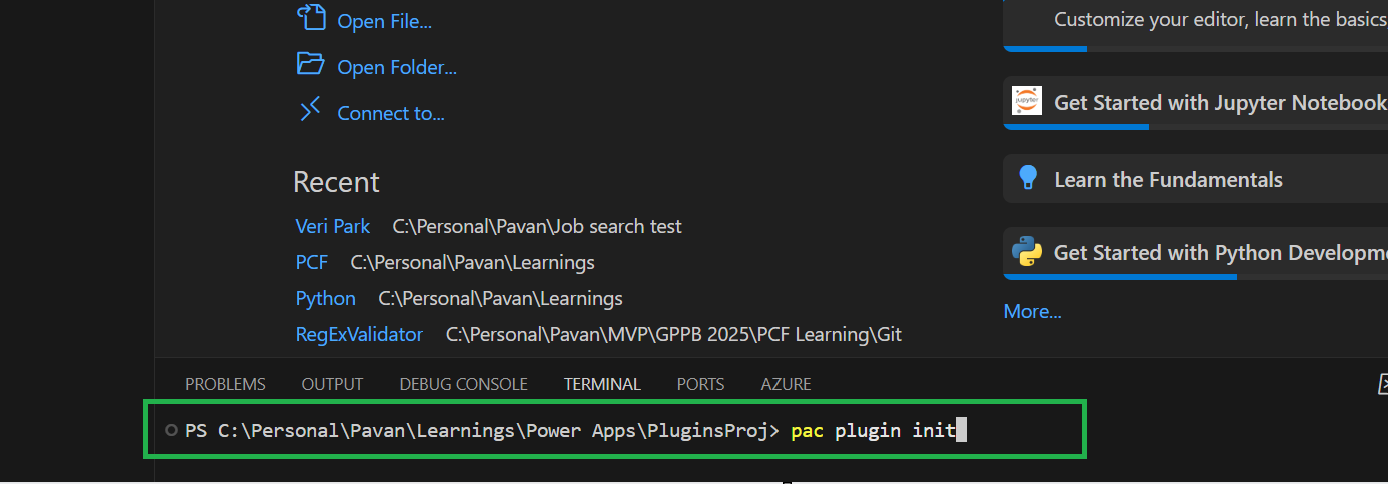
A plugin project will be created at your desired location as follows

Plugin project in local folder will be created as below

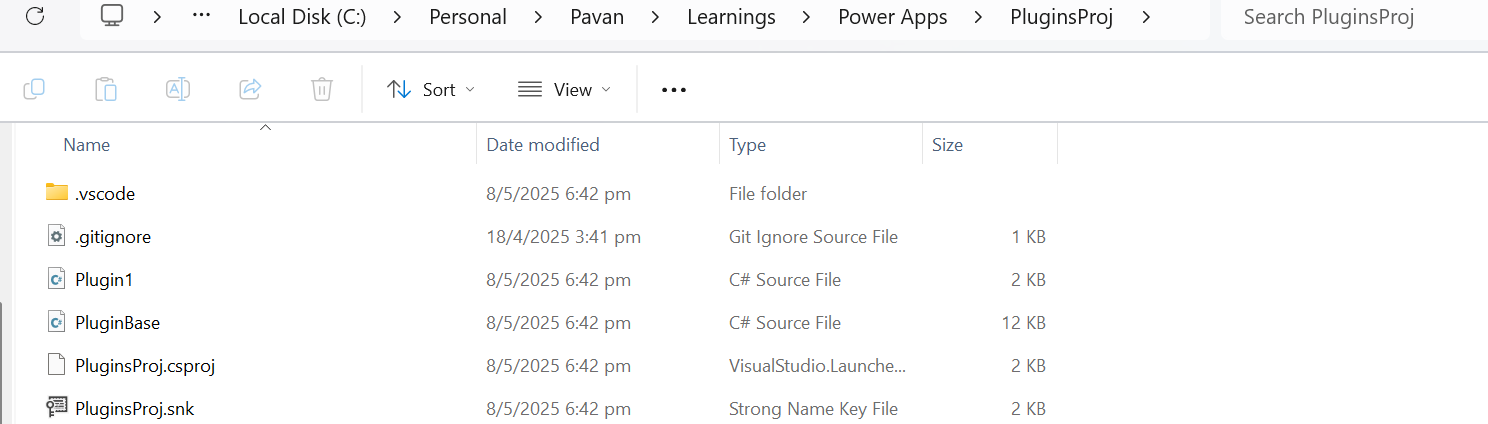
That’s it, you can close the VS Code for now.

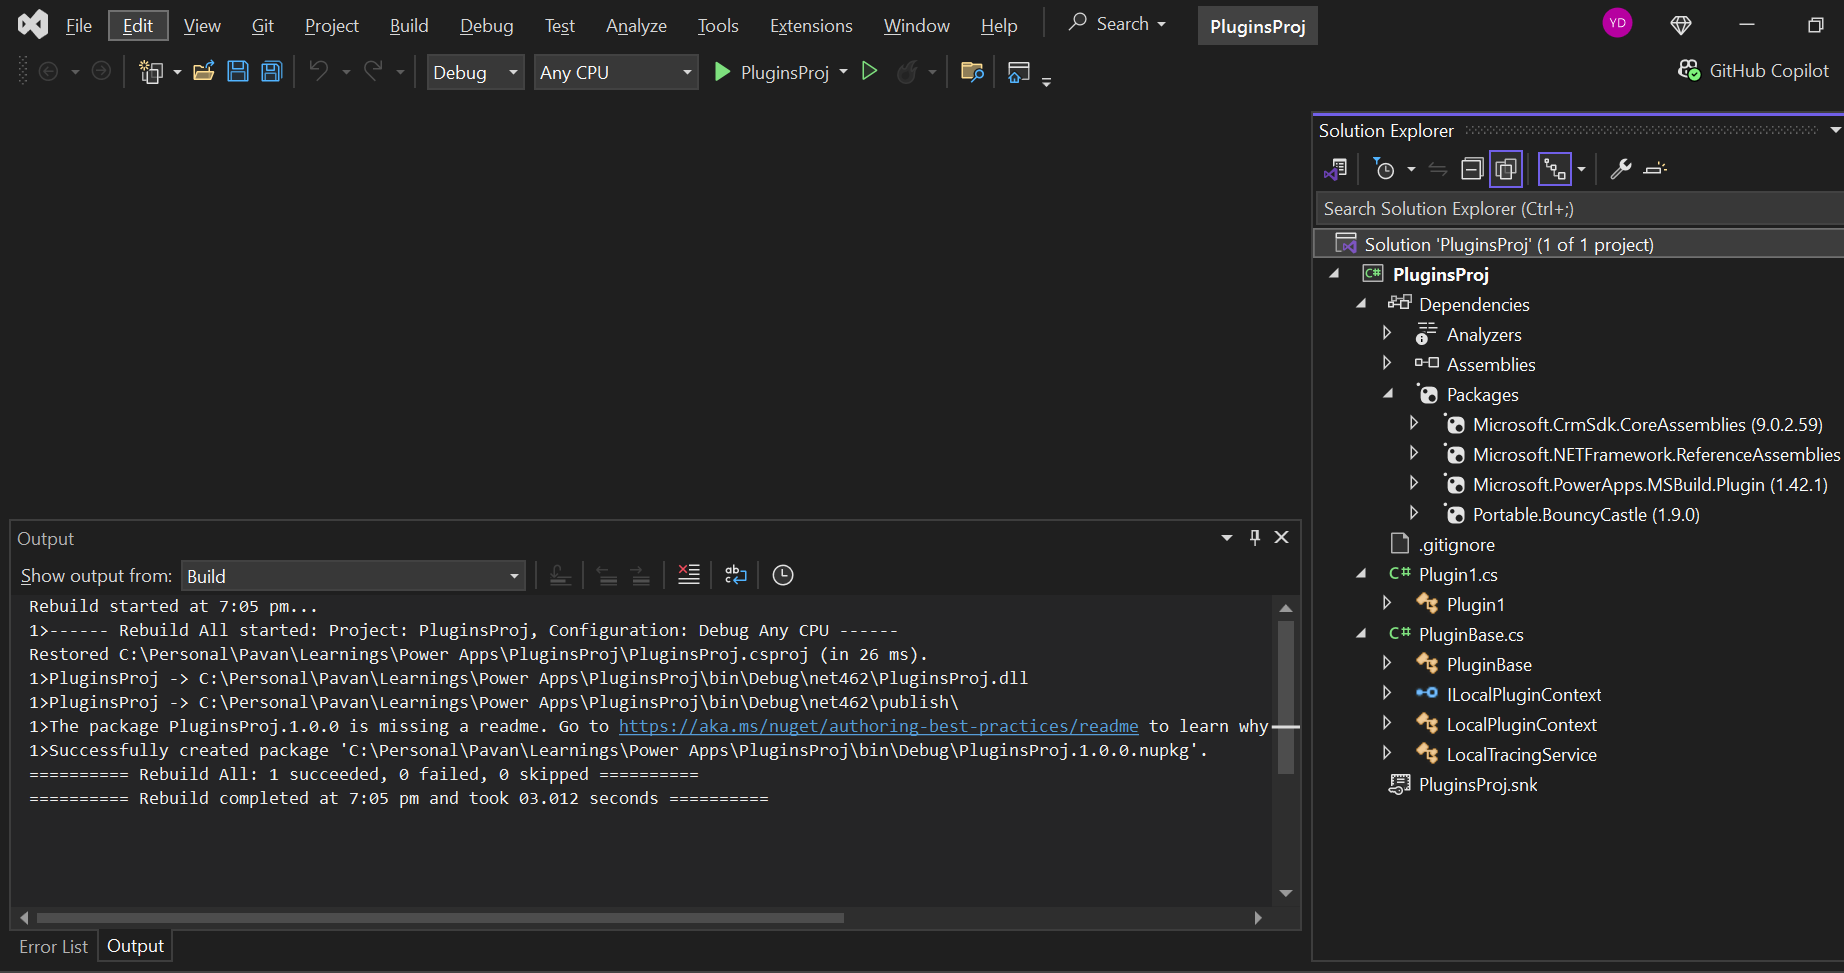
Click on the CS Proj file and open it in Visual Studio

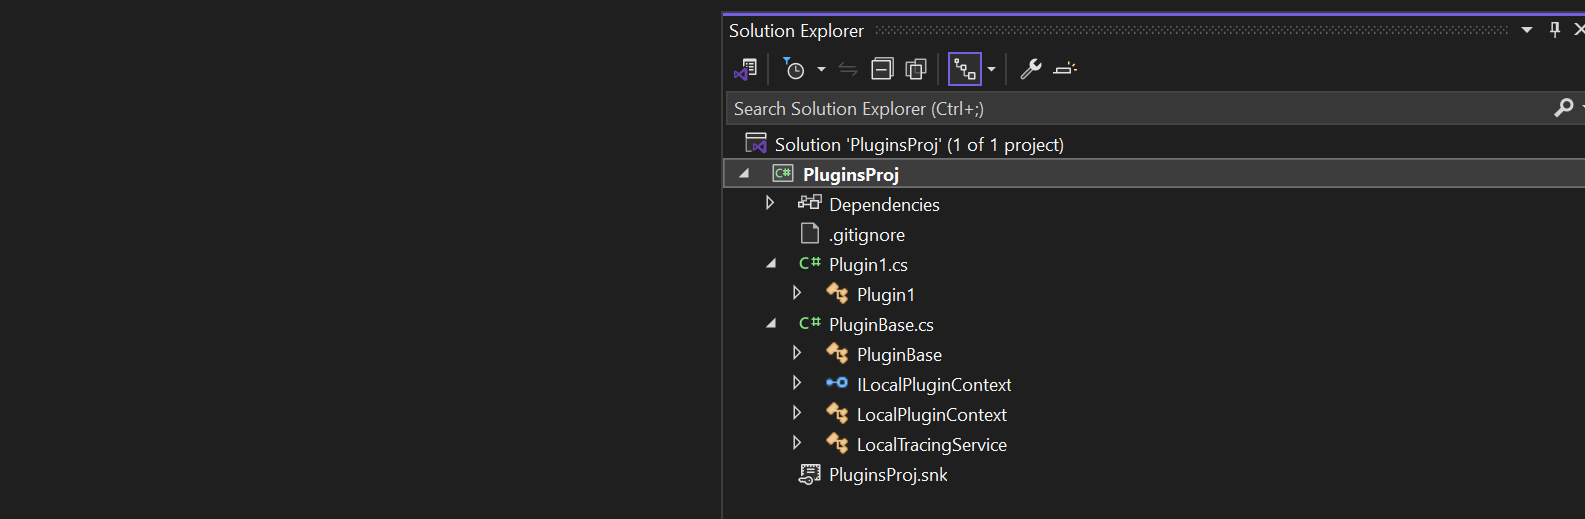
By default, 2 files are automatically created when you create a plugin project as shown above.

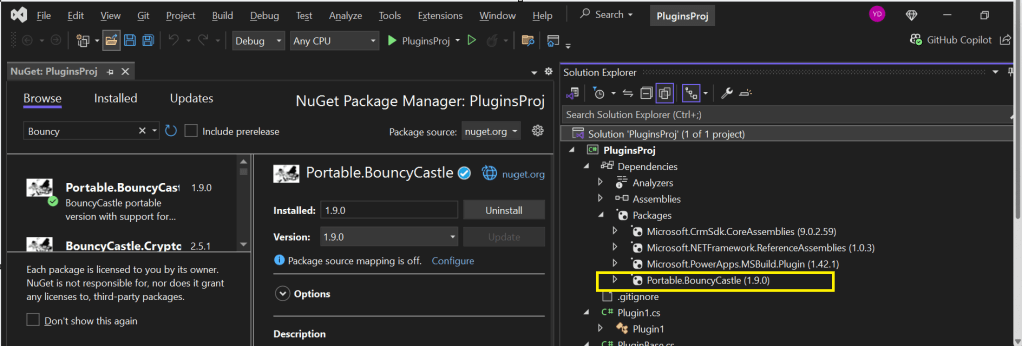
Now will install Bouncy Castle which is an external library, right click on the Plugin Solution –> Manage Nuge Packages

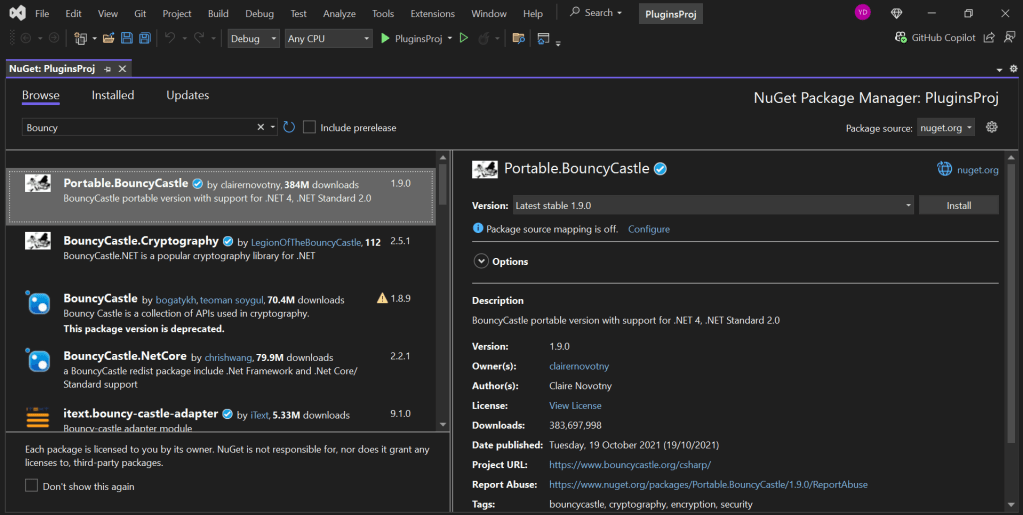
I have added Bouncy Castle NuGet Package to my plugin project for Encryption and Decryption. You can have your own required NuGet Package as per your need.

Build your project

After a successful build, you will get the output result as follows

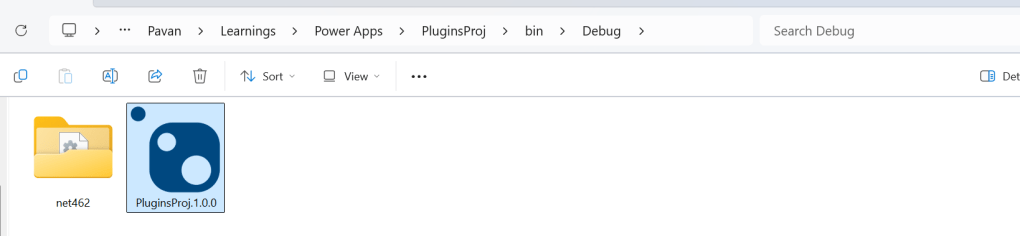
Browse the directory of your project

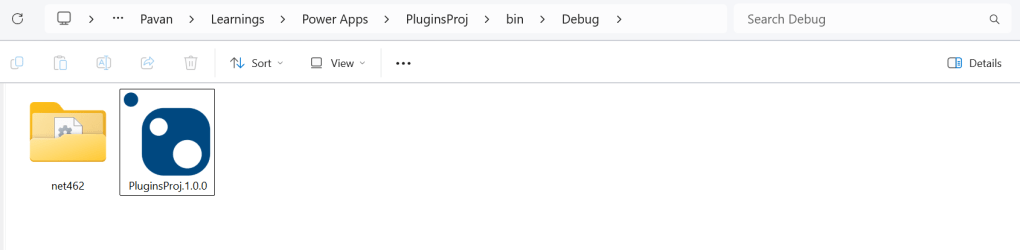
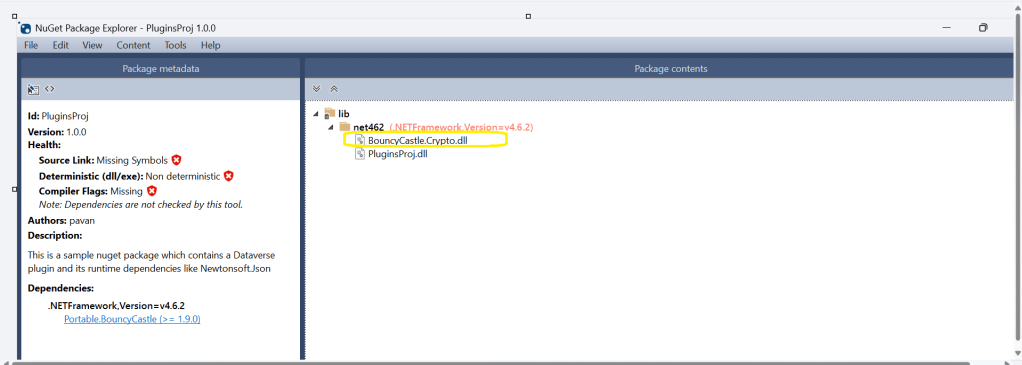
Open the file Plugin_Project.1.0.0.nupkg in Nuget Package Explorer by double clicking it

Now you can see that this nuget package file contains the information related to the added nuget package of Bouncy Castle that we want to include in our plugin project package as follows. In your case, you can have the required nuget package that you want to add 

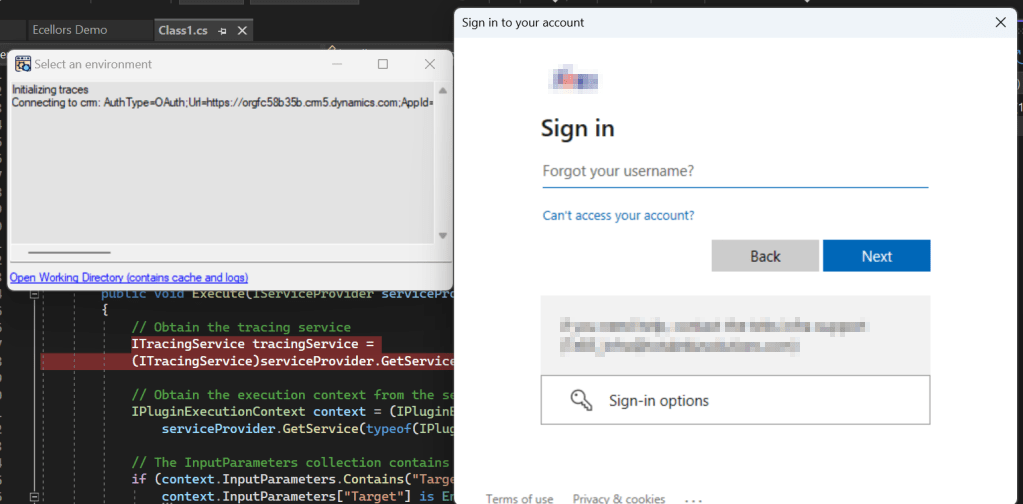
Now open up plugin registration tool

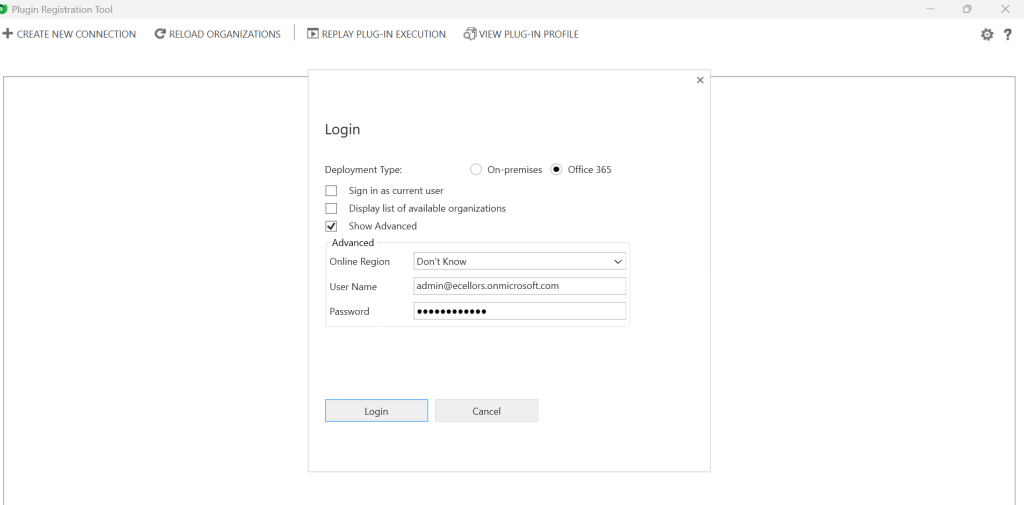
Click to create new connection

Provide login details and login

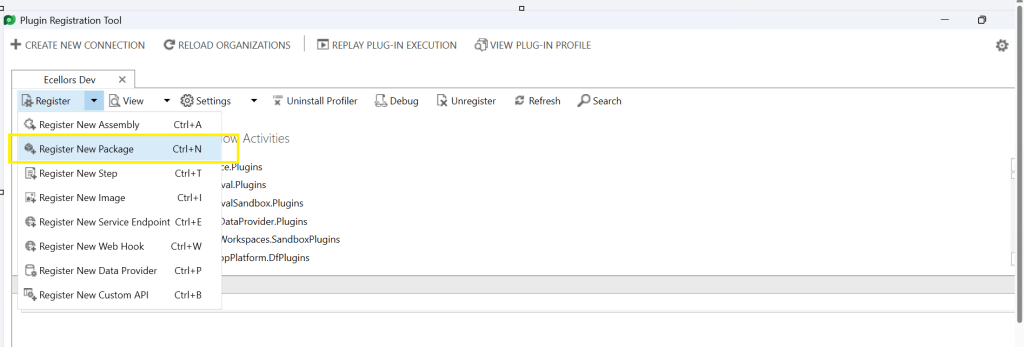
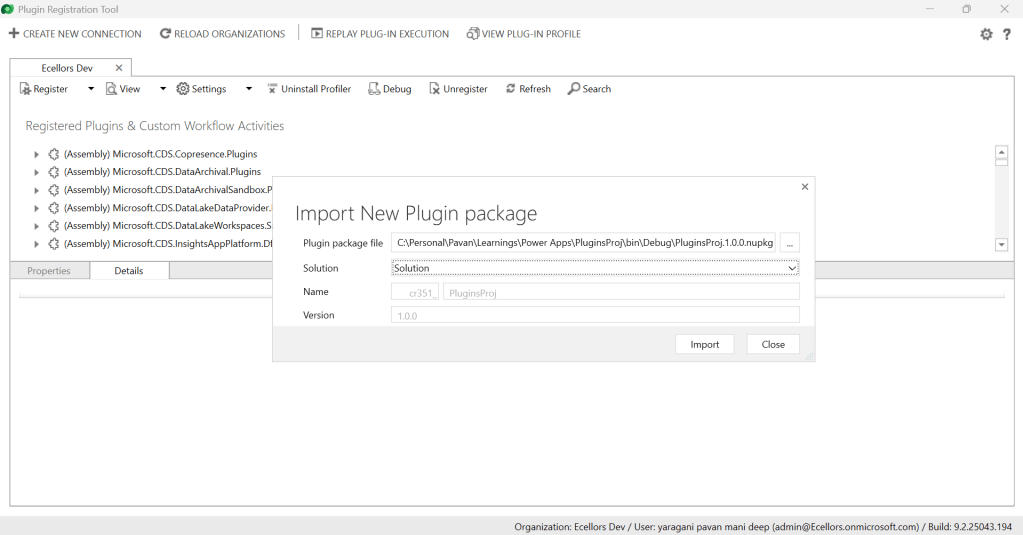
Click to Register New Package

Browse to the directory where your nuget package file was created automatically when you build the project and import this file 

Select the Command Data Service Default Solution and import it

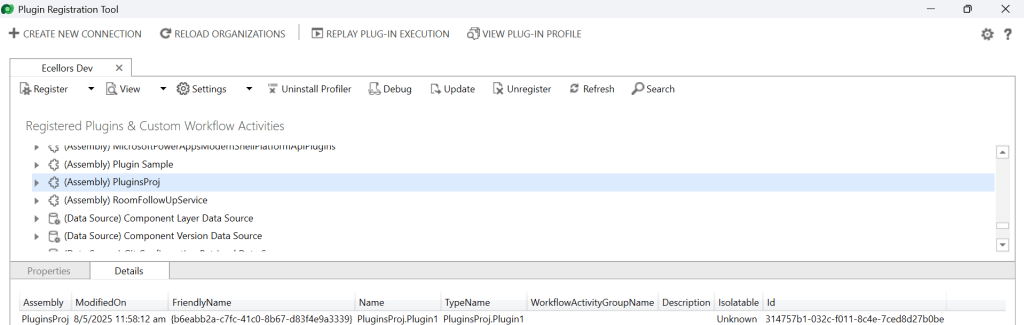
Click on view and Display by package

Now your Plugin Project is successfully registered with all dependent assemblies and ready to use.

While this post gives you a structure on how you can do build a plugin assembly, you can add the business logic as per your need.

Conclusion:

In conclusion, navigating the intricacies of Microsoft Dynamics 365 CRM plugins demands a nuanced approach, especially when dealing with NuGet Packages and dependent assemblies. This article has delved into the critical process of resolving the persistent ‘Could not load assemblies or its dependencies‘ issue, offering a comprehensive, step-by-step demonstration.

By following the recommended best practices, such as avoiding direct plugin project creation in Visual Studio and harnessing the power of Microsoft PowerApps CLI, developers can establish a standardized and reliable development environment. The CLI’s automatic creation of a NuGet Package file not only streamlines the process but also reduces the errors.

To further facilitate your journey, prerequisites such as downloading and installing essential tools like the Plugin Registration tool, Microsoft PowerApps CLI, and NuGet Package Explorer are highlighted. The guide emphasizes the significance of these tools in ensuring a smooth plugin development experience.

By adopting these practices and incorporating the suggested steps into your workflow, you not only troubleshoot existing issues but also fortify your understanding of the entire process. Take charge of your Dynamics 365 CRM plugin development, elevate your skills, and sidestep common pitfalls by mastering the art of handling NuGet Packages and dependencies seamlessly.

References:

Build and package plug-in code

Cheers,

PMDY 

Another way to install Plugin Registration Tool for Dynamics 365 CE from Nuget

Hi Folks,

Are you a Power Platform or Dynamics 365 CE Developer, you would definitely need to work on Plugin Registration tool at any given point of time and having a local application for Plugin Registration tool greatly helps…in this post, I will show a little different way to install Plugin registration tool and that too very easily.

Well, this approach is especially useful to me when I got a new laptop and need to work on Plugin Registration Tool where the Plugins already build for the implementation.

First 3 ways might have known to everyone through which you can download Plugin registration tool…do you know there is fourth approach as well…

  1. From XrmToolBox
  2. From https://xrm.tools/SDK
  3. Installation from CLI
  4. See below

Because there were limitations to use these approaches at least in my experience, I found the fourth one very useful.

  1. XrmToolBox – Not quite convenient to profile and debug your plugins
  2. https://xrm.tools/SDK – Dlls in the downloaded folder will be blocked and would need to manually unblock the DLL’s for the Tool to work properly
  3. CLI – People rarely use this.

Just do note that the approach is very easy and works only if you have a Plugin Project already. Please follow the steps below

  1. Just open the Plugin project.
  2. Right click on the solution and choose manage Nuget Packages for the solution
  3. Search for Plugin Registration tool as below

4. Choose the Plugin project and click install, confirm the prompt and agree the license agreement shown

5. Once installed, next go to the Project folder in the local machine.

6. Navigate to Packages folder, you should see a folder for Plugin Registration tool below

7. There you go, you can open the Plugin Registration Application under tools folder. You can undo the changes for the Assembly it is linked to Source control.

That’s it, how easy it was? Hope this would help someone.

Cheers,

PMDY

Debug Plugins with Dataverse Browser – Quick Recap

Hi Folks,

This post is for all who are working on D365 Model Driven Apps and mainly Plugins.

Yes, you saw it right, in this blog post, we will see how can debug plugin without using our favorite plugin profiler which is very widely used from quite some time by everyone working on Plugins for Dynamics 365. All this is done by a tool called Dataverse Browser, which is not yet on XrmToolBox. Please note that there were some limitations as detailed in limitation section below.

Here are 3 simple steps to follow..

  1. Install Dataverse Browser
  2. Attach the Debugger
  3. Run your actual operation.
  4. Step into your code and debug it.

The tool embeds a web browser based on Chromium. It works by translating the Web API requests to SDK requests. Then it analyzes if plugin steps are registered on the message and it loads them, make them run locally. All other requests are sent to the Dataverse, so that the plugins are interacting with the real database.

Download the latest source code of Dataverse browser here.

Next extract the zip file downloaded as highlighted below

Extract the zip file downloaded, open Dataverse.Browser Application as highlighted below.

In the popup window, click on More info as highlighted below…

Then run the application anyway…you will be presented with a window where you can select the environment. Going forward, any time you want to open Dataverse browser, just open the Dataverse.Browser.exe and choose the environment as below.

Click on New, enter the details as above and key in the details.

  • Enter the settings of your environment:
    • A name meaningful for you
    • The host name of your instance (without the https://)
    • The path to the plugins assembly file (the dll). For a better experience, it should be compiled in debug mode with the pdb file generated.

Then click Go.

You just need to Authenticate to your instance.

Once Authenticated to the respective model driven apps, all the Web API requests sent to Dataverse will be shown as below.

I have following Plugin Libraries registered.

Next step is to choose the instance and perform the respective operation which triggers the Plugin. So, in here, I will perform an update to the Account entity from the Dataverse Browser which triggers the Plugin.

Once an update is performed, a Web API request gets recorded in the Dataverse browser as highlighted below.

Since the Plugin is in Post Operation, i.e. Stage number is 40

Just expand the Patch Request, you should see two operations on 30, 40, but area of interest here is for the Plugin which was registered on stage 40.

Make sure you open the Visual Studio and perform the below steps from Dataverse Browser.

Attach the debugger from Dataverse Browser by clicking on the Plug Symbol as below which will show the list of debugger options available for you to select from. Here I have selected Execute Plugins, plugin will be invoked. You can either select any of the three options as presented below.

1.Do not execute plugins – recommended when you want to debug without actually triggering your plugin logic. i.e. With this approach even you can check the code in Production environment.

2. Execute plugins/Execute plugins with auto break – recommended when you want to debug by triggering your actual plugin, this is recommended in case your plugin code had changed recently and in Development environments.

Just select Ecellors Demo – Microsoft Visual Studio: Visual Studio Professional 2022 version which will launch an existing Visual studio 2022 as below in break mode. Next click on Continue as highlighted below or press Click F5 on your keyboard.

This shows you that the debugger has been attached when you navigate to Dataverse Browser asking you to place your breakpoints.

Now just place breakpoints in your code in Visual Studio. Just go back to Dataverse Browser and click on Ok on the Diaglog box.

Perform the operation which triggers the Plugin from Dataverse Browser itself, this will hit the break point in Visual Studio from where you can debug your plugin.

As you might have observed, your code need not throw exception in order to debug, you could do similarly to the way you would debug using Profiler. But here just that you don’t need to deploy the latest code to the Dataverse just for debugging purpose.

This gives a lot more flexibility eases the way you debug plugins.

Limitions:

  • There is no support for transactions.
  • When plugins are triggered because of a server-side operation, they will not be run locally.
  • For many reasons, behavior will never be perfectly similar to the one when plugins are executed on server side.

Happy debugging, I hope you found this post useful…

References:

Dataverse Dev Browser

Cheers,

PMDY

Pro-grammatically create Document location records in SharePoint Online from Dynamics Customer Engagement Online without using native integration

Hi Folks,

Have you ever got a requirement to specifically create records in SharePoint without using the out of the box CRM-Sharepoint integration, then your were at right place and this post is going  absolutely help you with your requirement.

With the out of box integration, we will be able to create records in SharePoint when we navigate to OPEN LOCATION under Document Associated grid. But this adds record GUID to name of the record being created. But in our case, we only want the document location record to be created  with the name of the record. Please use the below code…all you need is Tenant ID, Resource ID, Client ID, Client Secret and your SharePoint domain and URL.

This approach uses Access token approach using the SharePoint based Add-in.

Steps to create SharePoint based Add-in. Navigate to below URL…

Ex: [Site Collection URL]/_layouts/15/AppRegNew.aspx0

AppRegNew Form

At this point, you’ll need to fill in the following details,

Name Description
Client Id Click Generate unique client id for your add-in. It’s a GUID which will be used to identify your add-in.
Client Secret Acts like a password for your add-in. It will include some special characters as well. So while using it, we have to encode the same first.
Title The name of your add-in that will be displayed to the end user.
App Domain For provider-hosted add-in, this will be the domain where, the add-in is hosted. For token generation add-in, fill in any value. Make sure, not to include protocols(https) or slashes(/).
Redirect URI For provider-hosted add-in, fill in the redirect URL. For token generation add-in, fill in any value.

Once you have filled in all the below details, hit Create to register the add-in1

Register SharePoint Add-in

    • You will be navigated to a page displaying the details of your add-in. Save Client Id & Client Secret for future references(Don’t forget this step as you won’t be able to navigate to this page to view details later)2                                  
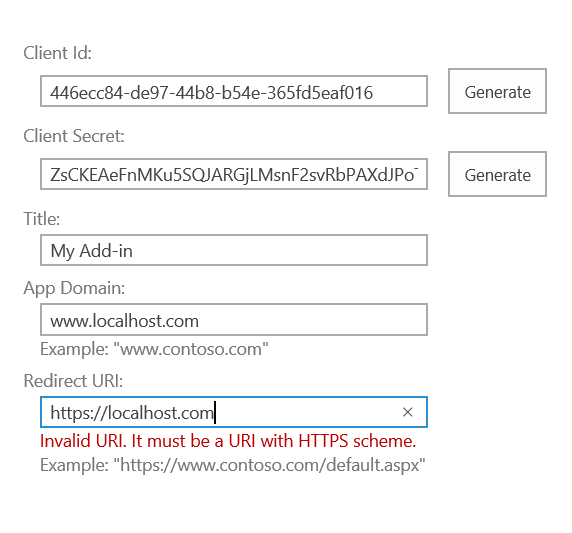
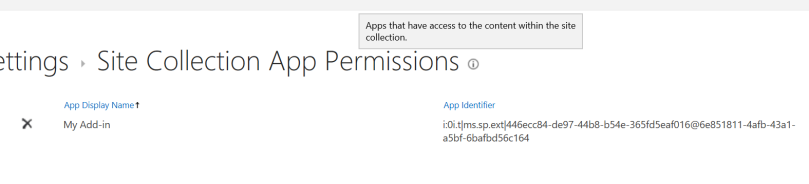
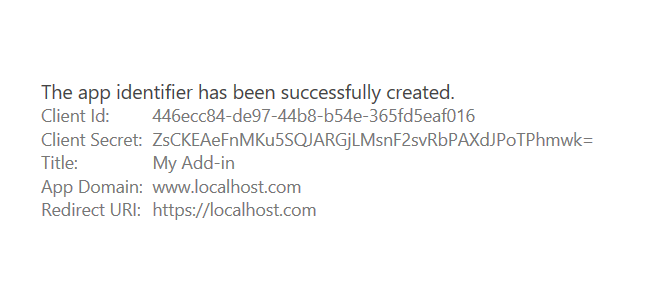
SharePoint Add-in Identifier
    • Grant permission to an add-in

      Now that the identifier is created, we need to grant the necessary permission for it to perform any action. In this example, I’ll demonstrate how to grant full control access on a Site Collection.

      • Navigate to
        [Site Collection URL]/_layouts/15/AppInv.aspx

        3

      • Enter your Client Id value in the App Id option and hit the Lookup button. Details of your add-in will be displayed automatically.4
      • Now this is crucial, you need to give permissions to your app. In the option, Permission Request XML, let’s write the below XML code to grant our add-in full control on the given site collection.Capture
      • Just hit the Create button. You will now be prompted to trust the add-in for all the permissions that it requires.5                                      Trust SharePoint Add-In
      • Hit the Trust It to grant the requested accesses. You can navigate to the following URL to also confirm that the permission has been assigned to the add-in.
        [Site Collection URL]/_layouts/15/appprincipals.aspx

        6

    • Now once you have created the app in SharePoint, you need to get the access token to perform CRUD Operations in SharePoint using REST API.
    • For testing purpose, you can use either POSTMAN or a console application…I have written the approach in both the ways.
    • For retrieving Tenant ID firstly using postman..
    • Perform a GET Request to the following URL..
    • [Site Collection URL]/_vti_bin/client.svc
    • After entering the above URL in the text-box in the URL text-box. We will get the Unauthorized exception on accessing the information. Because SharePoint Online is very much secured and that doesn’t allow anonymous users to access the information for their site. The below is the error message response, after sending the request. Highlighted is your Tenant ID..note it down..Capture1
    • Instead you can use the below C# code to get the Tenant ID details:public string GetTenant(string stGetTenantDetailsUrl)
      {
      WebRequest myWebRequest;
      string tenantID = string.Empty;
      string resourceID = string.Empty;
      string accessToken = string.Empty;myWebRequest = WebRequest.Create(stGetTenantDetailsUrl);
      myWebRequest.Method = “GET”;
      myWebRequest.Headers.Add(“Authorization”, “Bearer”);
      WebResponse myWebResponse = null; ;
      try
      {
      myWebResponse = myWebRequest.GetResponse();
      return tenantID;
      }
      catch (System.Net.WebException ex)
      {
      //get the Web exception and read the headersstring[] headerAuthenticateValue = ex.Response.Headers.GetValues(“WWW-Authenticate”);
      if (headerAuthenticateValue != null)
      {foreach (string stHeader in headerAuthenticateValue)
      {
      string[] stArrHeaders = stHeader.Split(‘,’);
      //loop all the key value pair of WWW-Authenticate
      foreach (string stValues in stArrHeaders)
      {if (stValues.StartsWith(“Bearer realm=”))
      {
      tenantID = stValues.Substring(14);
      tenantID = tenantID.Substring(0, tenantID.Length – 1);
      }
      if (stValues.StartsWith(“client_id=”))
      {
      //this value is consider as resourceid which is required for getting the access token
      resourceID = stValues.Substring(11);
      resourceID = resourceID.Substring(0, resourceID.Length – 1);
      }
      }}

      }

      return tenantID;//your tenant ID
      }
      }

    • Next step is to get the Access token..from Postman..

                                         Generate the Access Token

      In response header, we will get WWW-Authenticate as one of the header and that contains the necessary information required for next step. The realm value contains the tenant id for the SharePoint Online site and clientid value contains the resource information (we’ll use it later).

      Key Syntax Value
      Content-Type application/x-www-form-urlencoded application/x-www-form-urlencoded

      Body

      Key Syntax Value
      grant_type client_credentials client_credentials
      client_id ClientID@TenantID 4b4276d0-74cd-4476-b66f-e7e326e2cb93@10267809-adcb-42b6-b103-c7c8190b3fed
      client_secret ClientSecret nuC+ygmhpadH93TqJdte++C37SUchZVK4a5xT9XtVBU=
      resource resource/SiteDomain@TenantID 00000003-0000-0ff1-ce00-000000000000/spsnips.sharepoint.com@10267809-adcb-42b6-b103-c7c8190b3fed
      • After applying the configuration, click Send button. That will returns the response with the Access Token.

      Fig 7: Postman response contains Access Token

      You can use the below C# code to generate access token

      public string GetAuthorisationToken(string stGetAccessTokenUrl, string stSiteDomain, string tenantID, string resourceID, string stClientID, string stClientSecret)
      {

      string accessToken = string.Empty;
      stGetAccessTokenUrl = string.Format(stGetAccessTokenUrl, tenantID);

      WebRequest request = WebRequest.Create(stGetAccessTokenUrl);

      request.ContentType = “application/x-www-form-urlencoded”;
      request.Method = “POST”;

      string postData = “grant_type = client_credentials” +
      “&client_id =” + WebUtility.UrlEncode(stClientID + “@” + tenantID) +
      “&client_secret =” + WebUtility.UrlEncode(stClientSecret) +
      “&resource =” + WebUtility.UrlEncode(resourceID + “/” + stSiteDomain + “@” + tenantID);

      byte[] byteArray = Encoding.UTF8.GetBytes(postData);
      // Set the ContentType property of the WebRequest.
      request.ContentType = “application/x-www-form-urlencoded”;
      // Set the ContentLength property of the WebRequest.
      request.ContentLength = byteArray.Length;
      // Get the request stream.
      Stream dataStream = request.GetRequestStream();
      // Write the data to the request stream.
      dataStream.Write(byteArray, 0, byteArray.Length);
      // Close the Stream object.
      dataStream.Close();

      try
      {
      using (WebResponse response = request.GetResponse())
      {
      dataStream = response.GetResponseStream();
      // Open the stream using a StreamReader for easy access.
      StreamReader reader = new StreamReader(dataStream);
      // Read the content.
      string responseFromServer = reader.ReadToEnd();
      // Clean up the streams.
      reader.Close();
      dataStream.Close();
      //Get accesss token
      accessToken = “access_token\”:\””;
      int clientIndex = responseFromServer.IndexOf(accessToken, StringComparison.Ordinal);
      int accessTokenIndex = clientIndex + accessToken.Length;
      accessToken = responseFromServer.Substring(accessTokenIndex, (responseFromServer.Length – accessTokenIndex – 2));

      return accessToken;

      }
      }
      catch (WebException wex)
      {
      HttpWebResponse httpResponse = wex.Response as HttpWebResponse;
      createlog(_service, “Error occured” + wex.ToString());
      throw new InvalidPluginExecutionException(“Exception occured while retrieving Access Token” + wex.ToString());

      }

      }

      Once we are received the access token, you were all set and we got the authorization to access the SharePoint data based on the permission applied in Grant Permission of Add-In .

      So now we would implement our logic to create folders in plugin…make sure we should be passing the Access token received while accessing share point.

      public void CreateFolder(string sharePointSite, string token, string library, string folder,Guid entityID)
      {
      string result = string.Empty;
      StringBuilder sb = new StringBuilder();
      sb.Append(sharePointSite);
      sb.Append(“_api/web/GetFolderByServerRelativePath(decodedUrl='”);
      sb.Append(library);
      sb.Append(“‘)/Folders”);
      Uri uri = new Uri(sb.ToString().Replace(“{“, “”).Replace(“}”, “”));
      HttpWebRequest wreq = (HttpWebRequest)WebRequest.Create(uri);
      wreq.Headers.Add(“Authorization”, “Bearer ” + token);
      wreq.Method = “POST”;
      wreq.ContentType = “application/json”;
      string postData = “{‘ServerRelativeUrl’:’folder’}”;
      postData = postData.Replace(“folder”, folder);
      byte[] byteArray = Encoding.UTF8.GetBytes(postData);
      wreq.ContentLength = postData.Length;
      Stream dataStream = wreq.GetRequestStream();
      dataStream.Write(byteArray, 0, byteArray.Length);
      dataStream.Close();
      WebResponse wresp = null;
      try
      {
      wresp = wreq.GetResponse();
      using (wresp = wreq.GetResponse())
      {
      dataStream = wresp.GetResponseStream();
      StreamReader reader = new StreamReader(dataStream);
      string responseFromServer = reader.ReadToEnd();
      reader.Close();
      }
      }
      catch (WebException wex)
      {
      HttpWebResponse httpResponse = wex.Response as HttpWebResponse;
      createlog(_service, “Error occured” + wex.ToString());
      throw new InvalidPluginExecutionException(“Exception occured while creating record” + wex.ToString());
      }
      }

  • You can place the Client ID, Client Secret, Sharepoint domain name in Unsecure configuration in Plugin for easier movement of code to other environment.
  • Entire code is available here…you can grab it…
  • Hope this helps some one looking out integrating Dynamics CRM Online with SharePoint online without relying on out of box integration between Dynamics CRM & SharePoint.
  • Hope you enjoyed this post…please post your valuable comments..

Cheers,

PMDY