After a break, I am back with my next blog post, this is a very short one.
Whenever you were working on any implementation, you could have added entity assets to the solution, many people miss adding metadata for the entity, since they don’t have a way to check properly, folks end up removing and readding the entity with metadata toggle on.
But don’t worry, here is a simple way to check this..
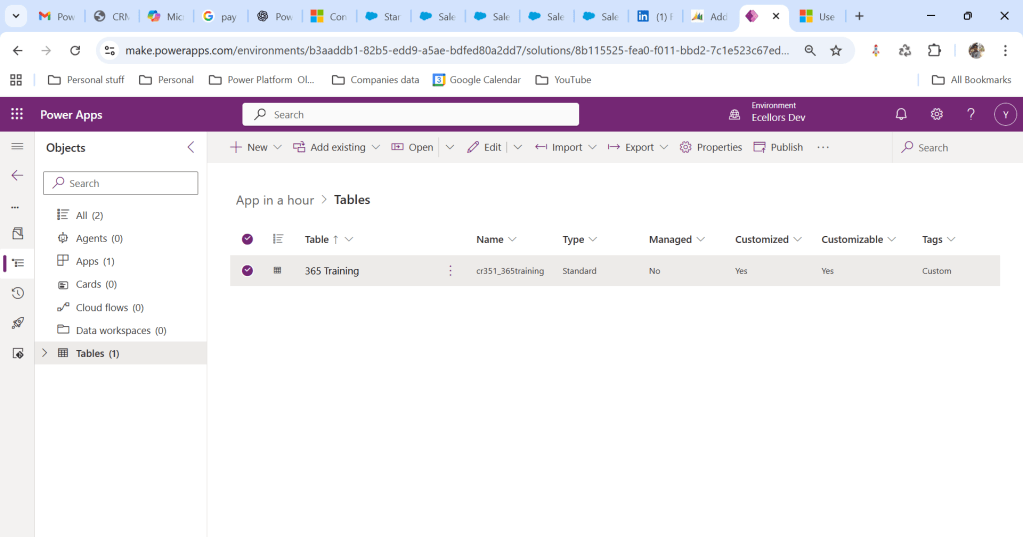
Let’s say you have added a table to the form like below
Now you want to add the metadata for this, click on the table name below
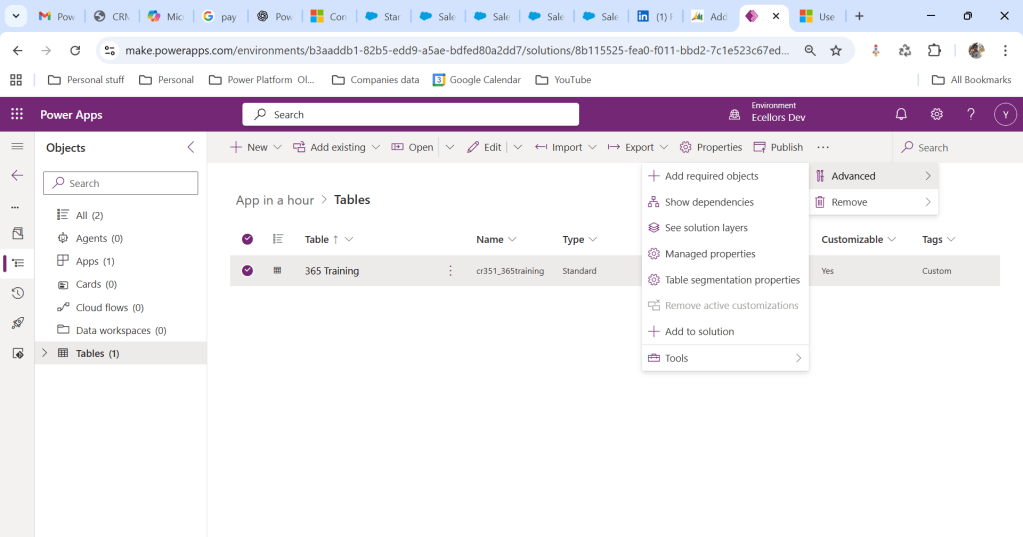
Click on Elipses…
Choose table segmentation as shown above
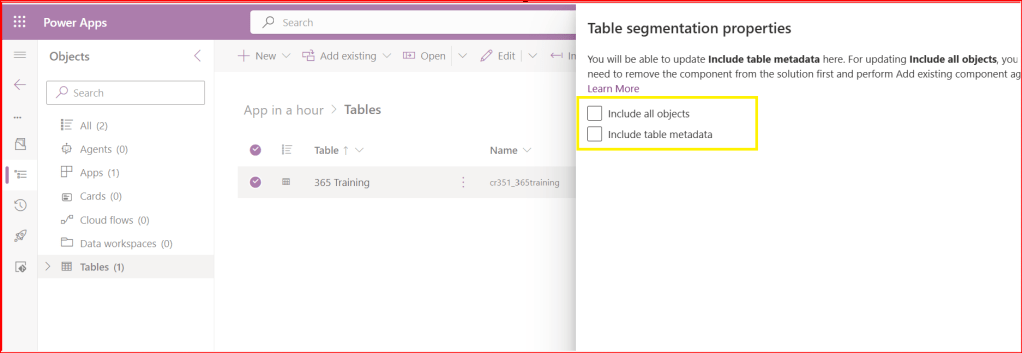
So as highlighted above, you can include all the objects or include table metadata.
Hope this small tip helps…so even if you miss adding metadata, you can safely add it later at any point of time.
In this blog post, I am going to talk about establishing tenant hygiene using COE Stater kit, in today’s world where there increasing Power Platform demand. Organizations have become mature, that every implementation is now looking for having some kind of governance being established.
If you were some one who want to get some knowledge of implementing governance, you were at right place.
In order to efficiently implement governance, we need to understand the environment strategy, your current implementation has used. Of course if you were looking for some guidance, there were examples of tooling available in the CoE Starter Kit and out-of-the-box capabilities to help CoE teams effectively manage and optimize their Power Platform solutions.
Few key steps to be considered for maintaing this in your environment, so let’s get started…
Define Environment Strategy
Assign your admins the Power Platform service admin or Dynamics 365 service admin role.
Restrict the creation of net-new trial and production environments to admins
Rename the default environment to ‘Personal Productivity’
Provision a new Production environment for non-personal apps/flows
Define and implement your DLP policies for your environments
When establishing a DLP strategy, you may need multiple environments for the same department
When establishing your Power Platform environment strategy, based upon your licensing, you may find that you need to provision environments without a Dataverse (previously called Common Data Service) database and also use DLP policies to restrict the use of premium connectors.
Establish a process for requesting access or creation of environments
Dev/Test/Production environments for specific business groups or application
Individual-use environments for Proof of Concepts and training workshops
Use a service account to deploy production solutions
Reduce the number of shared development environments
Share resources with Microsoft Entra Security Groups.
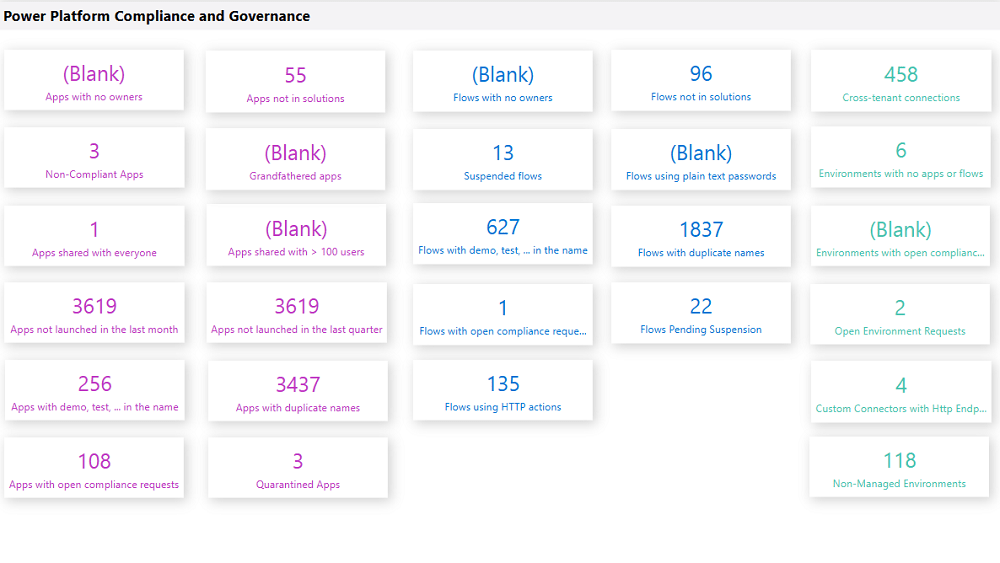
2. Compliance and Adoption:
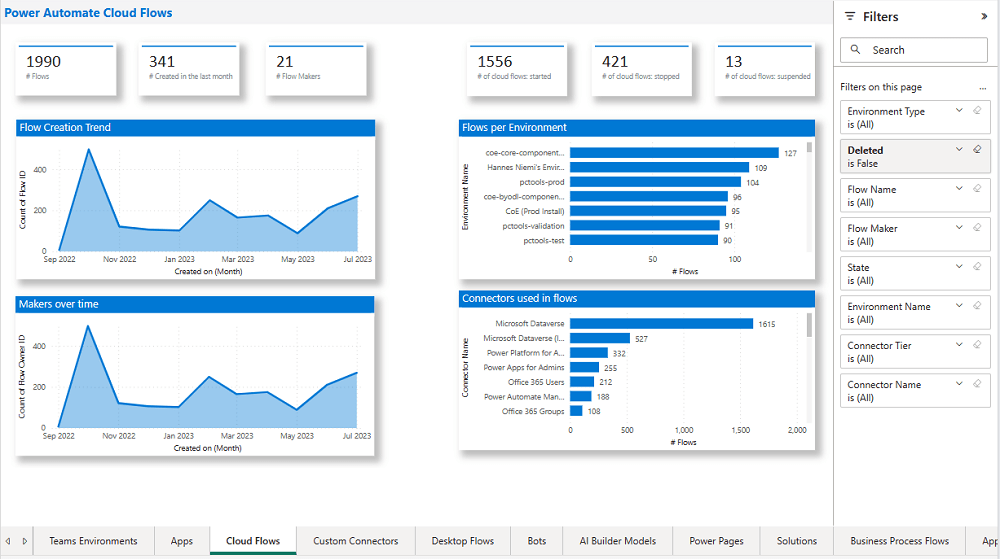
The Compliance page in the CoE Starter Kit’s Compliance and adoption dashboard can help you identify apps and flows with no owners, noncompliant apps, and suspended flows.
Rename and secure the default environment
Identify unused apps, pending suspension, suspended cloud flows and not without an owner or not in solutions
Quarantined noncompliant apps and clean up orphaned resources
Enable Managed Environments and establish a data loss prevention policy
Apply cross tenant isolation
Assign Administrator roles appropriately
Apps and flows with duplicate names not compliant with DLP policies or billing policies
Apps shared with everyone and apps shared with more than 100 users and Apps not launched in the last month and in the last quarter
Flows using plain text passwords and using HTTP actions
Cross-tenant connections
Environments with no apps or flows
Custom connectors using HTTP environments
3. Managing Dataverse for Teams environments
If you were not using Dataverse for Teams, you can safely skip this step, else please review
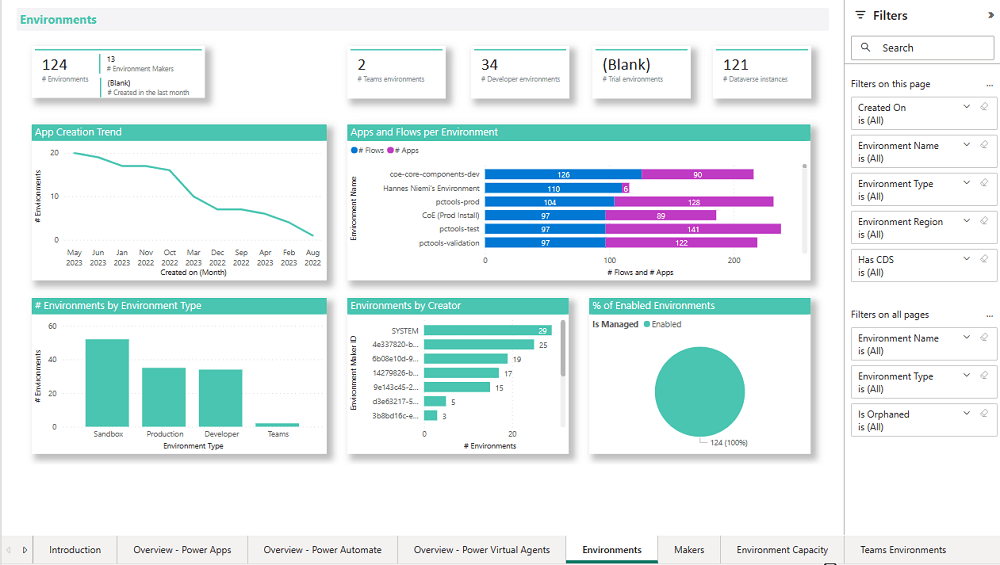
The Microsoft Teams environments page in the CoE Starter Kits dashboard provides you with an overview of your existing Teams environments, apps and flows in those environments, and the last launched date of apps.
By checking for new Dataverse for Teams environments daily, organizations can ensure they’re aware of all environments in use.
State of Dataverse for Teams
Power Platform action
83 days after no user activity
Send a warning that the environment will be disabled. Update the environment state on the Environments list page and the Environment page.
87 days after no user activity
Send a warning that the environment will be disabled. Update the inactive environment state on the Environments list page and the Environment page.
90 days after no user activity
Disable the environment. Send a notice that the environment has been disabled. Update the disabled environment state on the Environments list page and the Environment page.
113 days after no user activity
Send a warning that the environment will be deleted. Update the disabled environment state on the Environments list page and the Environment page.
117 days after no user activity
Send a warning that the environment will be deleted. Update the disabled environment state on the Environments list page and the Environment page.
120 days after no user activity
Delete the environment. Send a notice that the environment has been deleted.
Please note a warning is displayed only if the Dataverse for Teams environment is <= 7 days until disablement.
4. Highly used apps
The Power BI Dashboard available out of the box with COE Starter Kit will provide you the necessary guidance over high performing apps and also your most active users.
5. Communicating governance to your makers
This is one of the important step while setting up COE and governance guidelines, follow the below approaches
Clearly communicate the purpose and benefits of governance policies:Explain how governance policies protect organizational data
Make governance policies and guidelines easily accessible:Place the policies and guidelines in a central location that is easily accessible to all makers
Provide training and support:Offer training sessions and resources to help makers understand and comply with governance policies.
Encourage open communication: Foster culture where makers can ask questions and raise concerns about governance policies.
Incorporate governance into the development process:For example, you can require a compliance review before deploying a solution.
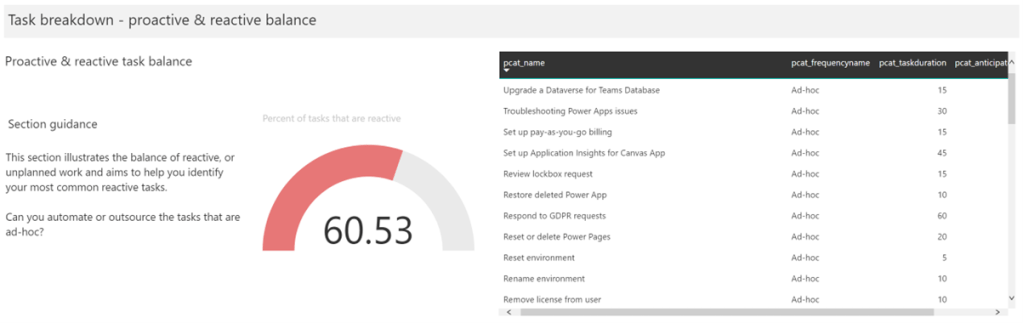
6. Administration of the platform
Power Platform Administrator Planning Tool which comes with COE Strater Kit provides guidance and best practices for administration. Also the planning tool can optimize environments, security, data loss prevention, monitoring and reporting.
6. Securing the environments
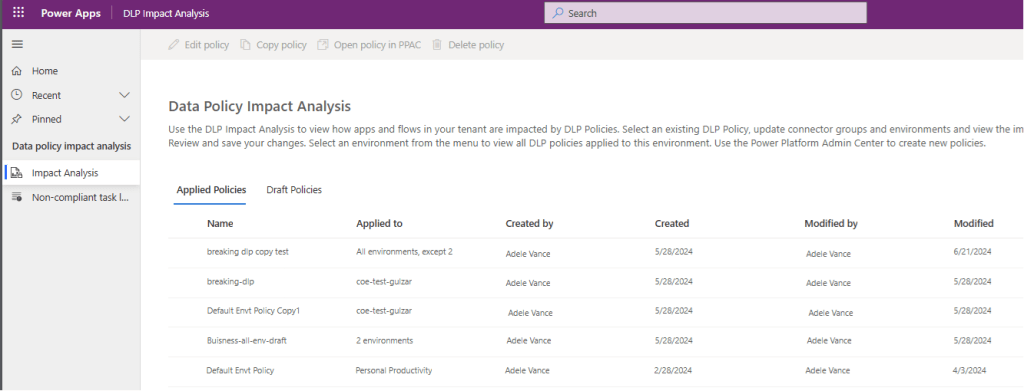
It is critical to establish a Data Loss Prevention (DLP) strategy to control connector availability.
The DLP editor (impact analysis) tool is available for use before making changes to existing policies or creating new DLP policies. It reveals the impact of changes on existing apps and cloud flows and helps you make informed decisions.
This is another post related to Plugins in Dynamics 365 CE.
Considering medium to large scale implementations, there isn’t a single Power Platform Project which don’t require merging of external assemblies.
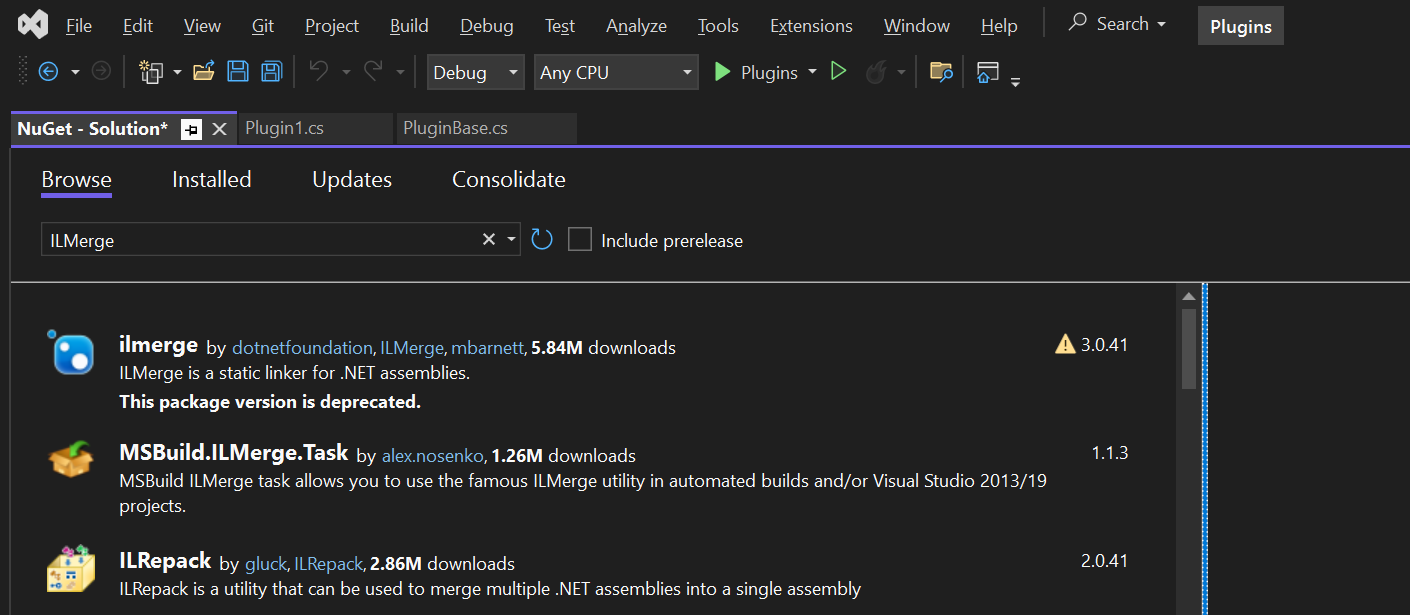
We relied on ILMerge to merge those assemblies into a single DLL. We used to search for ILMerge assemblies in Nuget and installed them for use.
Then the plugins are signed in for several reasons, primarily related to security, assembly integrity, and versioning of the sandbox worker process.
But either of the above are no longer needed with the help of Dependent Assembly feature…with few simple steps, you can build the Plugin…Interesting, isn’t it, read on…
Pre requisites:
Download Visual Studio 2022 Community Edition here
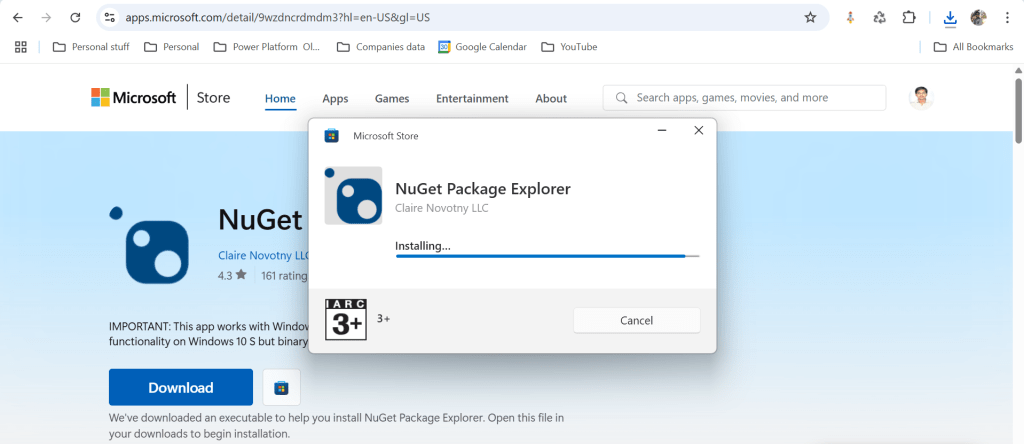
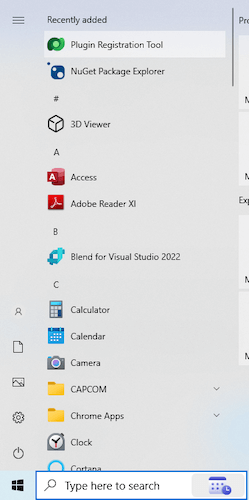
Download and install NuGet Package Explorer from this link NuGet Package Explorer open the NuGet Package Explorer
Avoid Direct Plugin Project Creation in Visual Studio
Never create a Plugin project directly from Visual Studio or any other IDE here after.
Use Microsoft PowerApps CLI instead
Always use Power Apps CLI as it easy and only requires a single command to create the entire Plugin project scaffolding
This ensures a standardized and reliable development environment.
It automatically creates a Nuget Package file that will be used to avoid ‘Could not load assemblies or its dependencies‘.
Ok, let’s begin.
Once you have downloaded all the prerequisites mentioned, make sure you have installed them in your local machine. Others are straight forward to download, for NuGet Package explorer, you need to search in Windows store to install.
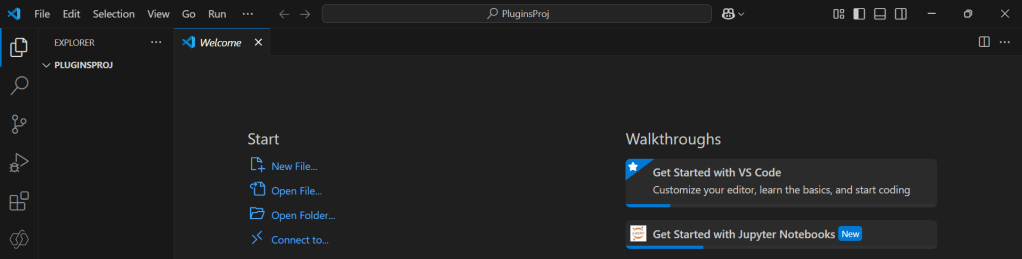
Create a local folder for the Plugins
Navigate to that folder from VS Code
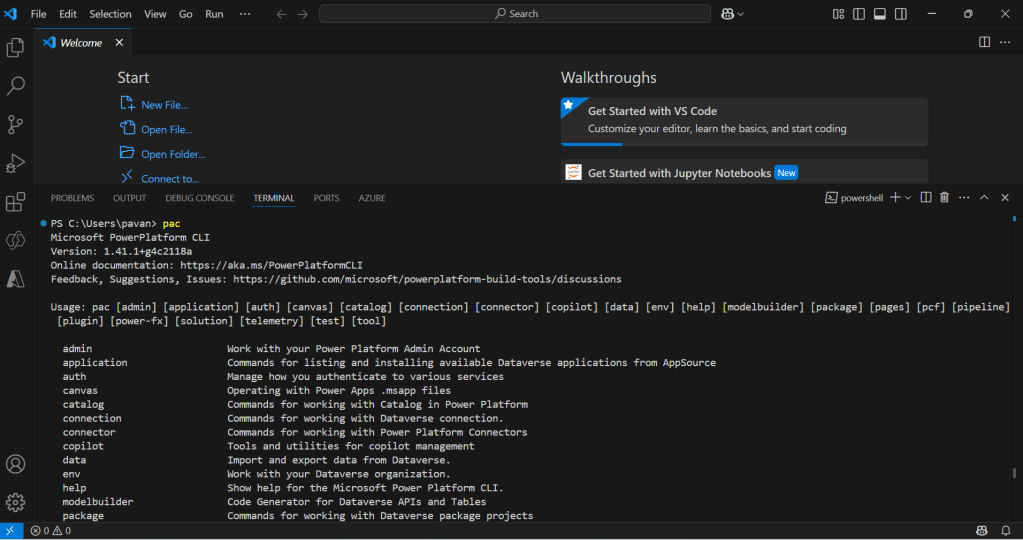
Now open terminal, run the pac command as below
Execute the following command to create plugin project
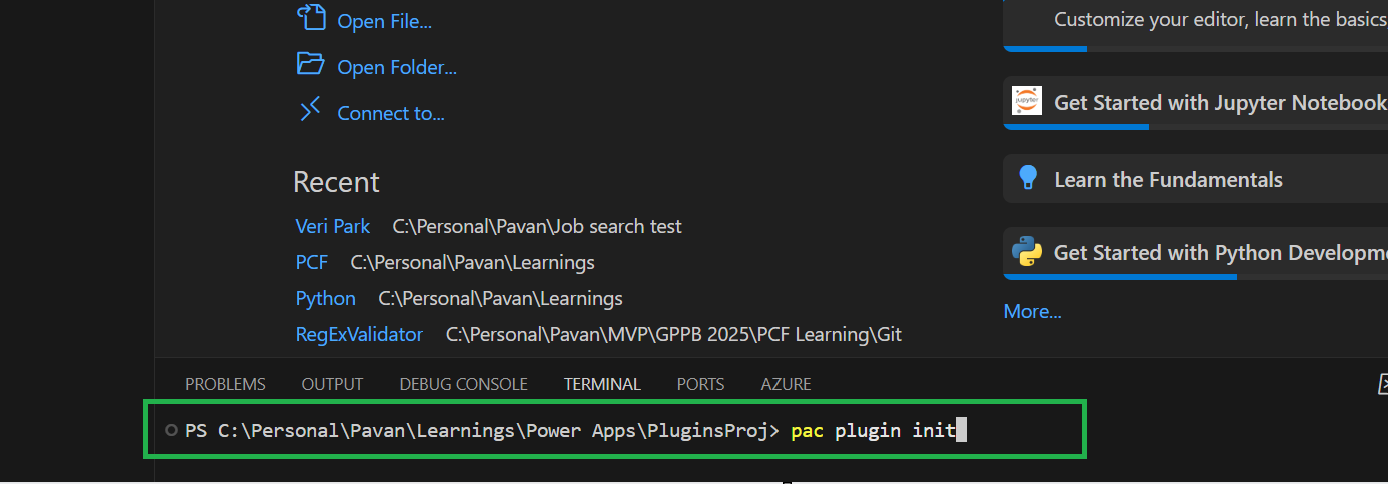
Browse to the directory where you want to create the plugin project
Execute the command on CMD to create plugin project “pac plugin init“
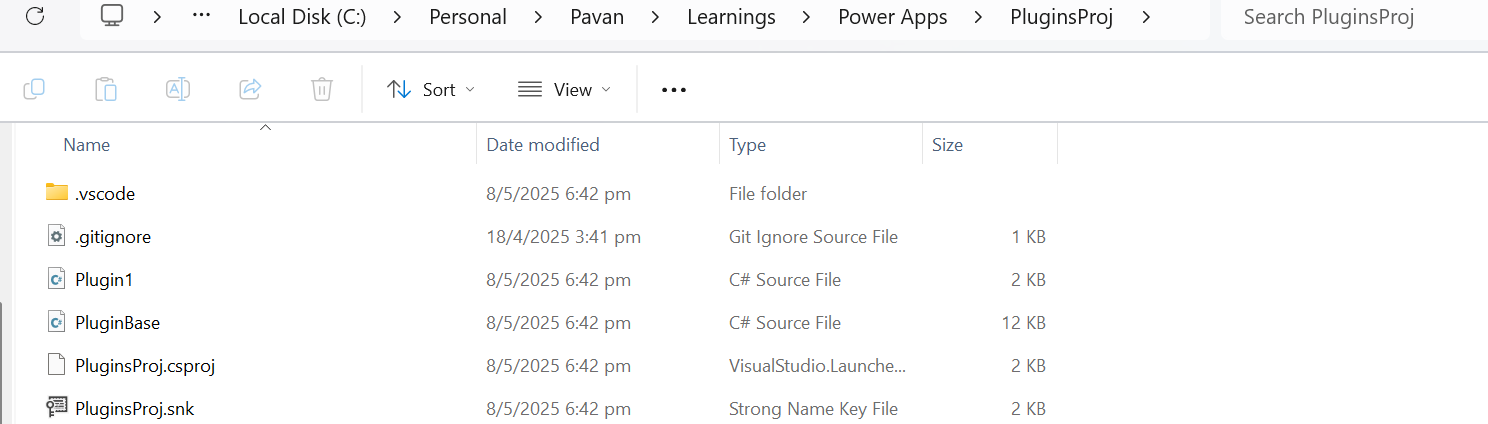
A plugin project will be created at your desired location as follows
Plugin project in local folder will be created as below
That’s it, you can close the VS Code for now.
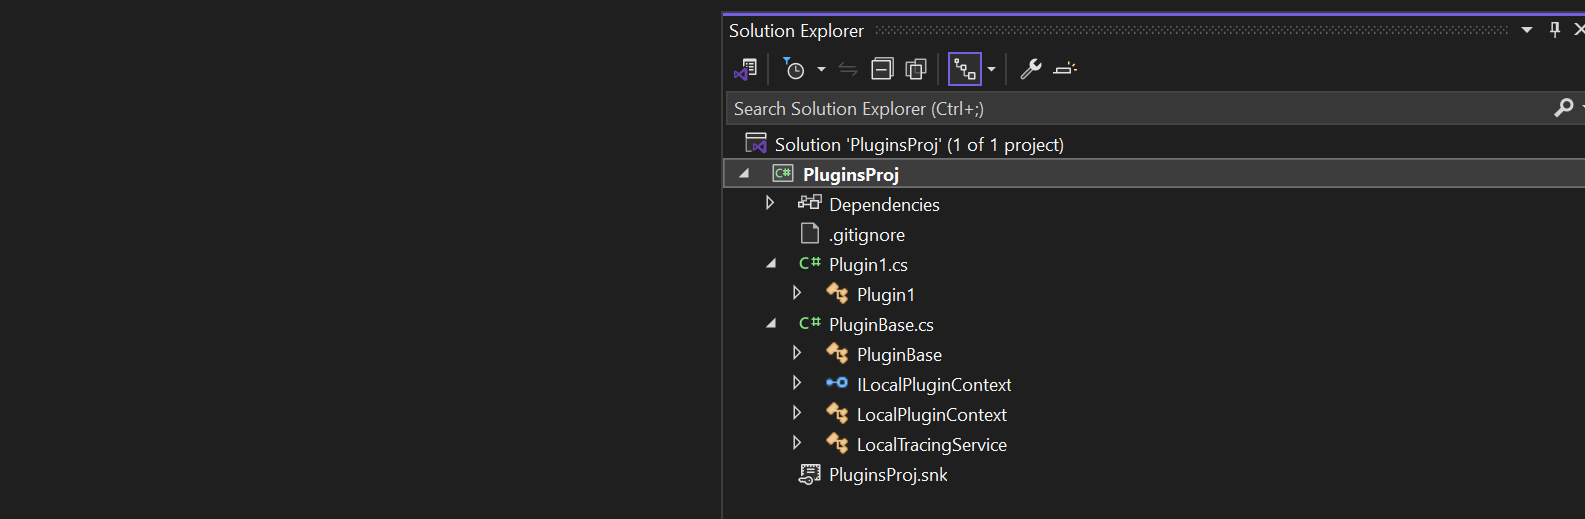
Click on the CS Proj file and open it in Visual Studio
By default, 2 files are automatically created when you create a plugin project as shown above.
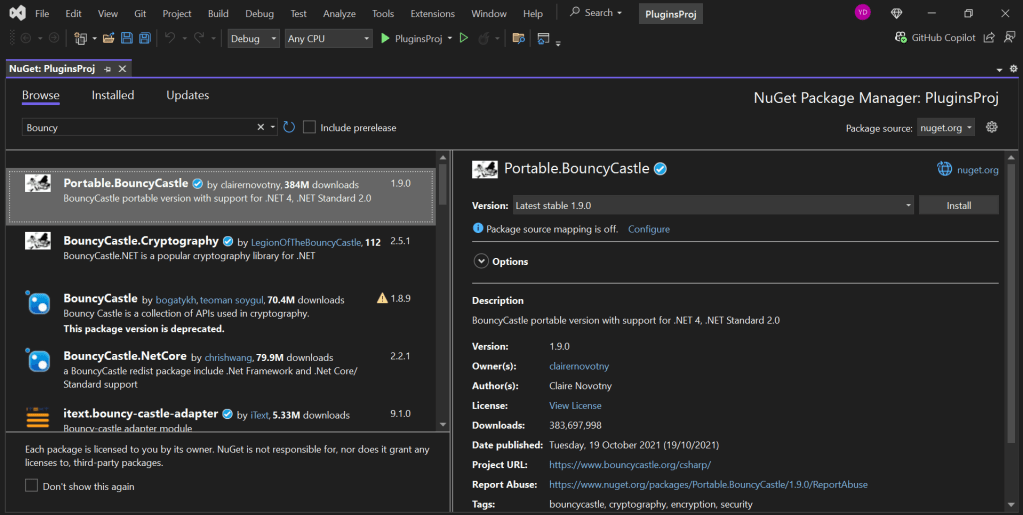
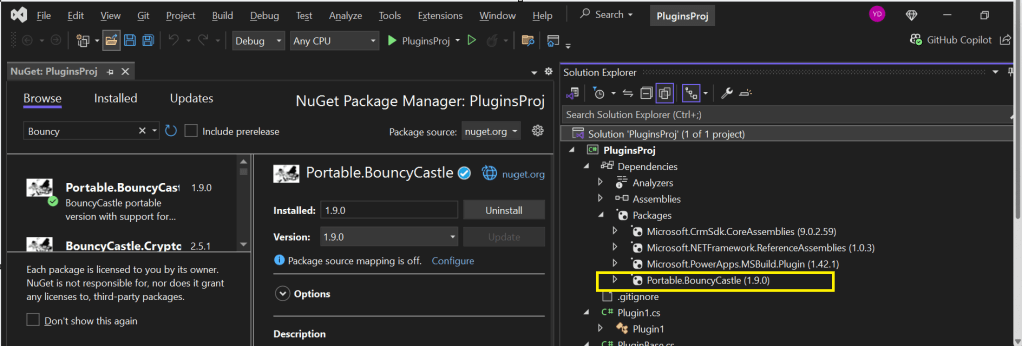
Now will install Bouncy Castle which is an external library, right click on the Plugin Solution –> Manage Nuge Packages
I have added Bouncy Castle NuGet Package to my plugin project for Encryption and Decryption. You can have your own required NuGet Package as per your need.
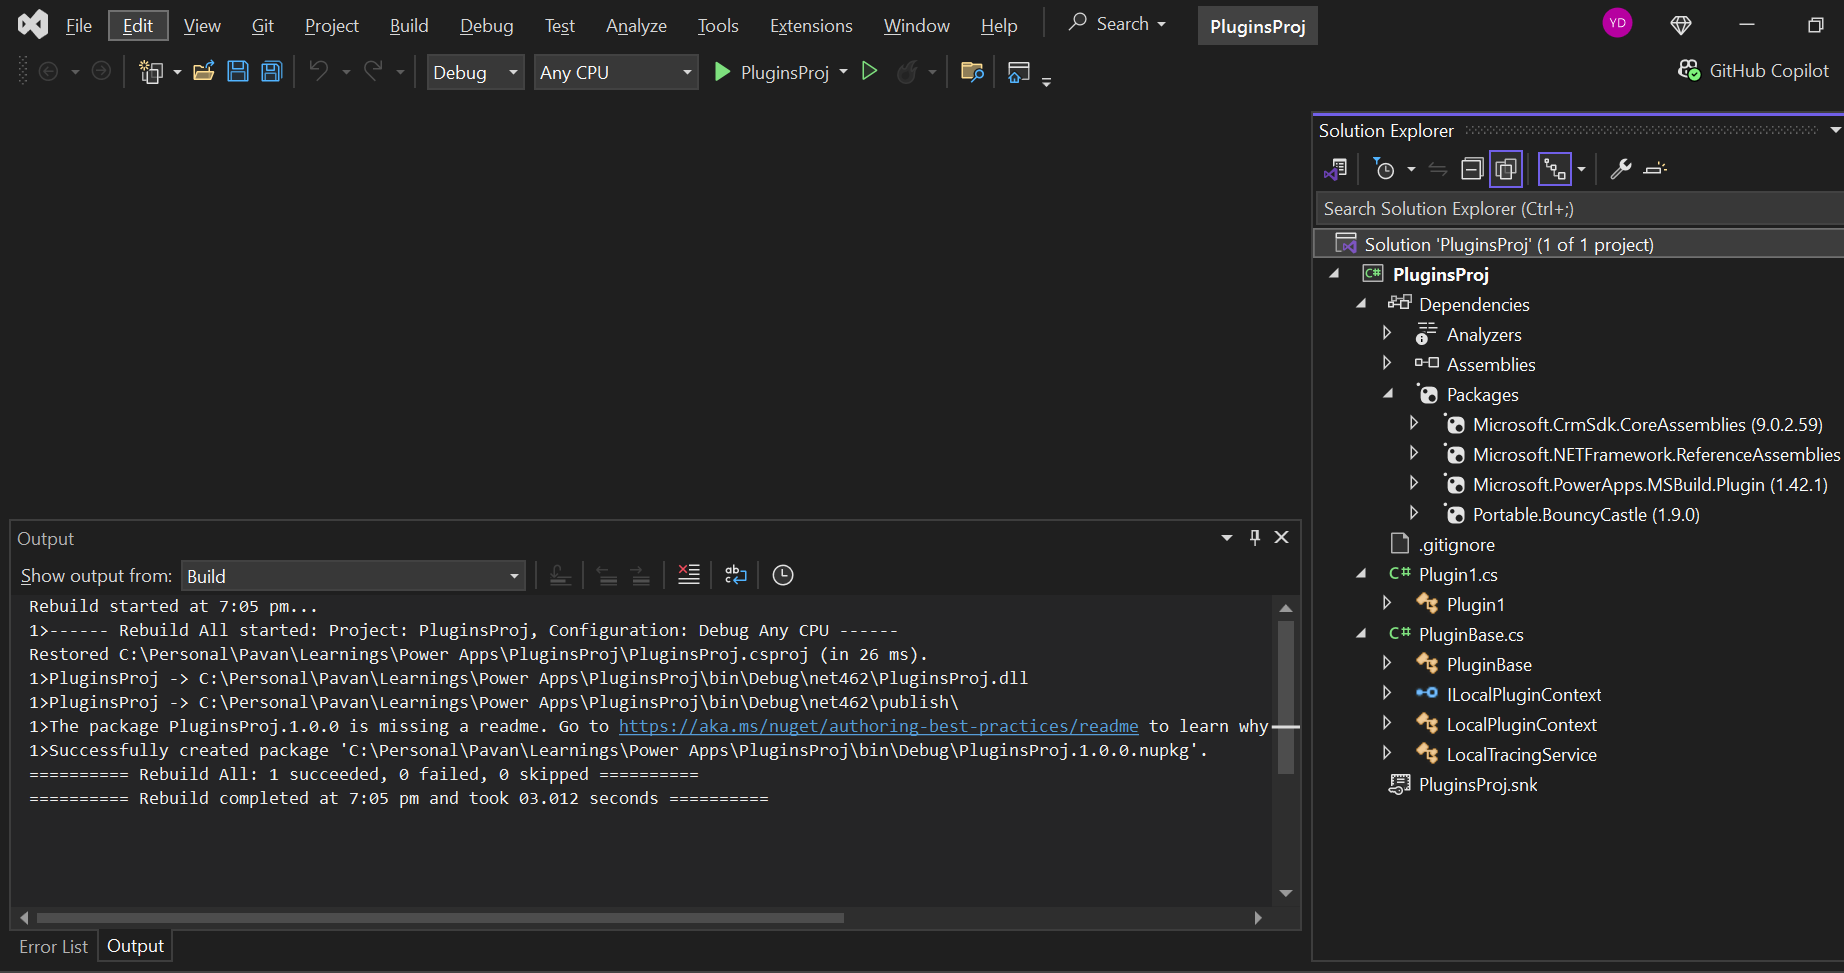
Build your project
After a successful build, you will get the output result as follows
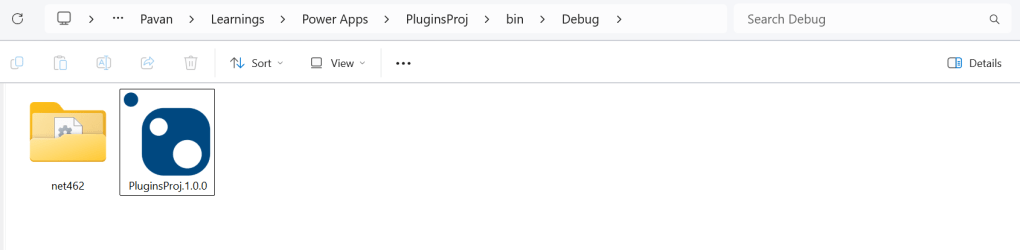
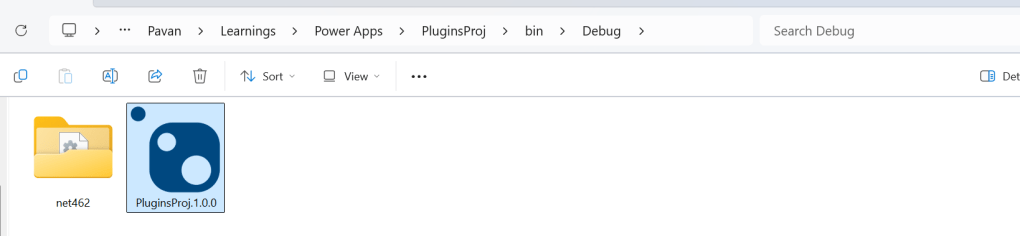
Browse the directory of your project
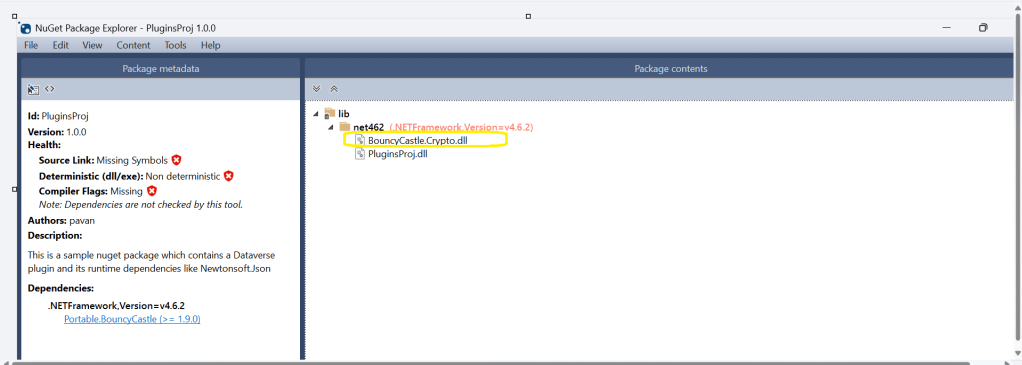
Open the file Plugin_Project.1.0.0.nupkg in Nuget Package Explorer by double clicking it
Now you can see that this nuget package file contains the information related to the added nuget package of Bouncy Castle that we want to include in our plugin project package as follows. In your case, you can have the required nuget package that you want to add
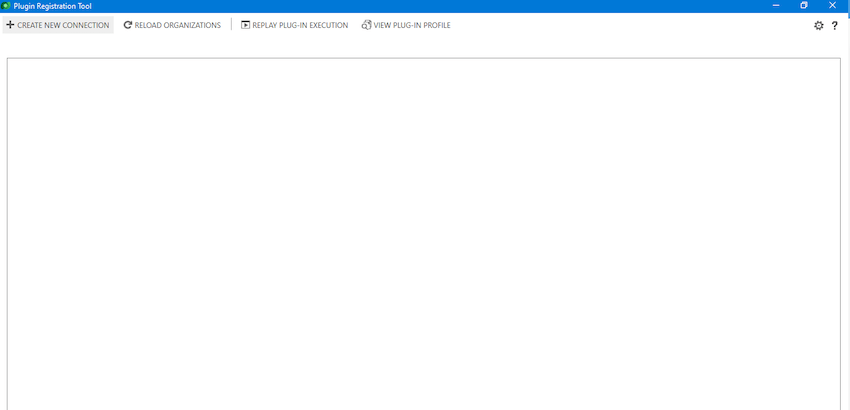
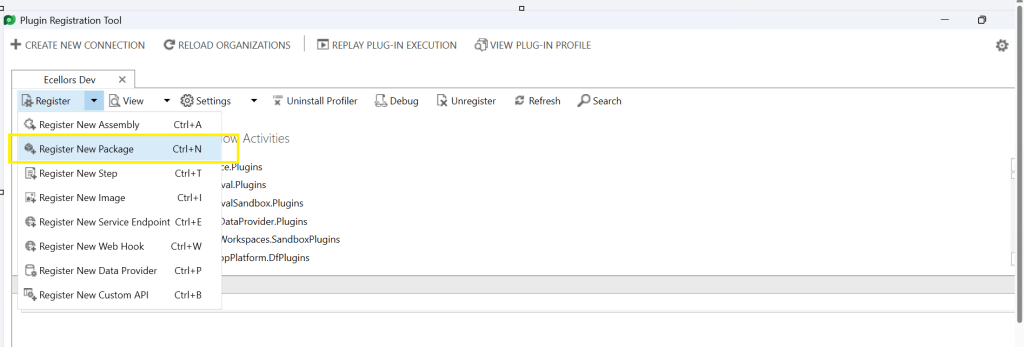
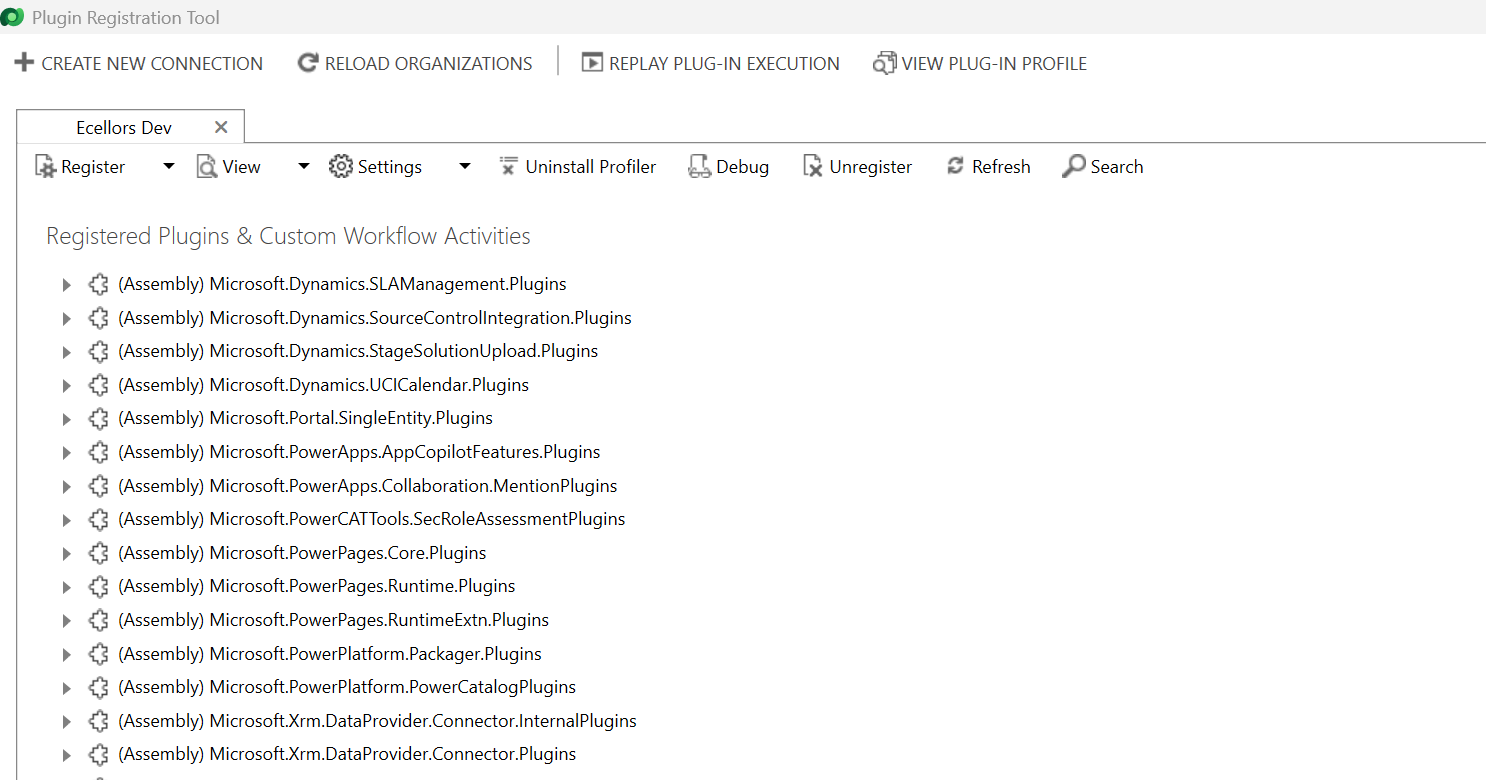
Now open up plugin registration tool
Click to create new connection
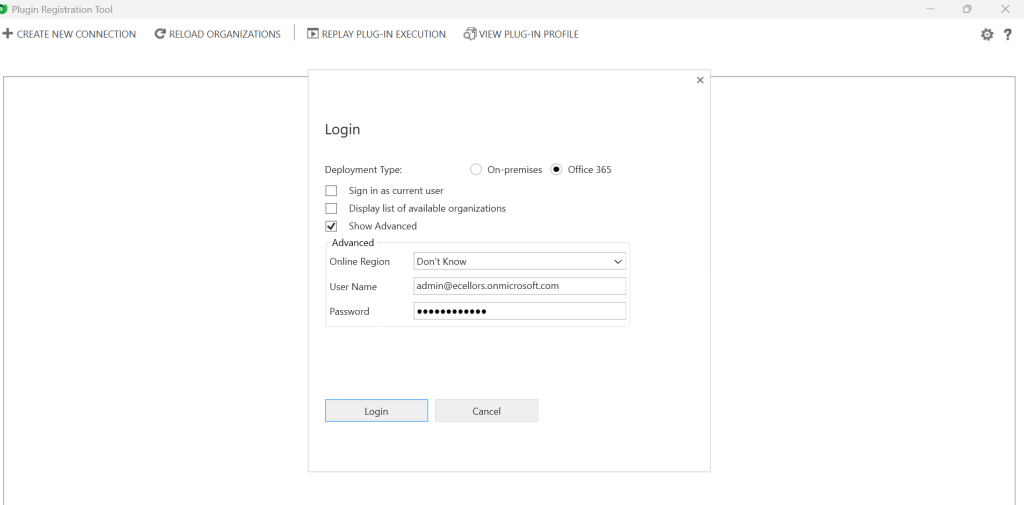
Provide login details and login
Click to Register New Package
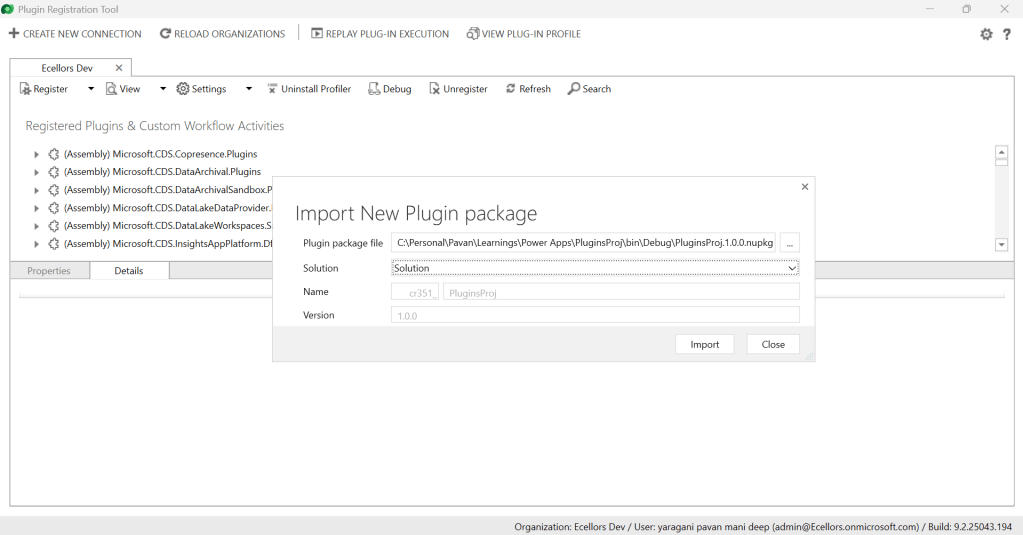
Browse to the directory where your nuget package file was created automatically when you build the project and import this file
Select the Command Data Service Default Solution and import it
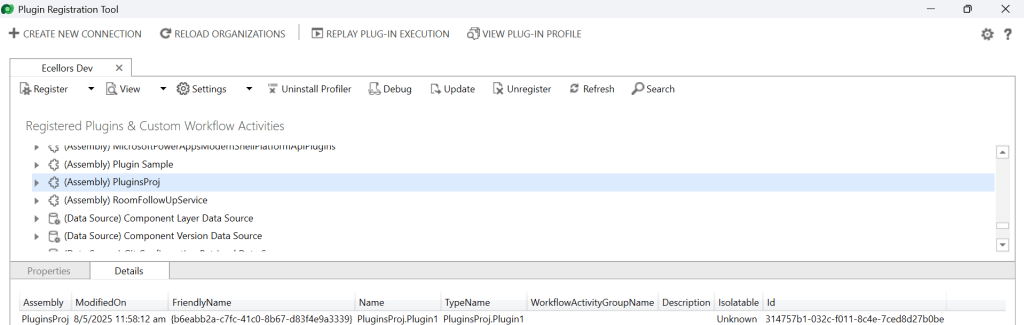
Click on view and Display by package
Now your Plugin Project is successfully registered with all dependent assemblies and ready to use.
While this post gives you a structure on how you can do build a plugin assembly, you can add the business logic as per your need.
Conclusion:
In conclusion, navigating the intricacies of Microsoft Dynamics 365 CRM plugins demands a nuanced approach, especially when dealing with NuGet Packages and dependent assemblies. This article has delved into the critical process of resolving the persistent ‘Could not load assemblies or its dependencies‘ issue, offering a comprehensive, step-by-step demonstration.
By following the recommended best practices, such as avoiding direct plugin project creation in Visual Studio and harnessing the power of Microsoft PowerApps CLI, developers can establish a standardized and reliable development environment. The CLI’s automatic creation of a NuGet Package file not only streamlines the process but also reduces the errors.
To further facilitate your journey, prerequisites such as downloading and installing essential tools like the Plugin Registration tool, Microsoft PowerApps CLI, and NuGet Package Explorer are highlighted. The guide emphasizes the significance of these tools in ensuring a smooth plugin development experience.
By adopting these practices and incorporating the suggested steps into your workflow, you not only troubleshoot existing issues but also fortify your understanding of the entire process. Take charge of your Dynamics 365 CRM plugin development, elevate your skills, and sidestep common pitfalls by mastering the art of handling NuGet Packages and dependencies seamlessly.
It’s been a since I posted on Dynamics 365 Plugins, so this blog post talks about one small tip when connecting to your Dynamics 365 instance from Plugin Registration Tool either if you were connecting from Standalone Plugin Registration Tool or using Plugin Registration Tool from XrmToolBox.
If you were looking to install plugin registration tool itself, you can check the below post or if you want to learn about all Plugin related issues at once, you can check the references at the bottom of this post, else you can continue reading this post.
If you don’t know this tip, it will be difficult and least you will spend many minutes figuring out the error message you see in the Plugin registration tool.
This is applicable for applications who have MFA enabled, even if you haven’t enabled, it was enabled by Microsoft by default to enforce security.
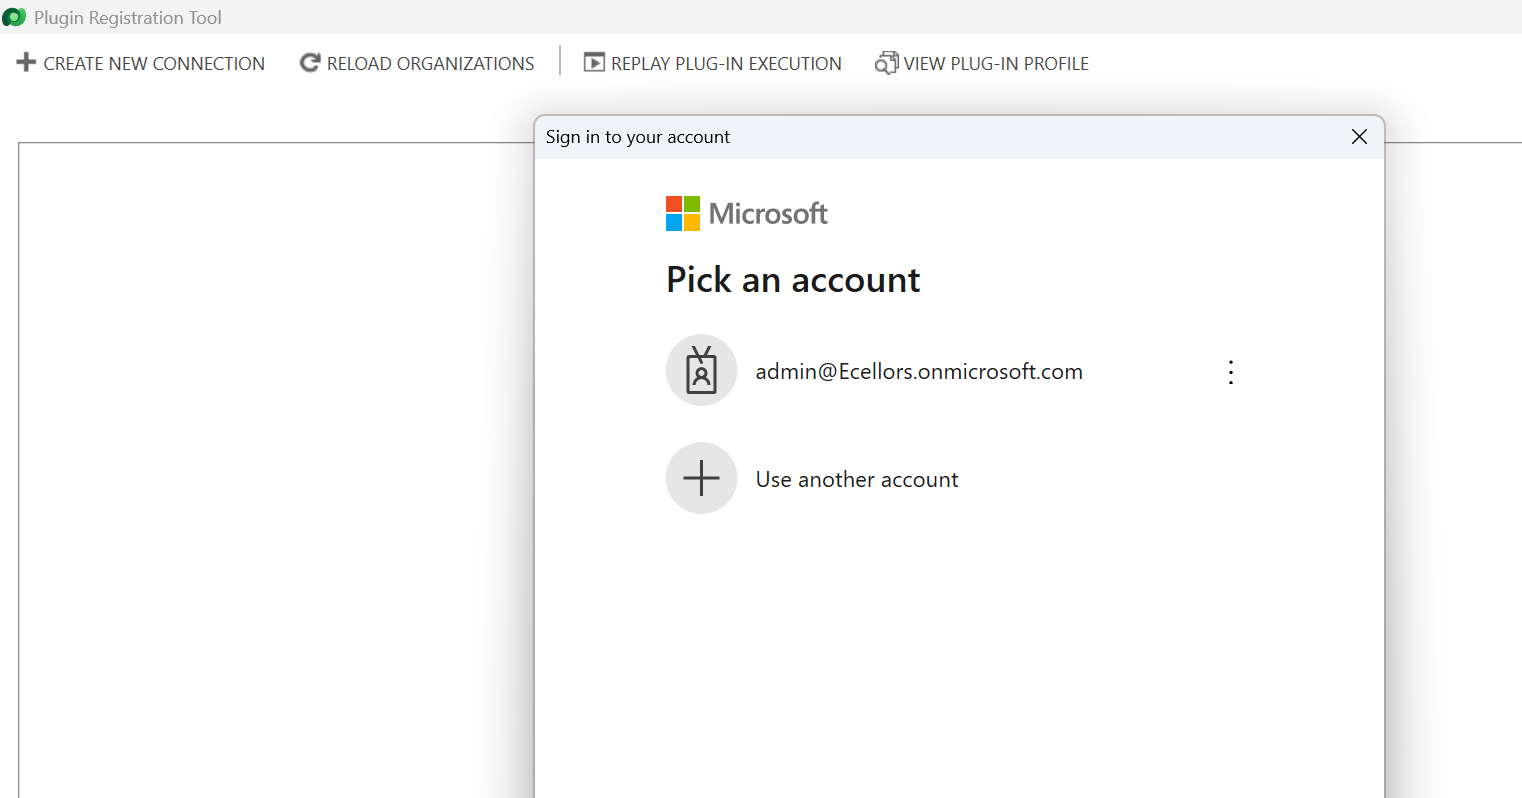
As usually, you select:
Office 365
Enable Display list of available organizations, Show Advanced
Provide User Name, Password
Click on Login
You will be prompted this error in such case
This file contains hidden or bidirectional Unicode text that may be interpreted or compiled differently than what appears below. To review, open the file in an editor that reveals hidden Unicode characters.
Learn more about bidirectional Unicode characters
Error : AADSTS50076: Due to a configuration change made by your administrator, or because you moved to a new location, you must use multi-factor authentication to access '00000007-0000-0000-c000-000000000000'. Trace ID: 7a7cac23-056c-4e77-ba82-98d50c0b7001 Correlation ID: d8b32fe6-6197-4d9a-a460-3834c8dc292a Timestamp: 2025-04-12 09:09:52Z
at Microsoft.Xrm.Tooling.CrmConnectControl.CrmConnectionManager.QueryOAuthDiscoveryServer(Uri discoServer, ClientCredentials liveCreds, UserIdentifier user, String clientId, Uri redirectUri, PromptBehavior promptBehavior, String tokenCachePath, Boolean useGlobalDisco)
at Microsoft.Xrm.Tooling.CrmConnectControl.CrmConnectionManager.QueryOnlineServerList(ObservableCollection`1 svrs, OrganizationDetailCollection col, ClientCredentials liveCreds, Uri trimToDiscoveryUri, Uri globalDiscoUriToUse)
at Microsoft.Xrm.Tooling.CrmConnectControl.CrmConnectionManager.FindCrmOnlineDiscoveryServer(ClientCredentials liveCreds)
at Microsoft.Xrm.Tooling.CrmConnectControl.CrmConnectionManager.ValidateServerConnection(CrmOrgByServer selectedOrg)
Error : {"error":"interaction_required","error_description":"AADSTS50076: Due to a configuration change made by your administrator, or because you moved to a new location, you must use multi-factor authentication to access '00000007-0000-0000-c000-000000000000'. Trace ID: 7a7cac23-056c-4e77-ba82-98d50c0b7001 Correlation ID: d8b32fe6-6197-4d9a-a460-3834c8dc292a Timestamp: 2025-04-12 09:09:52Z","error_codes":[50076],"timestamp":"2025-04-12 09:09:52Z","trace_id":"7a7cac23-056c-4e77-ba82-98d50c0b7001","correlation_id":"d8b32fe6-6197-4d9a-a460-3834c8dc292a","error_uri":"https://login.microsoftonline.com/error?code=50076","suberror":"basic_action"}: Unknown error
======================================================================================================================
Inner Exception Level 2	:
Source	: Not Provided
Method	: Not Provided
Date	: 12/4/2025
Time	: 5:09:52 pm
Error	: {"error":"interaction_required","error_description":"AADSTS50076: Due to a configuration change made by your administrator, or because you moved to a new location, you must use multi-factor authentication to access '00000007-0000-0000-c000-000000000000'. Trace ID: 7a7cac23-056c-4e77-ba82-98d50c0b7001 Correlation ID: d8b32fe6-6197-4d9a-a460-3834c8dc292a Timestamp: 2025-04-12 09:09:52Z","error_codes":[50076],"timestamp":"2025-04-12 09:09:52Z","trace_id":"7a7cac23-056c-4e77-ba82-98d50c0b7001","correlation_id":"d8b32fe6-6197-4d9a-a460-3834c8dc292a","error_uri":"https://login.microsoftonline.com/error?code=50076","suberror":"basic_action"}: Unknown error
Stack Trace	: Not Provided
======================================================================================================================
Based on the above inner exception, we can clearly understand that it is looking for Multifactor Authentication, so untick the Show Advanced checkbox, it then asks for Multifactor Authentication as shown below.
That’s it, with this simple tick of unchecking the Show Advanced, you were able to overcome this error, how cool is it…?
I have written lot of articles with respect to Plugin registration tool, you can check them below
This post is about Dataverse and Git Integration which is the most sought after feature in the todays automation Era. This is a preview feature, you would need to create a new environment with Early Access enabled to test this feature or you can use an existing US Preview environment for testing this out.
While every MDA(Model Driven Application) and it’s components can be safely and moved across the environments using Solutions with the help of Azure DevOps Pipelines. However when coming to integrating Power Platform Solutions to Azure DevOps, we had to manually export the solution and download them each and every time when we would like to commit the Solution Artifacts to Azure DevOps Repo.
With this new Preview feature we can directly integrate the Power Platform Solutions to Azure DevOps.
Let’s see this action…wait a moment, there were some prerequisites to be considered…
Environment should be a Managed Environment to start using this and you need to be an Admin for the environment
Azure DevOps subscription and license should be available to set this up, also permission to read source files and commits(should be a member of contributor group in Azure DevOps) from a Repo
Your email address used for Azure DevOps and Power Platform Solutions should be the same
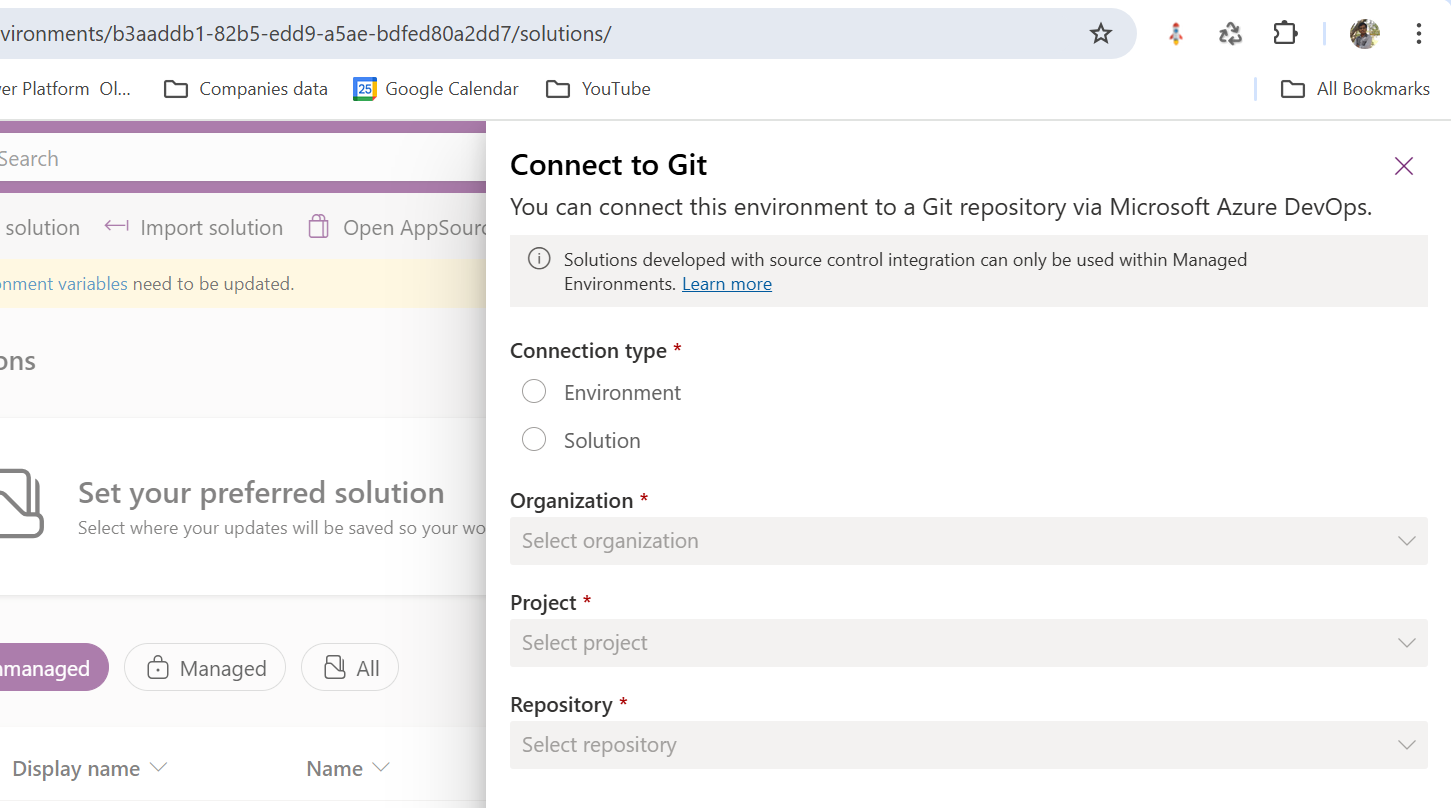
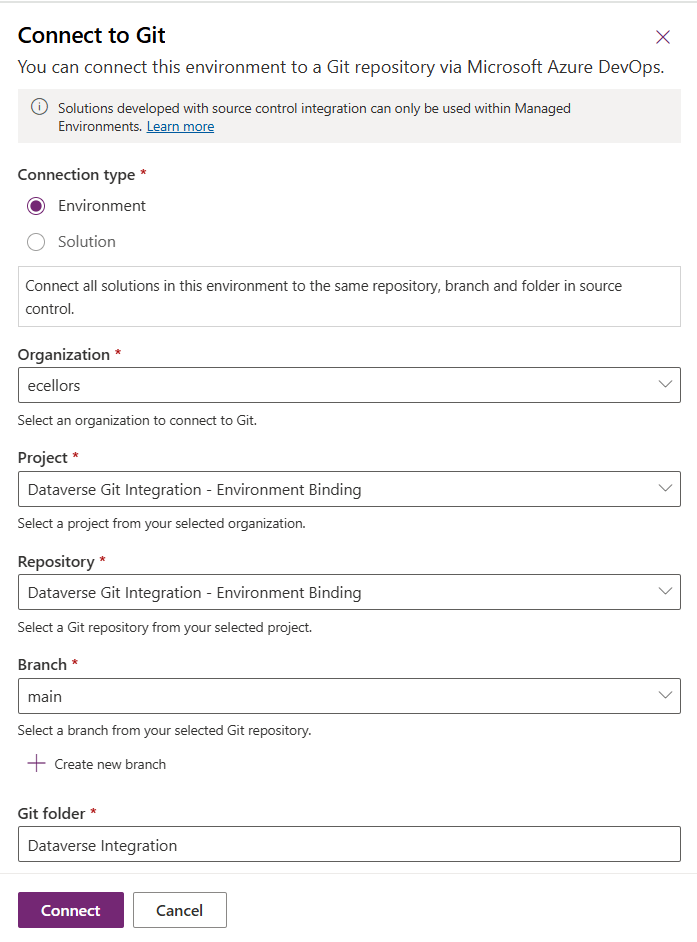
Setup:
Connecting Dataverse with Azure DevOps is easy but requires a bit of understanding of the Binding options available.
Well, there were two types of Binding options
Environment Binding – Single root folder binds to all the unmanaged solutions in the environment
Solution Binding – Different solutions uses a different root folder in Azure DevOps for binding
Note: Once the binding is setup, there isn’t away to change, so set this up carefully, else you may need to delete the folder and create a new one in Azure DevOps.
Let’s see one by one…for demoing purpose, I have created two projects in Azure DevOps Instance
Solution Binding: When we use this, all the components will be available as pending changes
Environment Binding: When we use this, all the unmanaged solution components will be mapped to one Azure DevOps root folder. Let’s set this up.
We are currently able to use only Solution binding, as Environment Binding doesn’t show up any changes to be committed, but there is a catch here.
We can set up for Environment binding and verify if the Solution components are getting marked as pending changes or not. Do note that Setting up the Binding is a one time activity for environment, once setup, it can’t be changed from one type to another.
Since we were currently using Environment binding, let’s select the Connection Type as Environment
Then click on Connect, once connected, you should a alert message in power apps maker portal at the top.
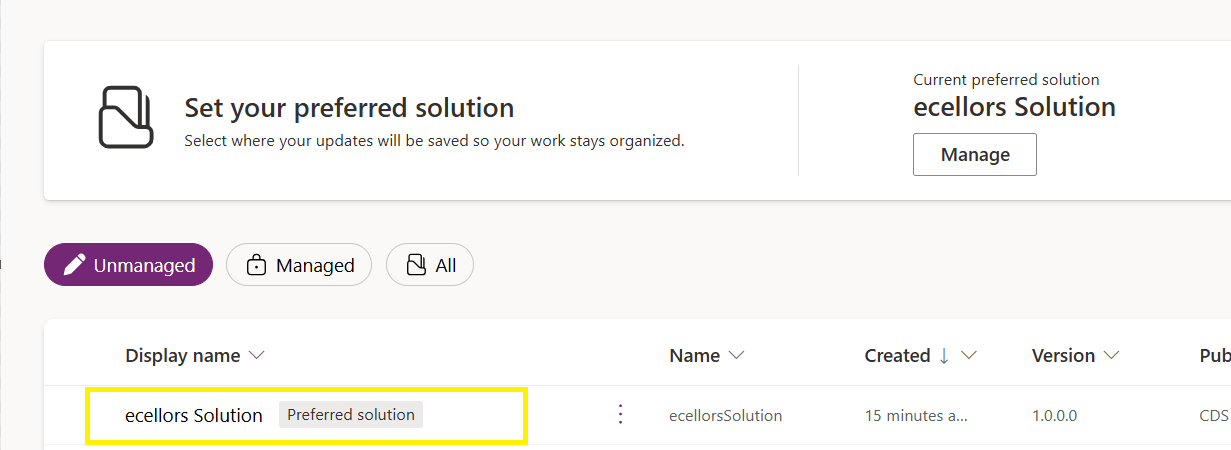
Now create a new solution as below named ecellors Solution
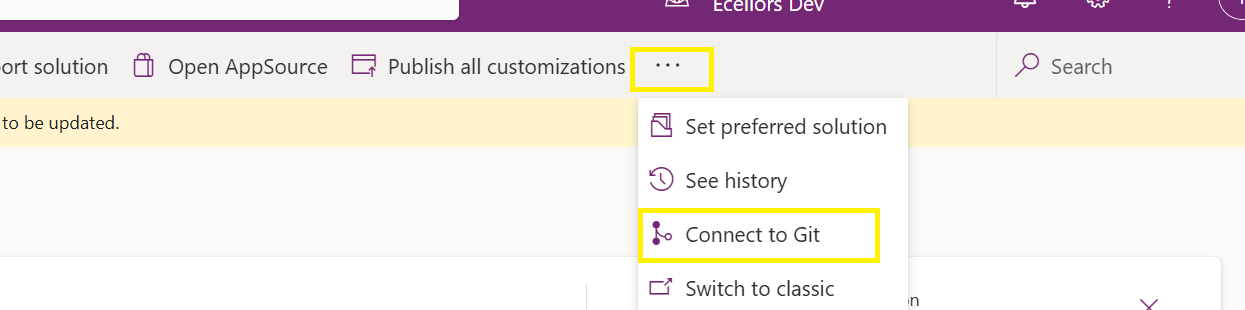
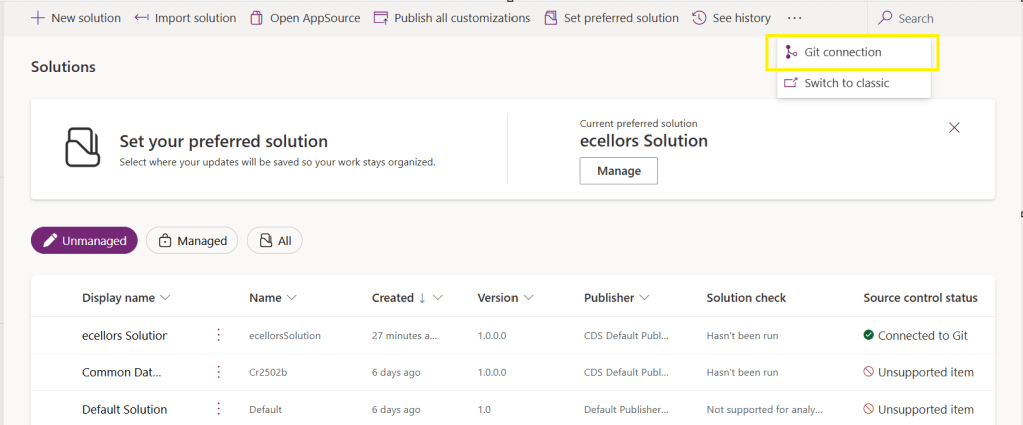
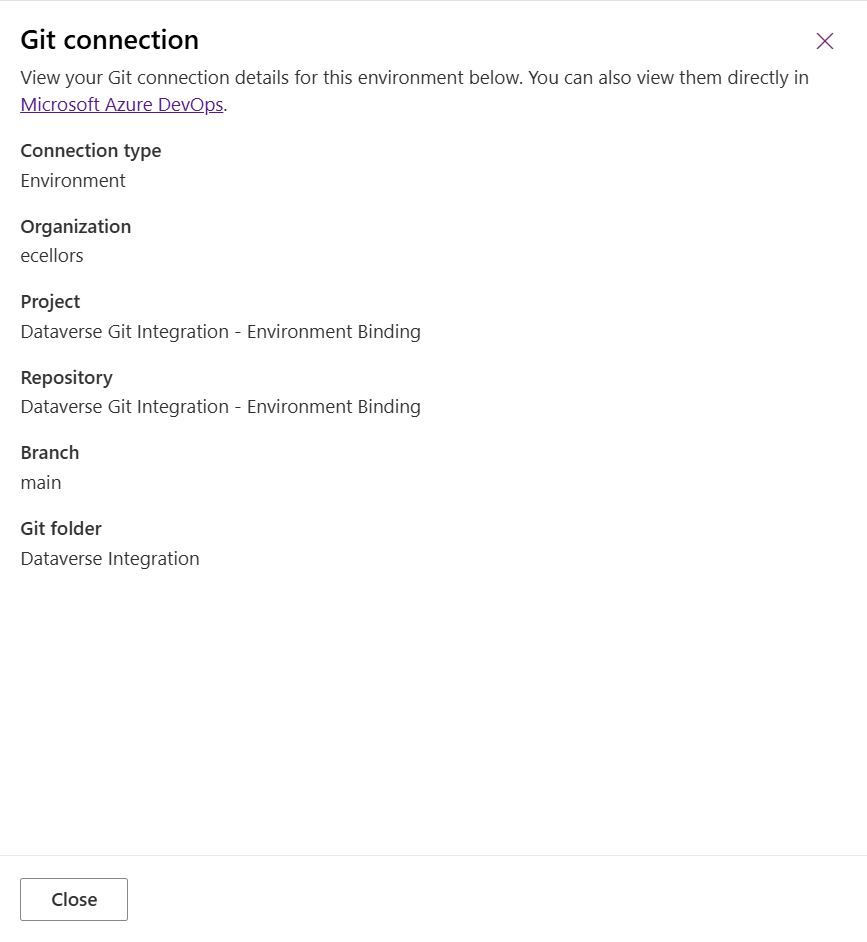
Verify the integration by clicking on Git Integration as below
It should show as below
Now let’s add few components to the solution we created
Once added, let’s publish the unmanaged solution and verify it..
Do look closely, you should see a Source Control icon highlighted in yellow color for illustration.
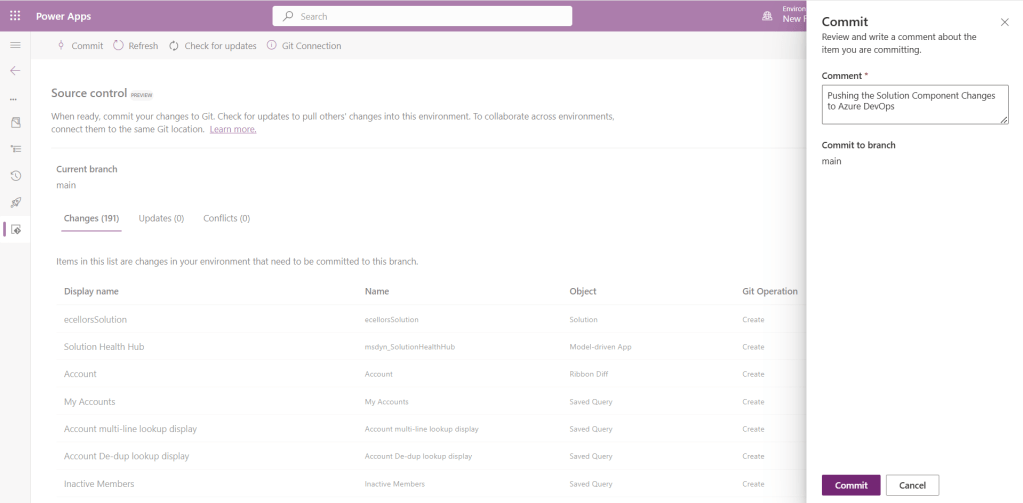
Also, you should see a commit option available at the top
You should now be able to commit the solution components as if you are committing the code changes.
It also specifies the branch to which we were commiting…
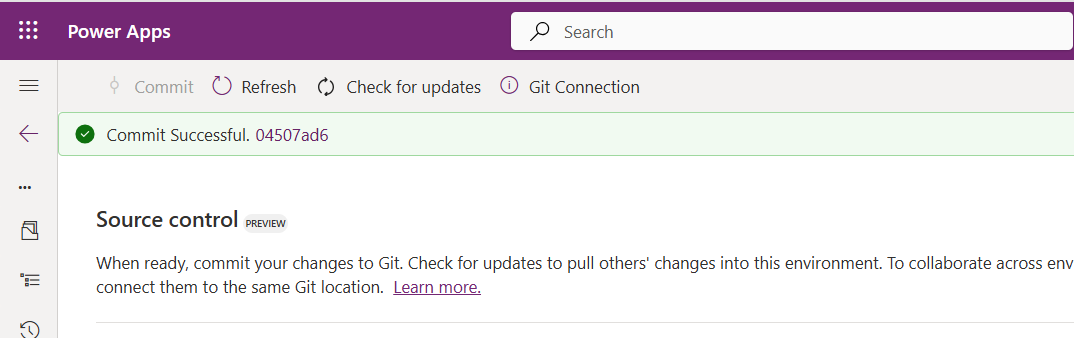
While it takes few minutes unlike pushing the code to Azure DevOps to push the changes, however this would depend based on the number of solution components you were pushing..once it is done, it will show a commit message like below…
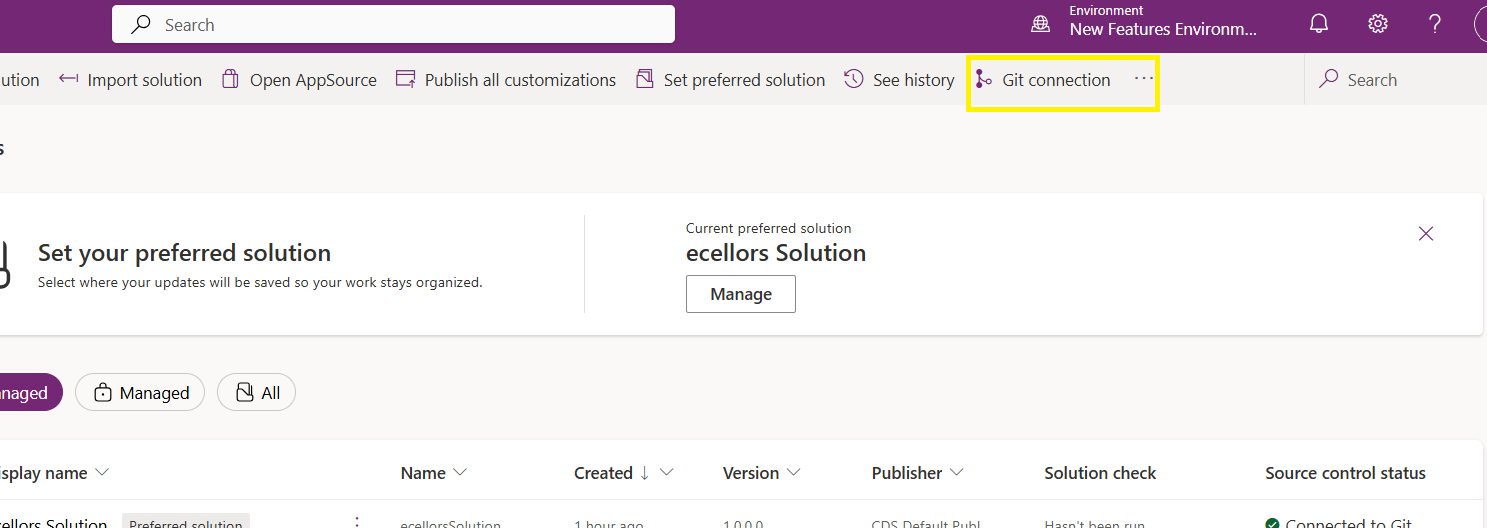
Now let’s verify our Azure DevOps Repo..for this you can go back to the main solutions page, click on Git Connection at the top..
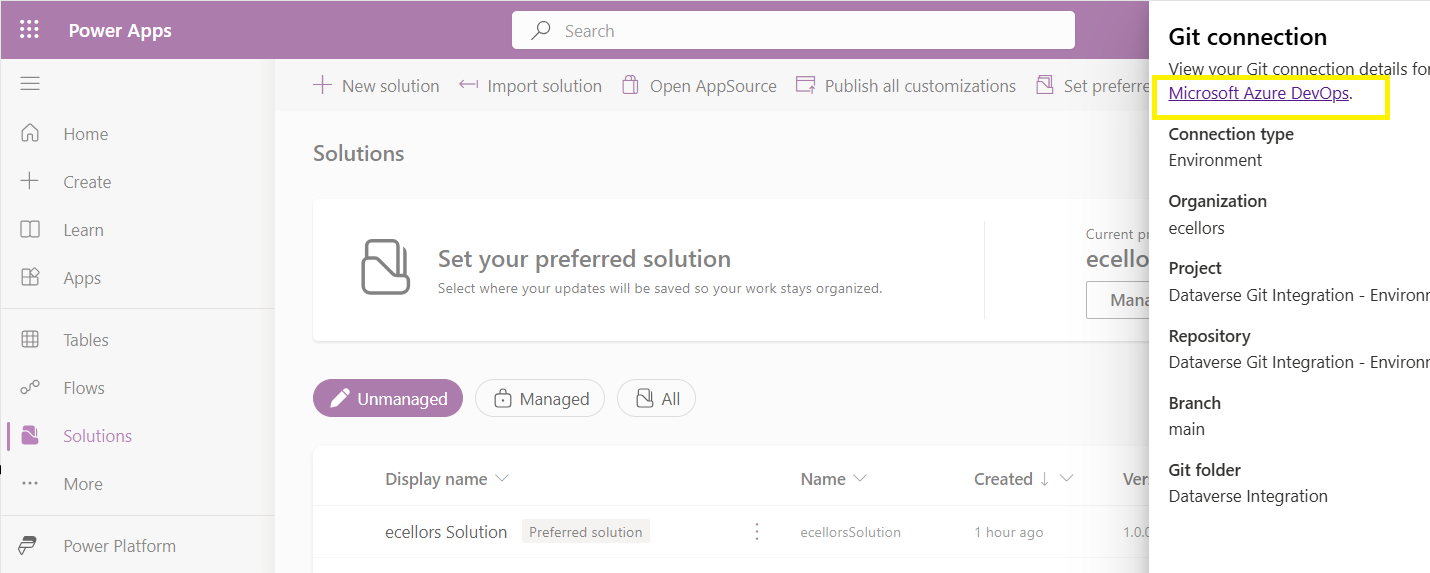
After clicking on Git Connection, click on the link to Microsoft Azure DevOps as below
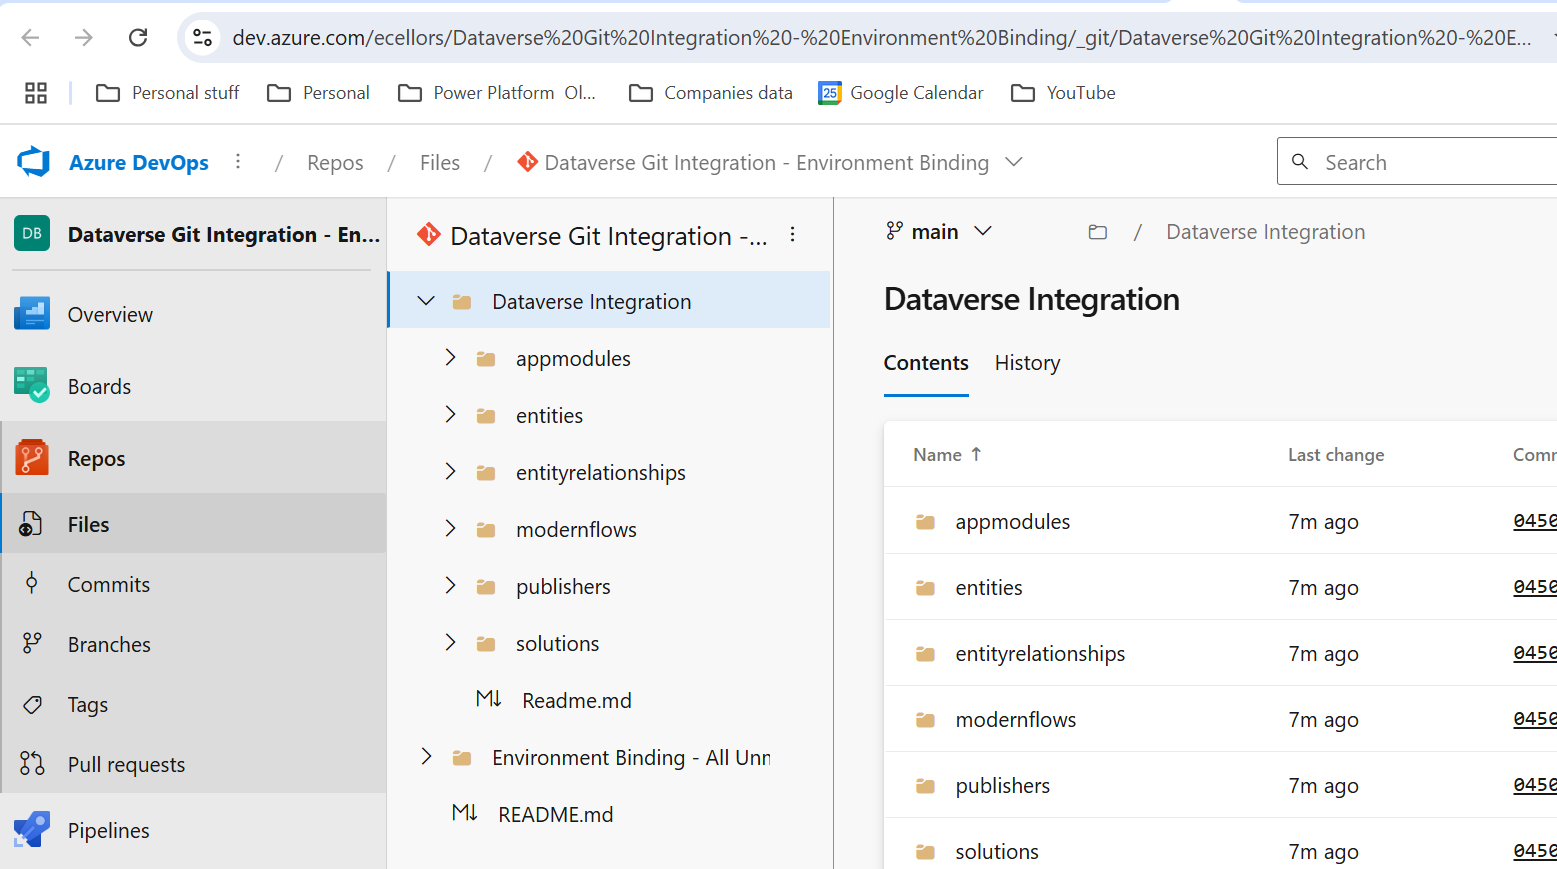
Then you should be navigated to Azure DevOps folder as below where all the solution files will be tracked component wise.
Now we will move back to Power Apps maker portal and make some changes to any of the components inside the solution…
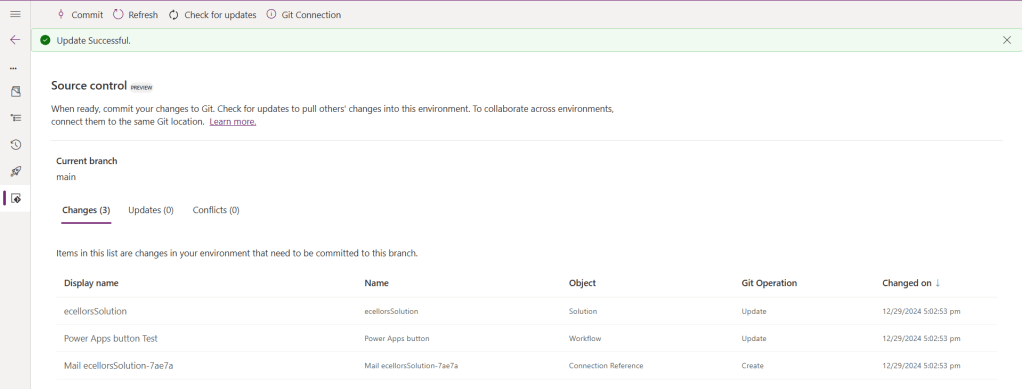
Let’s say, I just edited the flow name and created a new connection reference, saved and published the customizations.
If you did some changes at the Azure DevOps repo level, you can come back and click on Check for updates, if there were any conflicts between changes done in Azure DevOps and component in solution, it will be shown as conflict.
We now have 3 component changes and all were listed here…you can click on Commit.
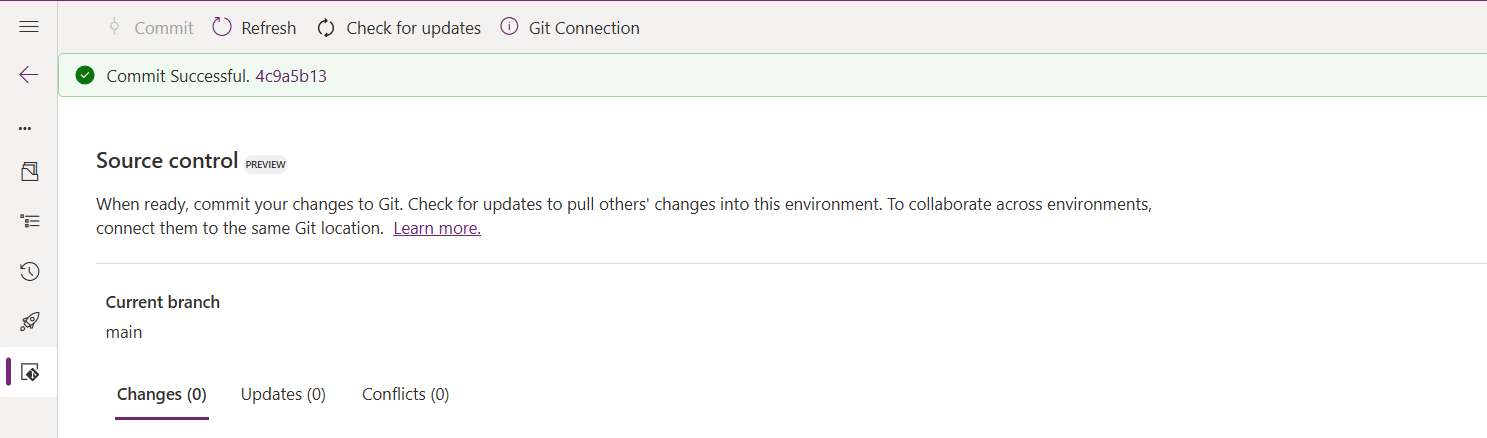
As soon as the changes are committed, you should see a message saying Commit Successful and 0 Changes, 0 Updates, 0 Conflicts.
Now you successfully integrated Dataverse Solution components with Azure DevOps without any manual intervention required while deploying solutions using Azure DevOps Pipelines.
Hope you learned something new today…while feature is still in Preview and only available for early release, while couple of issues still need to fixed by Microsoft.
I have tested this feature by creating an environment in US Preview region and this feature will be a good value to projects using Automation and this solution repository can be further deployed to other environments using Azure DevOps Pipelines.
This will be rolled out soon next year, hope you learned something new today…
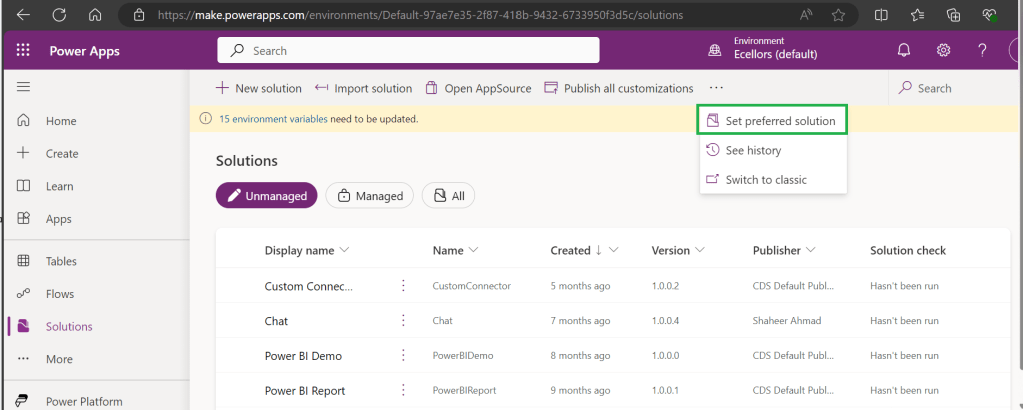
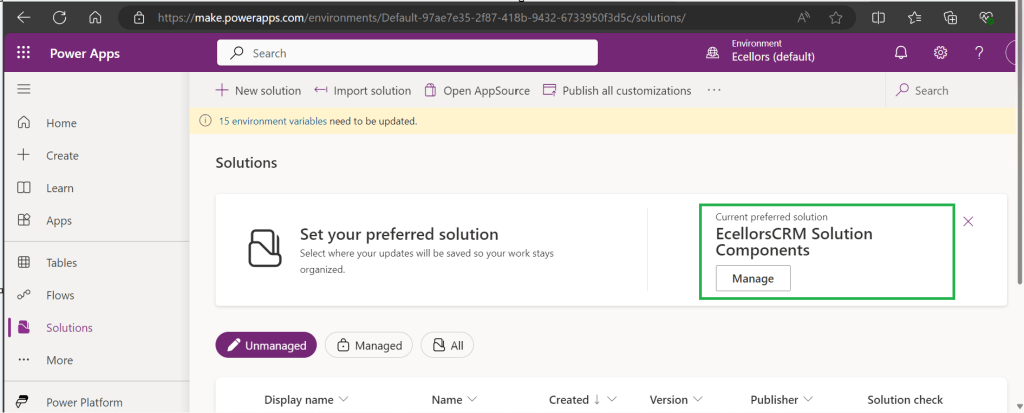
Today, I will be pointing out the advantages of using Preferred Solution and it’s consequences of using or removing it…while the feature is out there from quite few months, yet many of the Power Platform Projects are not utilizing this feature, it can reduce your hassles when many people are working together in a team and you can make sure everyone’s changes go to this solution.
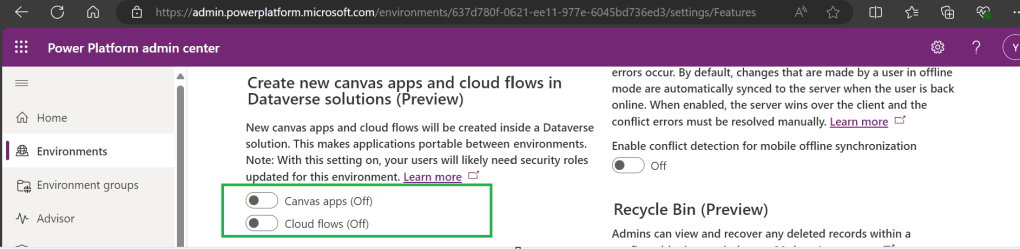
Here we understand what Preferred Solution means to the makers, firstly in order to use this affectively, let’s turn the feature to create Canvas Apps & Cloud Flows in Solutions by enabling this preview feature as suggested below from https://admin.powerplatform.com, this is not mandatory step but would be better as you can add Power Automate flows and Canvas Apps in the Solution and click Save.
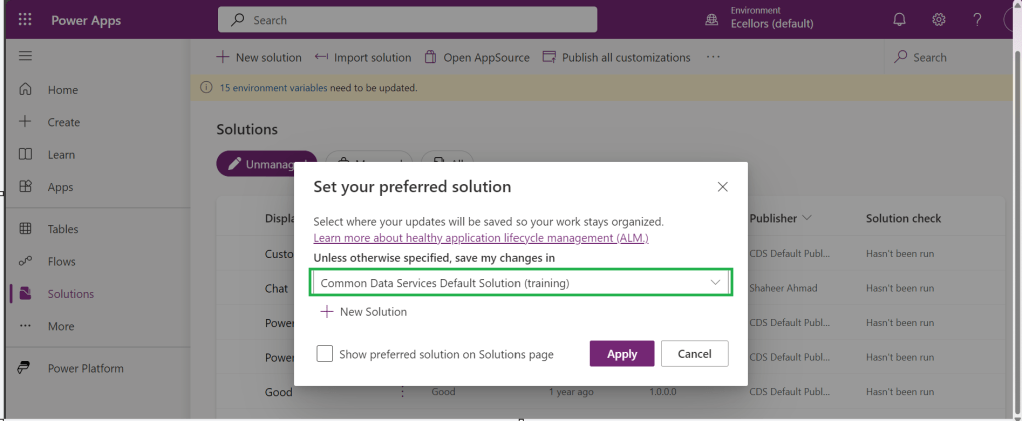
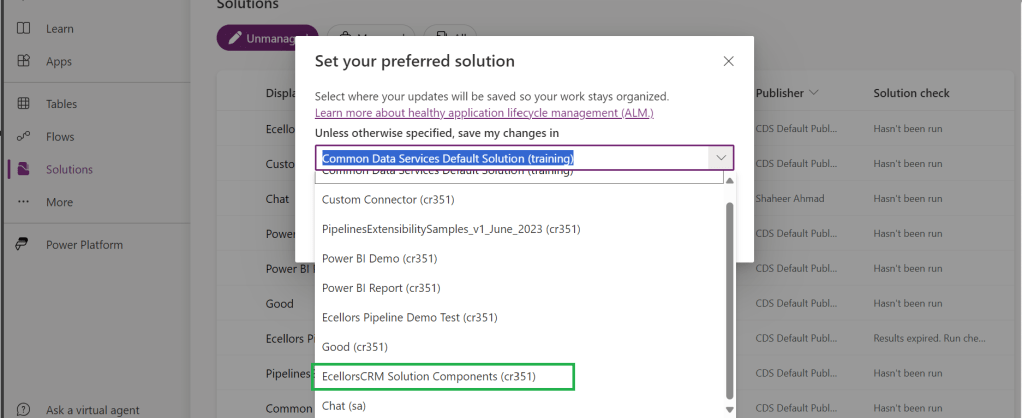
If no preferred solution is set, by default, it will show the Common Data Service Default Solution to set as Default Solution, if you wish to set another Solution, you can select the respective Solution from the drop down.
Enable/Disable the toggle to show Preferred Solution option in the Solutions Page.
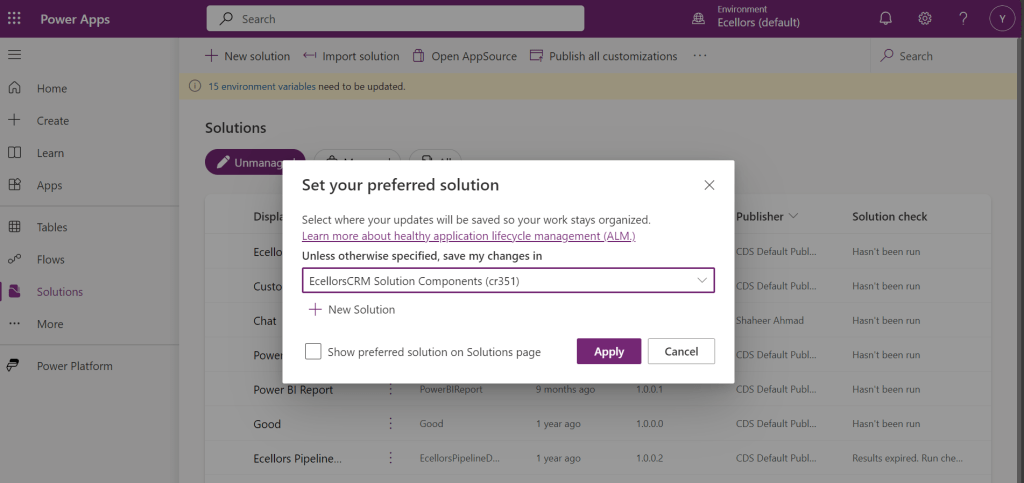
Just click on Apply.
Advantages:
Once preferred Solution is set, any components added by the makers would by default go the Preferred Solution, so makers need not worry about choosing right Solution while creating Power Platform Components.
No need to worry if the solution components will be added in the default solution as the new components will be added to the preferred solution automatically.
Limitations:
Preferred Solutions can be only set in Modern Designer
Components created in Classic Designer won’t go to Preferred Solutions
Custom Connector, Connections, DataFlows, Canvas Apps created from Image or Figma Design, Copilots/Agents, Gateways
You can always delete your preferred solution so that other makers can set their preferred solution, but do this with caution so that none of your team members or your works gets impacted.
Hope this saves few seconds of your valuable time…
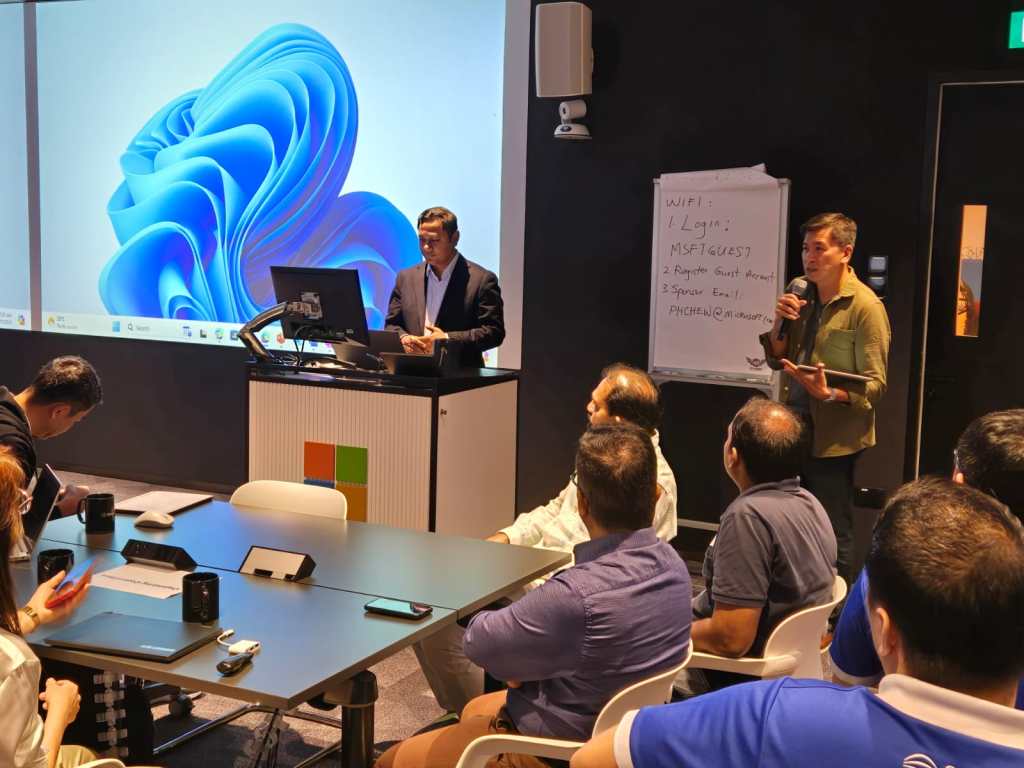
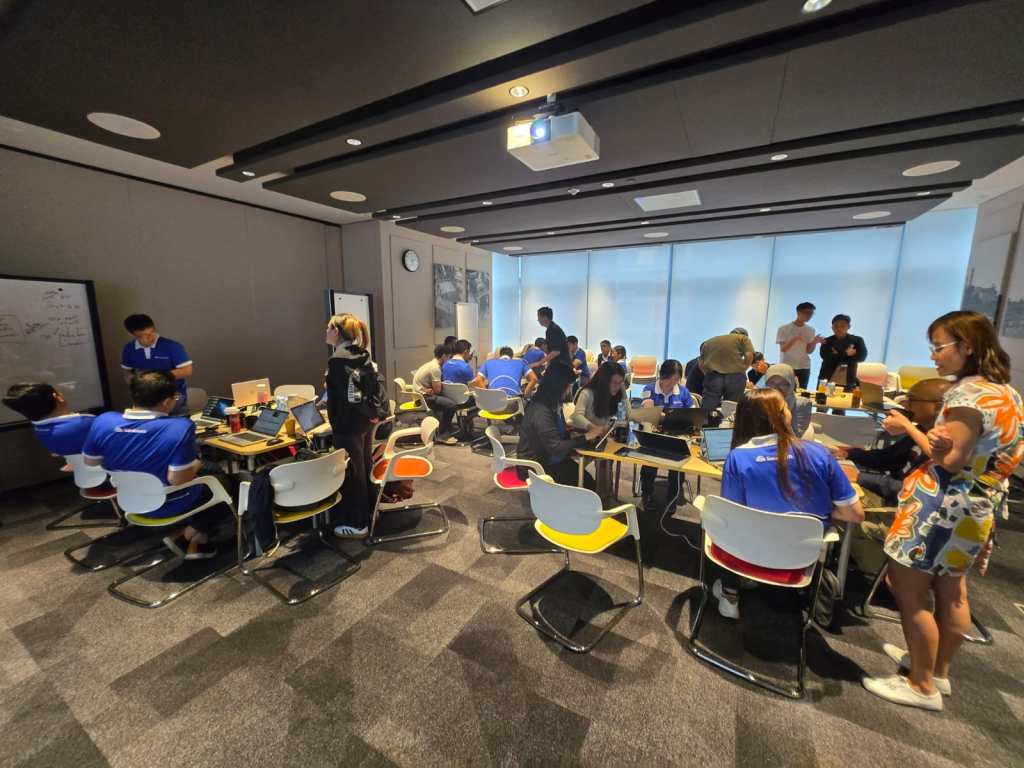
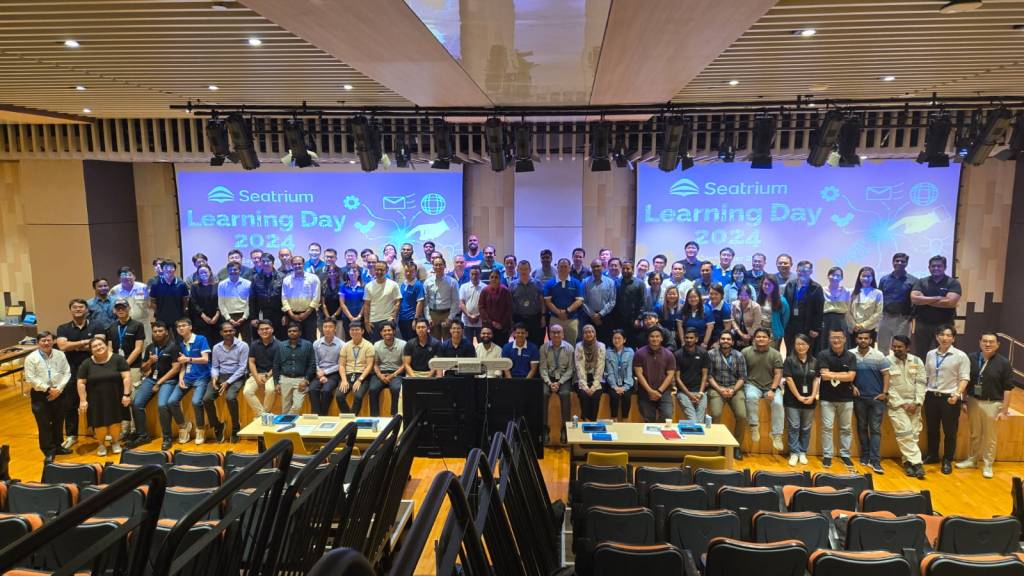
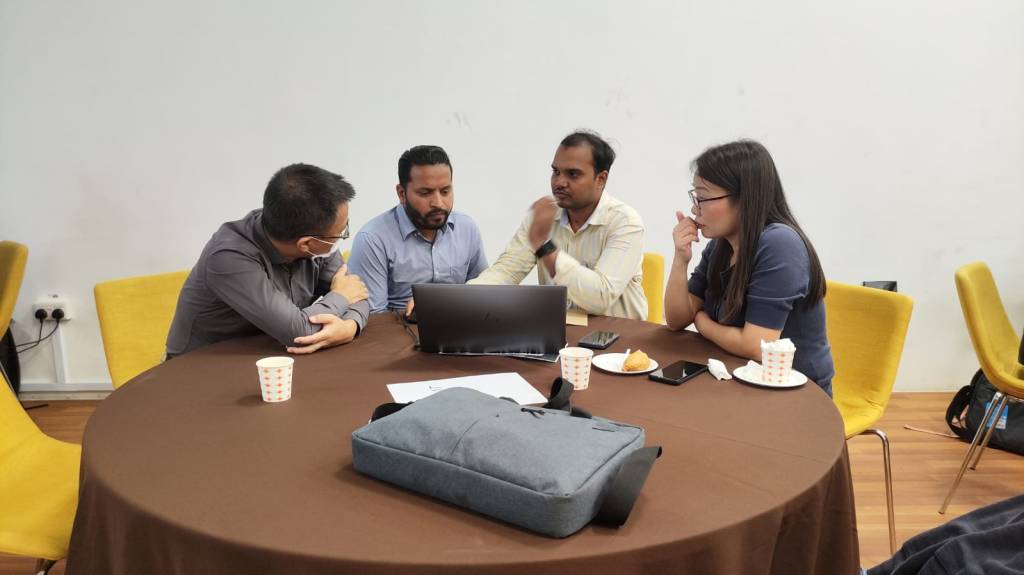
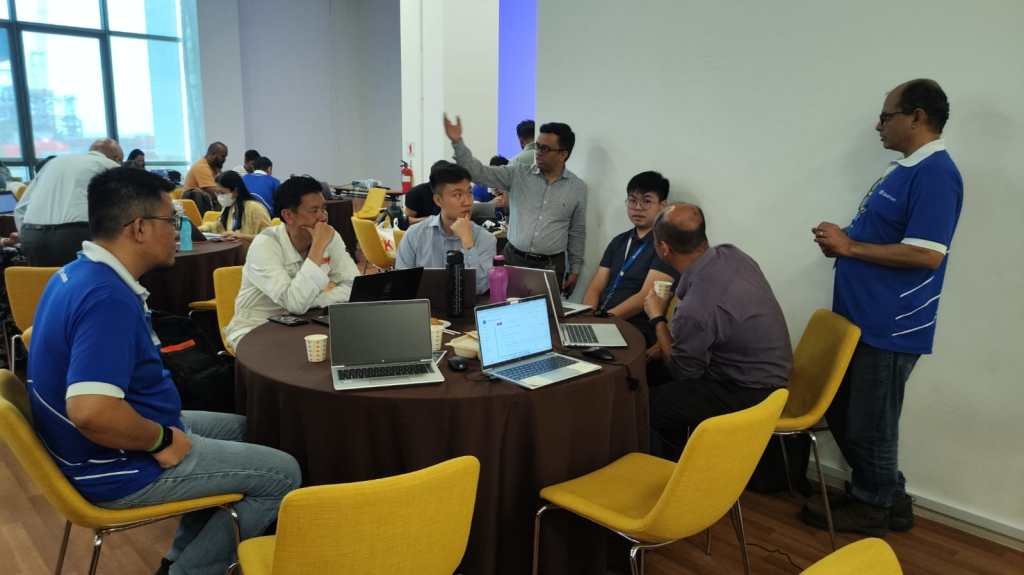
Excited to share about the recently held AI Innovation Day Bootcamp and Hackathon 2 day event organized by Microsoft, Singapore on September at Seatrium, 80 Tuas S Blvd, Singapore, SG, 6265 1766.
🗣️ Business User Feedback & Reflections
Solutions buit by Seatrium employees based on the engagement and the type, thanks to David Choo, Seatrium Microsoft Technical Account Manager for spearheading this Initiative.
Seatrium management officially sent a thank you note to MVPs Pavan Mani Deep Yaragani, Goloknath Mishra, Senthami Selvan for spending 3 valuable days for this event making it a grand success.
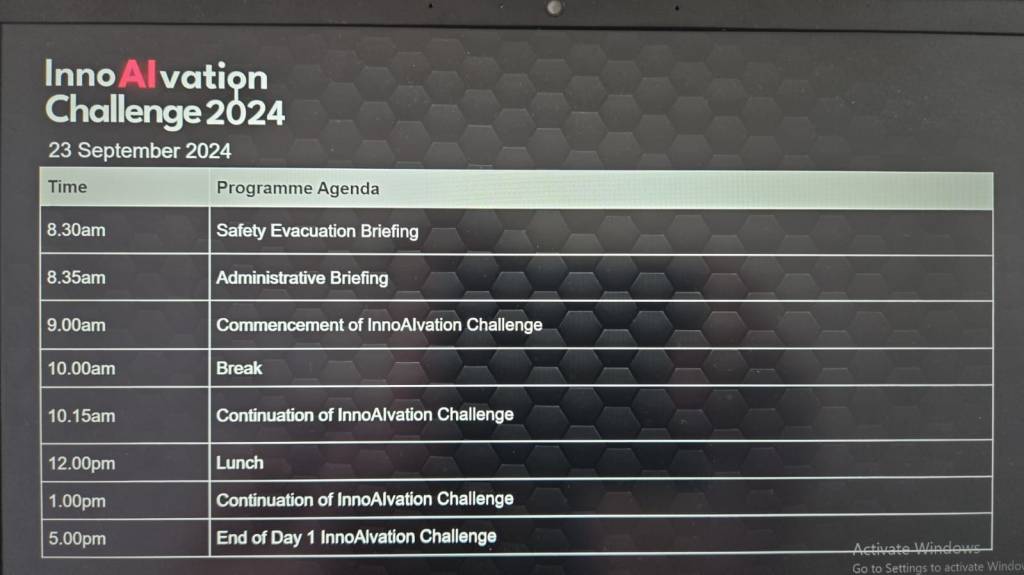
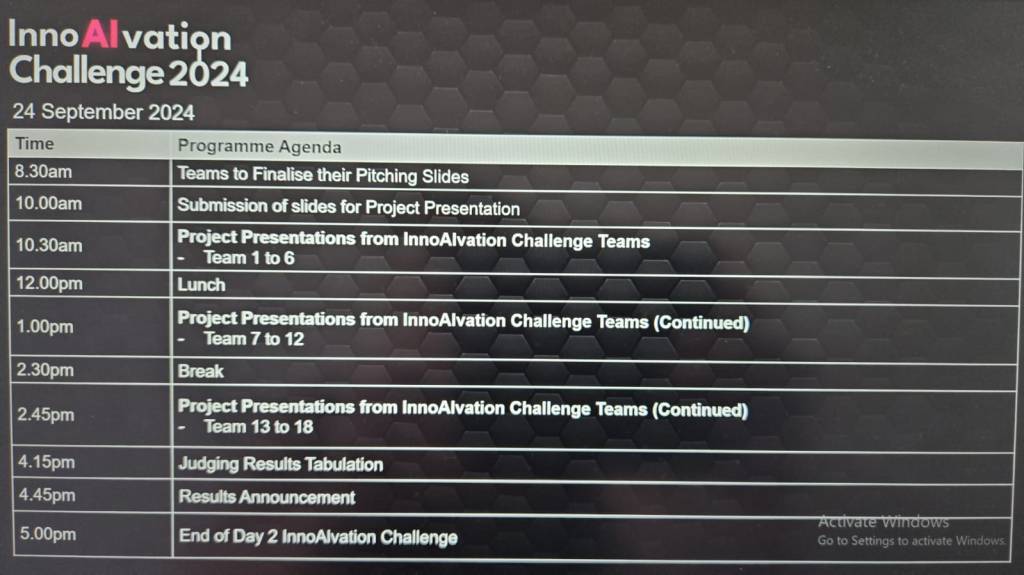
The event took place like below
Day Microsoft Singapore with Seatrium Hackathon Particpants for prepartion on 16 September
AI Innovation Day – 1 – 23 September, 2024.
AI Innovation Day – 2 – 24 September, 2024.
AI Innovation Day – Evaluation and Awards
Below were some the feedback from different business user teams.
🛠️ Operations & Production Team:
“We’ve been struggling with manual job task cards for years—seeing OCR and Copilot Studio digitize it in just two days was mind-blowing!”
“Tracking welder certifications used to take hours each week. Now, with this Power App, we can do it in seconds.”
📦 Supply Chain:
“This predictive maintenance idea using AI was something we thought only big tech could do. I didn’t expect we could prototype it so fast with Azure AI and Power Platform!”
“The Power BI dashboards finally give us a single view of procurement metrics without needing to export Excel sheets all day.”
🏗️ Engineering:
“We’ve been manually cross-checking MTOs and standards forever—having AI do that gives us back our time to actually focus on engineering work.”
“It’s amazing to see a tool extract information from drawings and relate it to VCDs without manual effort.”
💻 Group IT & HR:
“That SharePoint Copilot FAQ bot is going to save us a ton of IT support emails—super impressive.”
“Invoice checking and validation was one of our most time-consuming tasks—now it’s automated and way more reliable.”
📊 Commercial & Planning:
“We finally saw what Microsoft Fabric can do for project-level KPIs and dashboards. We’re excited to explore more.”
“This was one of the most hands-on, practical hackathons we’ve had. It wasn’t just ideas, we actually saw working solutions.”
One of my colleagues asked about Dataverse search, hence I am writing this article on Dataverse Search in Dynamics 365 and in the end, will compare different search options available in Dynamics 365.
Dataverse Search:
In layman terms, Dataverse Search is a powerful search tool that helps you find information quickly across your organization’s data in Microsoft Dataverse, which is the underlying data platform for apps like Power Apps, Dynamics 365, and more, shows you all the related information from across different tables or records in one place.
In short, Dataverse Search is the evolved version of Relevance Search, offering a more robust, faster, and user-friendly search experience including search results for text in documents that are stored in Dataverse such as PDF, Microsoft Office documents, HTML, XML, ZIP, EML, plain text, and JSON file formats. It also searches text in notes and attachments. Before enabling it, just note that once Dataverse search is enabled, it will be affected in all your Model Driven Apps, as of now, just take note.
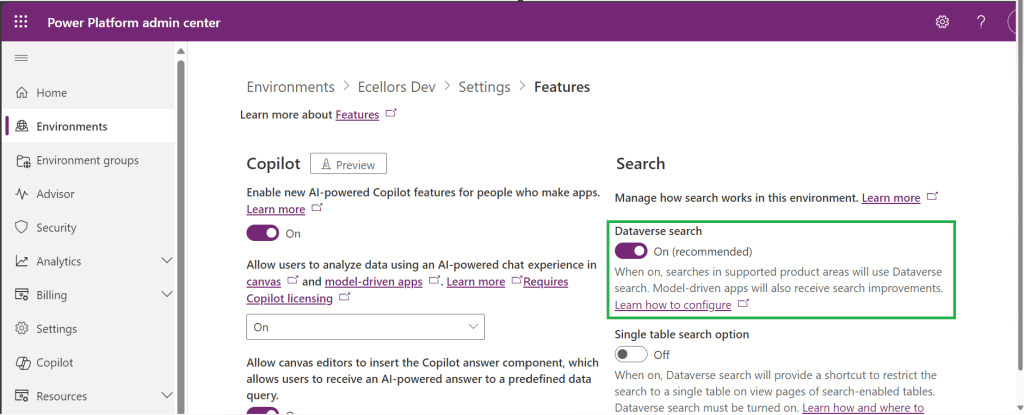
It is on by default, here is where you can now turn off the Dataverse Search:
Click on Environments –> Choose your required environment –> Settings –>Features
3. Disable/Enable the Dataverse search feature.
Once enabled, we need to configure the tables for Dataverse Search so that indexing is performed at the backend, in order to do this…
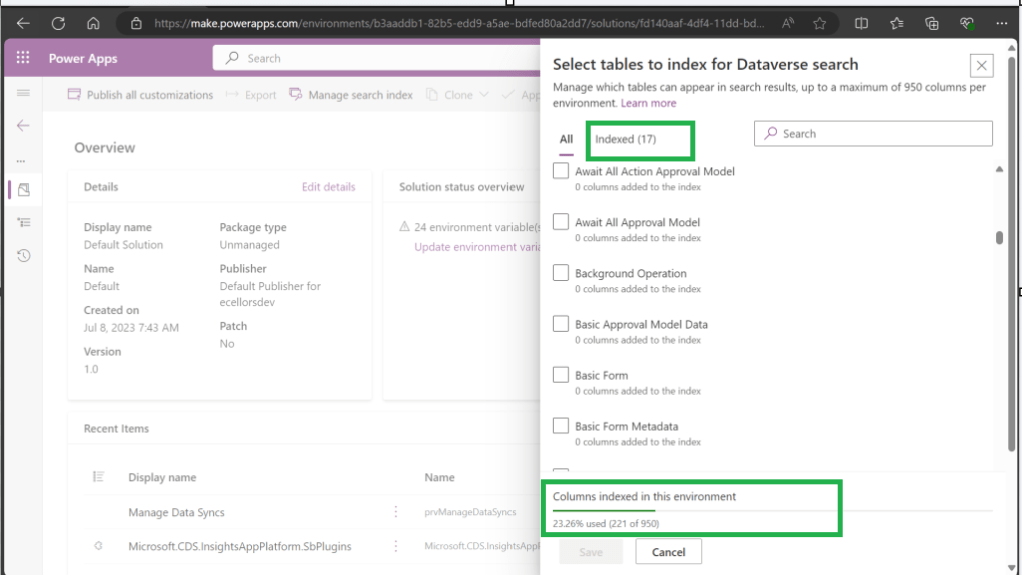
Navigate to https://make.powerapps.com, select your desired solution –> Click on Overview as shown below
Now you need to choose Manage Search Index and you can choose your desired table and fields, there isn’t a limit on the number of tables you can configure, but there is a limit on the number of fields you can configure for an environment, a maximum of 1000 fields are permitted both including system and custom fields, 50 fields are used by system, so you can configure 950 fields.
Just note that some field types are treated as multiple fields in the Dataverse search index as indicated in this table.
Field type
Number of fields used in the Dataverse search index
Lookup (customer, owner, or Lookup type attribute)
3
Option Set (state, or status type attribute)
2
All other types of fields
1
At the bottom of the snap above, you could see the percentage of columns indexed in this environment.
When Dataverse search is enabled, the search box is always available at the top of every page in your app. You can start a new search and quickly find the information that you’re looking for.
When Dataverse search is turned on, it becomes your default and only global search experience for all of your model-driven apps. You won’t be able to switch to quick find search also known as categorized search.
You can also enable Quick actions as shown in the below table
Table
Quick actions
Account
Assign, Share, Email a link
Contact
Assign, Share, Email a link
Appointment
Mark complete, Cancel, Set Regarding, Assign, Email a link
Task
Mark complete, Cancel, Set Regarding, Assign, Email a link
Phone Call
Mark complete, Cancel, Set Regarding, Assign, Email a link
Email
Cancel, Set Regarding, Email a link
Here is the short table comparing all types of searches in Dynamics 365…
Yes. Note: For non-production environments an administrator must manually enable it.
Yes, for the table grid. No, for multiple-table quick find (categorized search). An administrator must first disable Dataverse search before multiple-table grid find can be enabled.
Yes
Single-table search scope
Not available in a table grid. You can filter the search results by a table on the results page.
Available in a table grid.
Available in a table grid.
Multi-table search scope
There is no maximum limit on the number of tables you can search.
Searches up to 10 tables, grouped by a table.
Multi-table search not available.
Search behavior
Finds matches to any word in the search term in any column in the table.
Finds matches to all words in the search term in one column in a table; however, the words can be matched in any order in the column.
Query builder where you can define search criteria for the selected row type. Can also be used to prepare data for export to Office Excel so that you analyze, summarize,or aggregate data, or create PivotTables to view your data from different perspectives.
Searchable columns
Text columns like Single Line of Text, Multiple Lines of Text, Lookups, and Option Sets. Doesn’t support searching in columns of Numeric or Date data type.
All searchable columns.
All searchable columns.
Search results
Returns the search results in order of their relevance, in a single list.
For single-table, returns the search results in a table grid. For multi-table, returns the search results grouped by categories, such as accounts, contacts, or leads.
Returns search results of the selected row type with the columns you have specified, in the sort order you have configured.
Hope you learned something today…if you have any questions, do let me know in the comments…
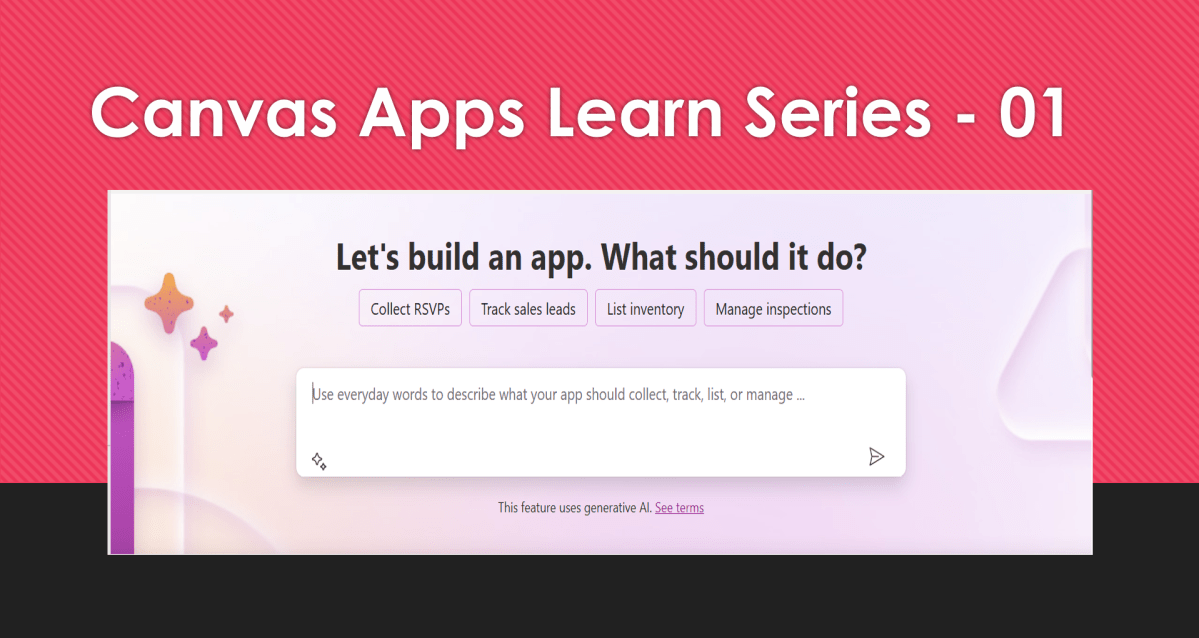
This is the second blog post series on Canvas Apps where you can learn and grow from Zero – Hero in Canvas Power Apps. In this blog post, we will talk about different ways you can get started with creating canvas apps.
Introduction
Power Apps Canvas Apps allow users to build powerful applications with a drag-and-drop interface, requiring little to no coding. Whether you’re a beginner or an experienced user, setting up your first Canvas App is a straightforward process. This guide walks you through each step.
Basic knowledge of what you want to build (e.g., a simple data entry form).
Step 1: Accessing Power Apps Studio
There were different ways you can create a Canvas Apps
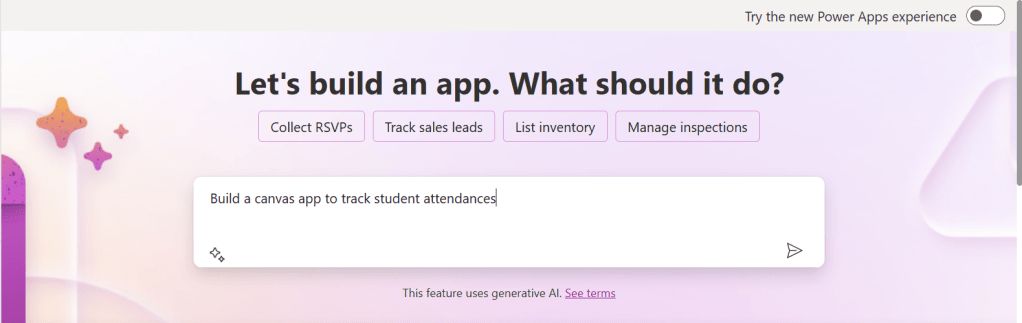
You can create a canvas app by giving your requirement in Copilot which will in turn build your Canvas Apps.
2. You can design them using any of the existing templates available
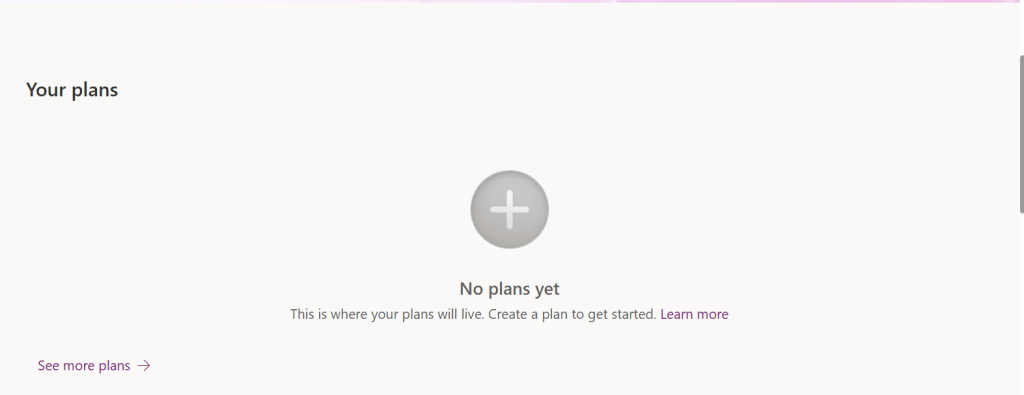
3. You can also design your App using Plan designer which is the latest feature released and still in preview, for this you need to enable
For this you need to have an plan available
You can click on See more plans option available, create new plans if necessary
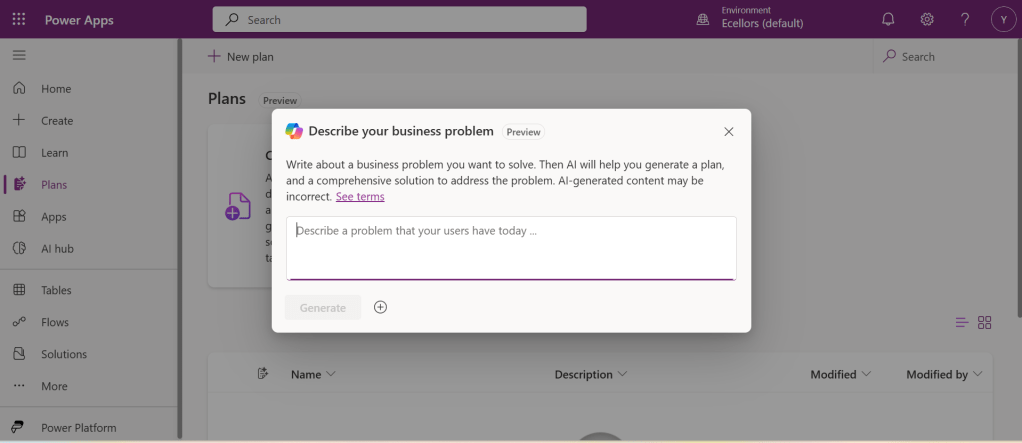
You have to state your business problem, this is pretty much same as using the Copilot in the old experience but here you just tell what problem you have been solving by creating the App, that’s it.
I entered Tracking Student Attendances as my problem and within a matter of 1 min, it designed whole data model where you can accept or propose for a new change.
Once you accept, next it will go ahead and start preparing the data necessary.
After you accept this, it will start designing for the user experiences
Once everything is done, you
It will ask you to save in a solution, this way you will be able to save all your changes to a solution which can be safely moved across environments.
And that’s it, your fully functional app is ready in few mins.
Step 2: Designing Your App
Once inside the Power Apps Studio:
Drag and drop controls from the left-side panel to the canvas.
Add labels, text inputs, buttons, and galleries as needed.
Resize and align elements for a clean layout.
Below is the sample Power App screen in Studio containing the components.
Step 3: Connecting to a Data Source
Click on Data in the left panel.
Select Add data and choose a source like SharePoint, Dataverse, or Excel.
Connect your app to the data source.
Step 4: Adding Functionality with Formulas
Power Apps uses Excel-like formulas to add functionality. Example:
To navigate to another screen: Navigate(Screen2, ScreenTransition.Fade)
To filter data: Filter(Orders, Status="Pending")
Step 5: Previewing and Testing Your App
Click on the Play button in the top-right corner.
Test the app’s functionality.
Fix any layout or data issues as needed.
Image Suggestion: Screenshot showing the app running in preview mode.
Step 6: Saving and Publishing
Click File > Save As.
Choose Cloud as the storage option.
Click Publish to make your app available.
Image Suggestion: Screenshot of the Save & Publish screen.
Conclusion
Congratulations! You’ve built your first Canvas App. You can continue refining it by adding more features, integrating AI, or automating workflows.
Are you ready to explore more? Share your first Canvas App experience in the comments!
Do you want step by step guided walk through, then check this App in a Day Workshop from Microsoft where you can start from scratch and build a fully functional Canvas App.
Understanding Screens and Navigation – How to structure an app with multiple screens.
Working with Data Sources – Connecting to SharePoint, Dataverse, Excel, and other sources.
Forms and Galleries – Displaying and capturing data effectively.
Mastering Power Fx – Key formulas and best practices.
User Experience and UI Design – Creating a responsive and user-friendly interface.
Using Components for Reusability – Making apps scalable and maintainable.
Working with Media and Attachments – Adding images, videos, and file uploads.
Performance Optimization Tips – Best practices to make apps faster.
Offline Capabilities in Canvas Apps – How to work with apps when offline.
Integrating Power Automate with Canvas Apps – Automating processes.
AI and Copilot Features in Canvas Apps – Adding intelligence to apps.
Advanced Security and Role-Based Access – Controlling user access and permissions.
Publishing and Managing Your Canvas Apps – Deployment, versioning, and governance.
Firstly, let’s start with some simple introduction for this post…
What Are Canvas Apps?
Canvas Apps are a powerful low-code development tool within Microsoft Power Platform that allows users to build custom business applications with a drag-and-drop interface. Unlike model-driven apps, which rely on structured data models, Canvas Apps provide full control over the user interface, enabling developers and business users to design highly customized applications tailored to specific business needs.
Canvas Apps can be used to create simple applications for internal business processes or sophisticated applications with multiple screens, data interactions, and integrations with other Microsoft and third-party services. Users can design these apps using Power Apps Studio, a web-based development environment that provides a range of components, such as buttons, galleries, forms, and media controls, to create intuitive and responsive applications.
Why Are Canvas Apps Important?
Canvas Apps bring significant value to businesses and developers by providing:
Low-Code Development – Build applications with minimal coding, making app development accessible to both developers and non-developers. Power Fx, a formula-based language, enables business logic implementation with ease.
Customization & Flexibility – Unlike model-driven apps that follow a predefined data structure, Canvas Apps allow users to freely design screens, layouts, and controls, ensuring the app meets unique business requirements.
Seamless Data Integration – Connect to over 800+ data sources, including SharePoint, Dataverse, Excel, SQL Server, and third-party APIs, ensuring seamless access to enterprise data.
Cross-Platform Compatibility – Run apps on web browsers, mobile devices (iOS & Android), and embedded within Microsoft Teams, SharePoint, and Dynamics 365.
Integration with Power Platform – Enhance apps with Power Automate for automation workflows, Power BI for data visualization, and AI Builder for AI-driven insights and intelligent automation.
Rapid Prototyping & Deployment – With the drag-and-drop interface and prebuilt templates, businesses can quickly prototype and deploy applications without long development cycles.
Security & Compliance – Apps built using Canvas Apps inherit Microsoft’s security infrastructure, allowing role-based access control (RBAC) and compliance with enterprise security standards.
Real-World Use Cases
Canvas Apps can be leveraged across industries to improve efficiency and streamline operations. Some common real-world use cases include:
Expense Management App – Employees can submit expenses with receipts, managers can approve them, and finance teams can generate reports.
Inventory Management System – Track stock levels, reorder inventory, and generate reports in real-time.
Incident Reporting App – Employees can report workplace incidents with photos, location, and real-time status updates.
Customer Feedback App – Collect customer feedback through mobile-friendly forms and analyze responses with Power BI.
Field Service Management – Field workers can access work orders, update job statuses, and capture customer signatures through mobile devices.
HR Onboarding App – Manage the onboarding process for new employees with guided forms, policy documents, and task checklists.
Getting Started with Canvas Apps
To start building a Canvas App, follow these steps:
Click on ‘Create’ and select ‘Canvas App from Blank’
Choose a layout (Tablet or Mobile) based on your app’s intended use
Design your app using Power Apps Studio:
Add Screens: Home screen, forms, galleries, etc.
Insert Controls: Buttons, text inputs, dropdowns, and images
Connect Data Sources: Link to Dataverse, SharePoint, SQL, etc.
Apply Business Logic: Use Power Fx formulas to create dynamic interactions
Test the App: Use Preview mode to validate functionality
Publish and Share Your App: Deploy the app and control access using Microsoft Entra ID (Azure AD)
Best Practices for Building Canvas Apps
Plan Your App Structure – Define screens, navigation, and key functionalities before starting.
Optimize Performance – Reduce unnecessary data calls and use delegation-friendly queries.
Use Components for Reusability – Create custom components for commonly used UI elements.
Ensure Responsive Design – Design layouts that work across multiple device sizes.
Leverage Power Automate for Automation – Automate approvals, notifications, and data processing.
What’s Next?
In the next post, we’ll walk through setting up your first Canvas App from scratch, covering app layout, adding controls, and connecting to a data source.