Enabling TDS End Point for Dataverse (Preview Feature) from Power Platform Admin Center and its advantages

Hi Folks,

Exciting news…

Here is how you can enable TDS End Point in Dataverse…

  1. Navigate to Power Platform Admin Center…https://admin.powerplatform.microsoft.com/home
  2. Next navigate to the respective Environment to which you want to enable TDS End Point
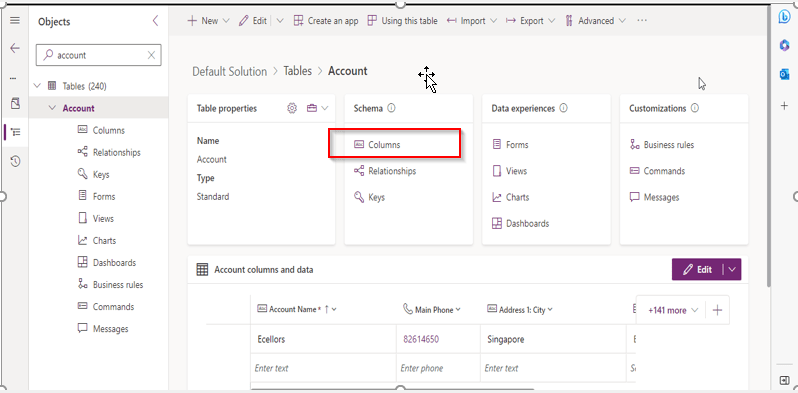
  3. Choose your respective environment, go to Settings
  4. In the Settings windows, select the Product and then Features.
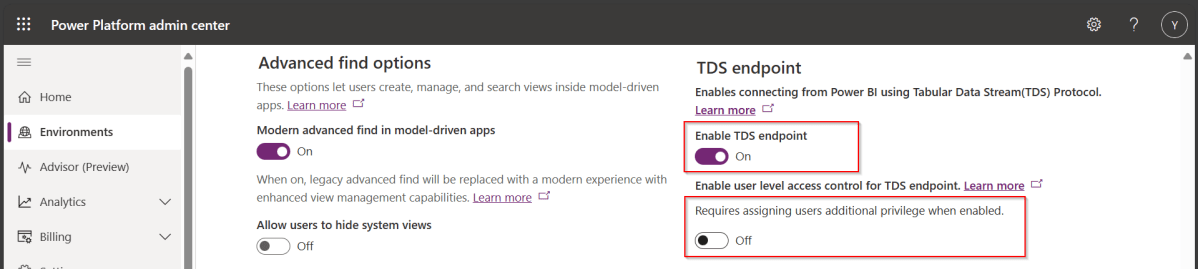
  5. Scroll down to see TDS end point, just enable the TDS end point toggle button
  6. Once this is enabled, you can also enable user level access for this TDS end point by configuring the security role as in the below step.
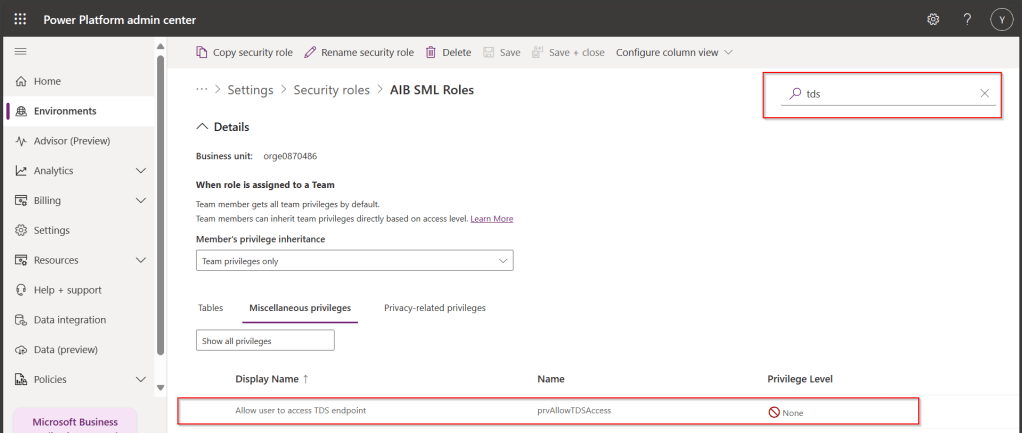
  7. Open Security from Power Platform Admin Center and navigate to the available security roles, go to Miscellaneous privileges, search for tds, you can find a privilege to Allow user to access TDS endpoint.

Advantages:

  1. With this TDS end point enabled, you can directly access the data in the Dataverse tables using SSMS(Preview) and in Power BI
  2. While the interesting part here is that Dataverse security model will be applied to the data being viewed by the user.
  3. That is whenever you were query the dataverse data using SSMS, the user role will be applied
  4. In the same way, if the Power BI report is built using the TDS(SQL end point), any user who is going to access the report will be only seeing the data he/she can access based on current security roles in Dataverse

While this is a cool feature for anyone who is trying to build Dataverse security in Power BI without using row level security as this is a mystery till now.

Hope this helps…

Cheers,

PMDY

Power Fx Fomula Data type – your new companion in addition to Calculated fields in Dataverse [Insight]

Hello Folks,

I believe ever Power Platform professional working on Dataverse had one or other time got a chance to work on calculated fields. Actually it provides an easy way to perform any calculations for the supported data types since it has been introduced with CRM Version 2015 update 1.

Here is a very simple example of simple calculation to get your Fx data type up and running in few seconds….follow along….

Navigate to https://make.powerapps.com/

Open your solution, navigate to the columns in any table….for simplicity I am taking example of Accounts table…

Now create new column as below

Key values for the field, make a note that the data type (Fx) is selected

I already have two fields as below already on the form for calculating the Annual revenue per Employee from Annual Revenue of the company…

So now let’s write a simple Power Fx formula to calculate the Annual Revenue per Employee…the expression goes as below…

Annual Revenue is a currency field and Number of Employees field is single line of text. As soon as you save, system automatically identifies the data type as Decimal Number as shown above, click on save and publish the form…

Let’s see the actual use in the form…as soon as you enter the values for Annual Revenue and Number of Employees and save, the value for Calculated Revenue for the Employee field value will be calculated by the Power Fx expression.

Hope this will be useful in future for your implementations…

Points to keep in view:

  1. This formula column is in preview right now at the time of writing this blog post.
  2. And currently, formula columns can’t be used in roll-up fields or with plugins.
  3. You can use the following operators in a formula column:
    +, -, *, /, %, ^, in, exactin, &
  4. Microsoft Documentation says that the Currency data type isn’t currently supported but it works actually.
  5. The Text and Value functions only work with whole numbers, where no decimal separator is involved

Ref: Formula Column

Cheers,

PMDY