Today, I will be pointing out the advantages of using Preferred Solution and it’s consequences of using or removing it…while the feature is out there from quite few months, yet many of the Power Platform Projects are not utilizing this feature, it can reduce your hassles when many people are working together in a team and you can make sure everyone’s changes go to this solution.
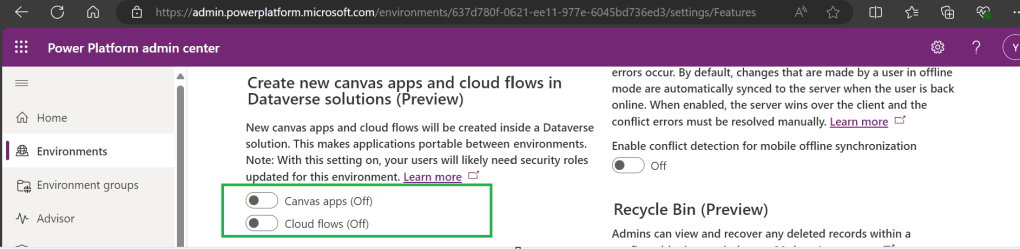
Here we understand what Preferred Solution means to the makers, firstly in order to use this affectively, let’s turn the feature to create Canvas Apps & Cloud Flows in Solutions by enabling this preview feature as suggested below from https://admin.powerplatform.com, this is not mandatory step but would be better as you can add Power Automate flows and Canvas Apps in the Solution and click Save.
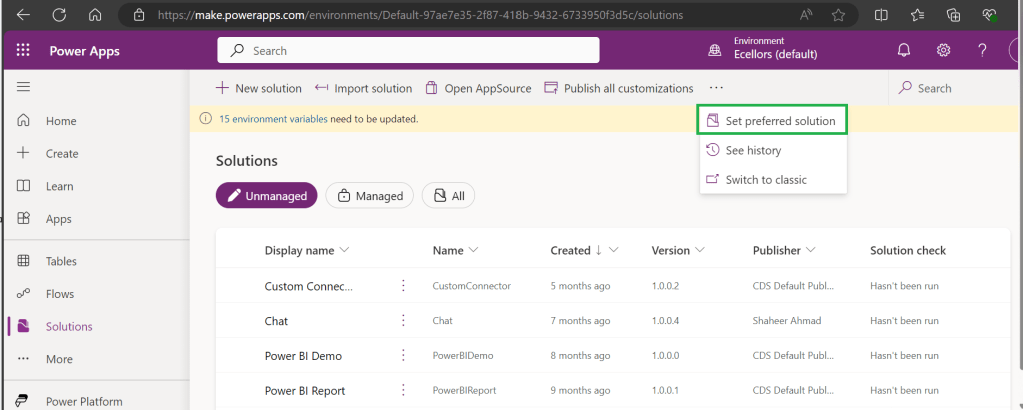
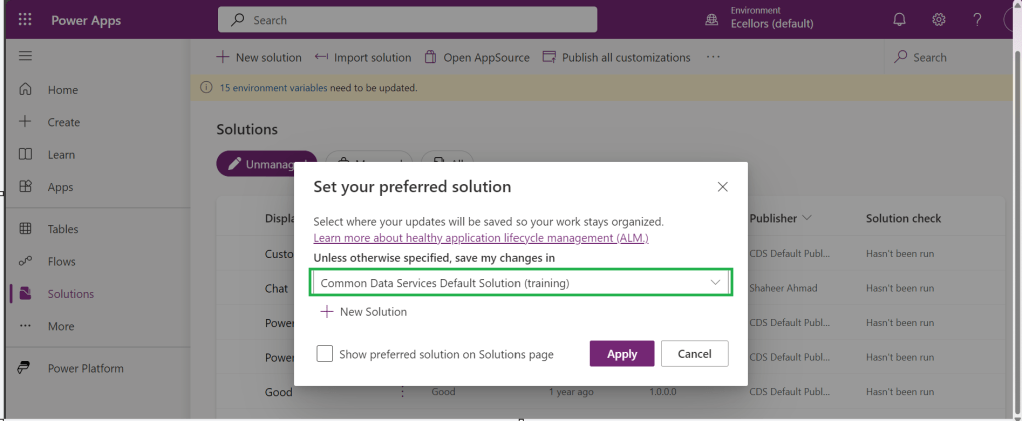
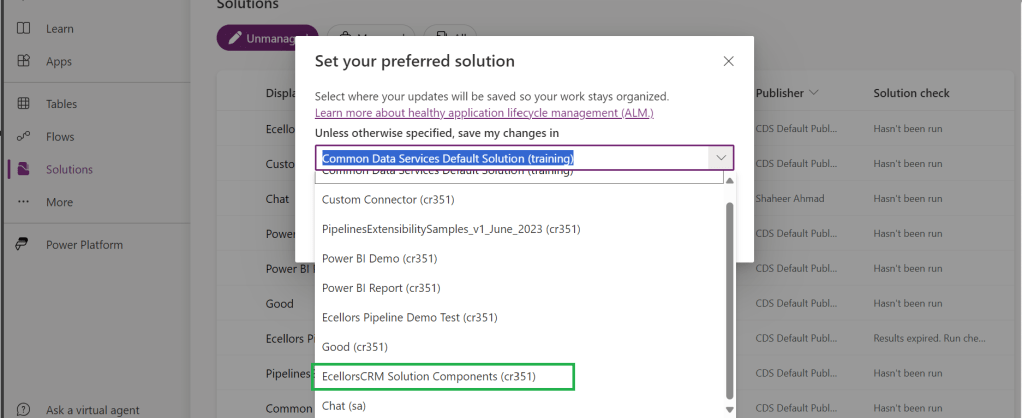
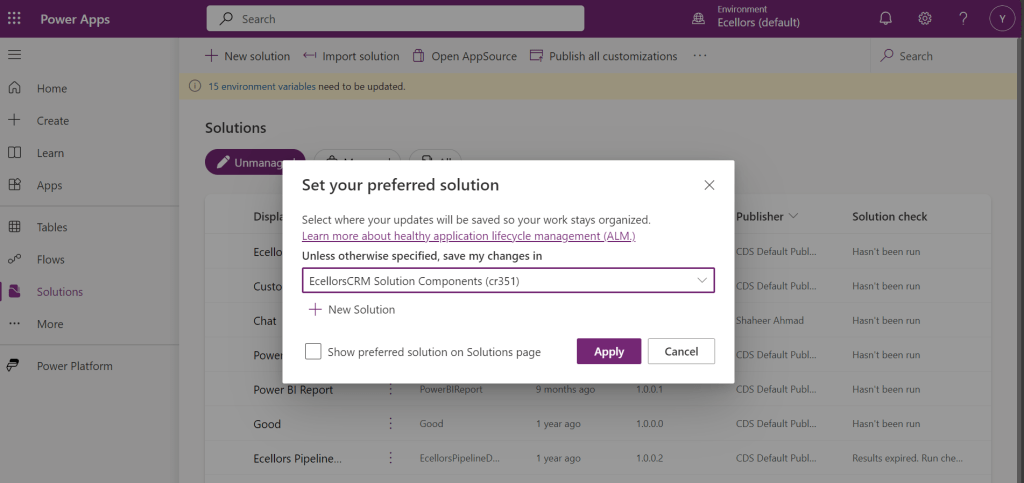
If no preferred solution is set, by default, it will show the Common Data Service Default Solution to set as Default Solution, if you wish to set another Solution, you can select the respective Solution from the drop down.
Enable/Disable the toggle to show Preferred Solution option in the Solutions Page.
Just click on Apply.
Advantages:
Once preferred Solution is set, any components added by the makers would by default go the Preferred Solution, so makers need not worry about choosing right Solution while creating Power Platform Components.
No need to worry if the solution components will be added in the default solution as the new components will be added to the preferred solution automatically.
Limitations:
Preferred Solutions can be only set in Modern Designer
Components created in Classic Designer won’t go to Preferred Solutions
Custom Connector, Connections, DataFlows, Canvas Apps created from Image or Figma Design, Copilots/Agents, Gateways
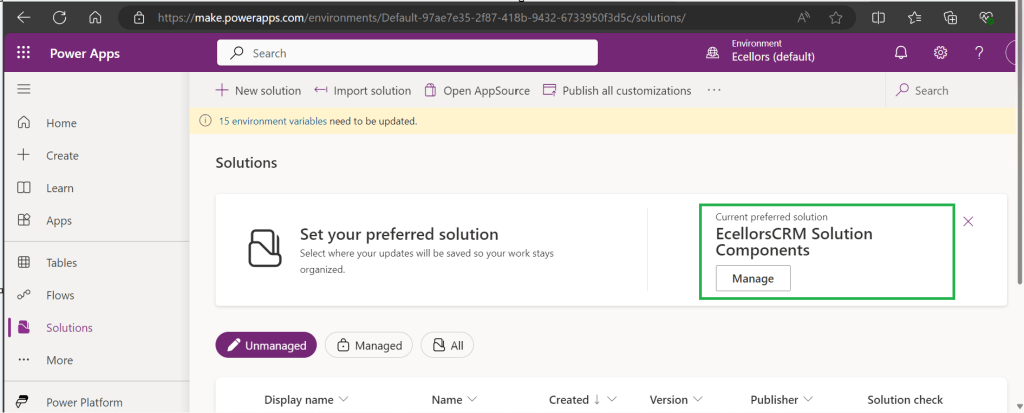
You can always delete your preferred solution so that other makers can set their preferred solution, but do this with caution so that none of your team members or your works gets impacted.
Hope this saves few seconds of your valuable time…
In App notifications are trending these days where many customers are showing interest in implementing these for their businesses.
So, in this blog post, I am going to show you the easiest way to generate In App notification using XrmToolBox in few clicks. Use the below tool to generate one.
So, let me walk you through step by step
Step 1: Open In App Notification Builder in XrmToolBox
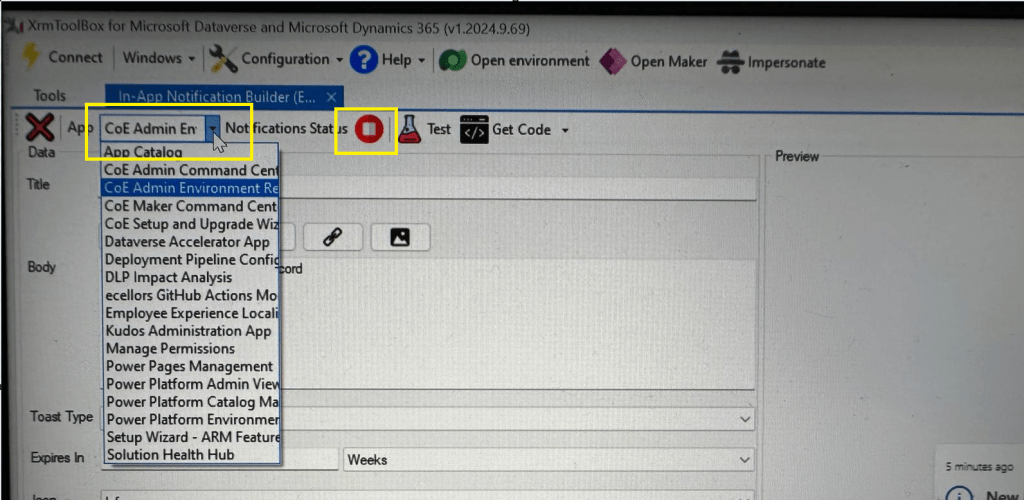
Step 2: In App notification is a setting that should be enabled at App level, so meaning if you have developed few Model Driven Apps, you will be able to enable the In App notification individually for each one of them.
Step 3: In the above snapshot, we should be able to select the respective App for which we want to enable the In App Notification. Red bubble besides indicate that the In App notification is not enabled for this App.
So, we need to enable it by clicking on the red icon itself, you should then be able to get this prompt as below.
Step 5: Upon confirming the confirmation dialog box, the In App notification will be enabled for that App and you the red button turns to green as below saying that In App Notification is enabled.
Now that the In App notification is enabled in the App, we will proceed with the remaining setup.
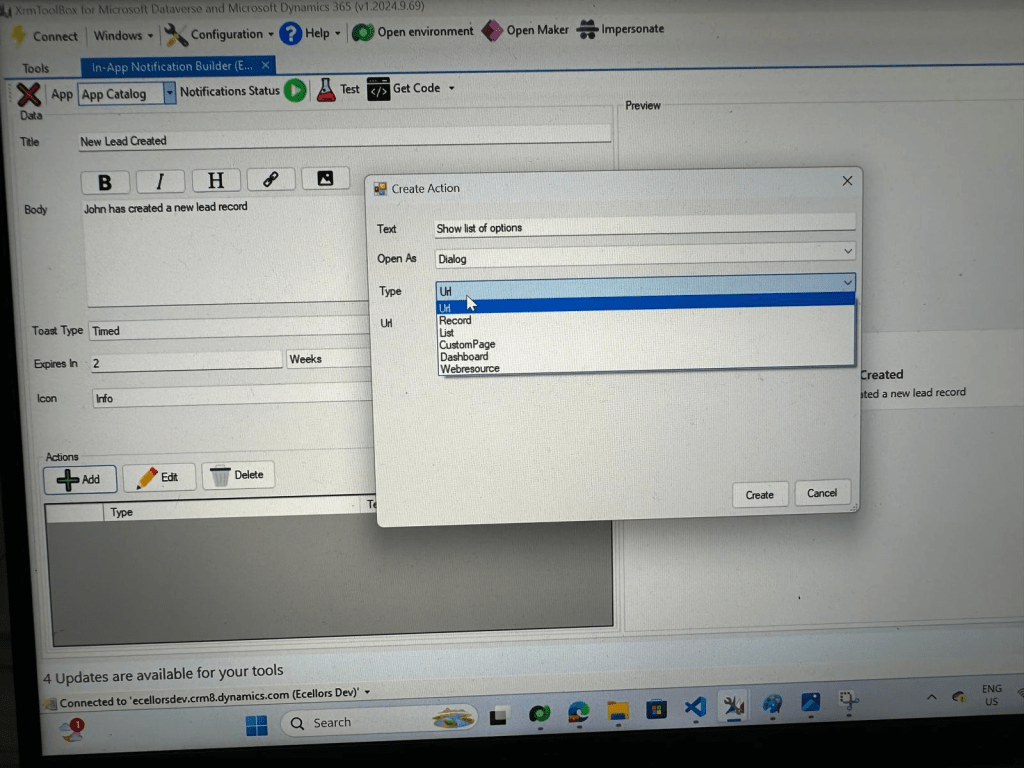
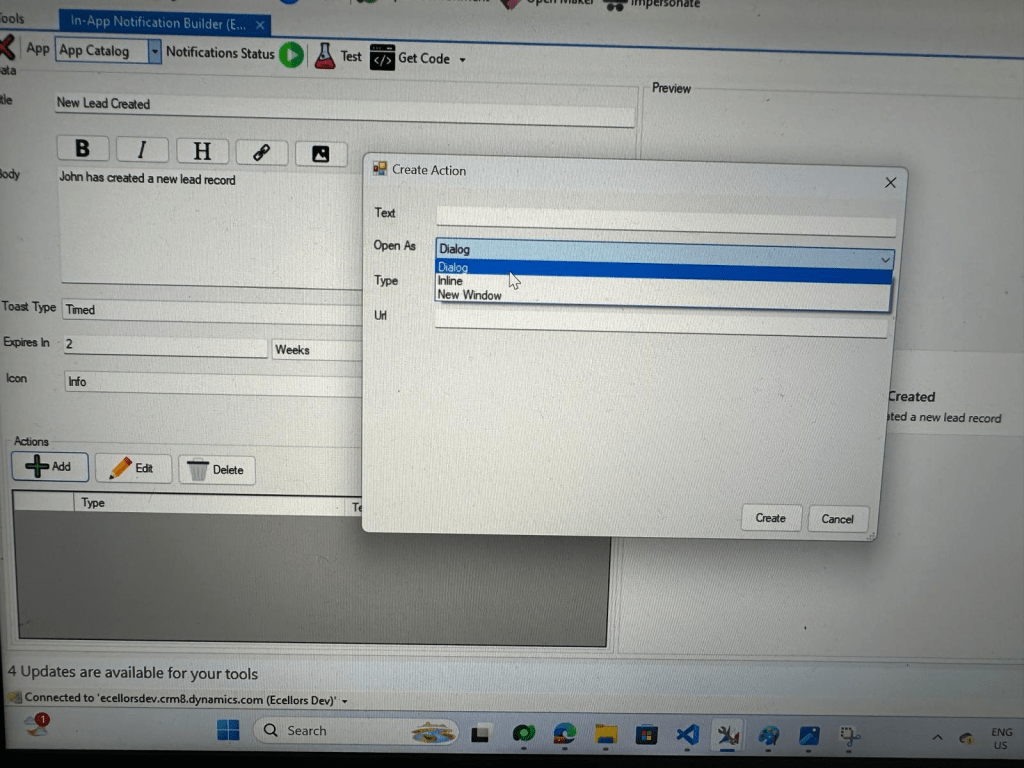
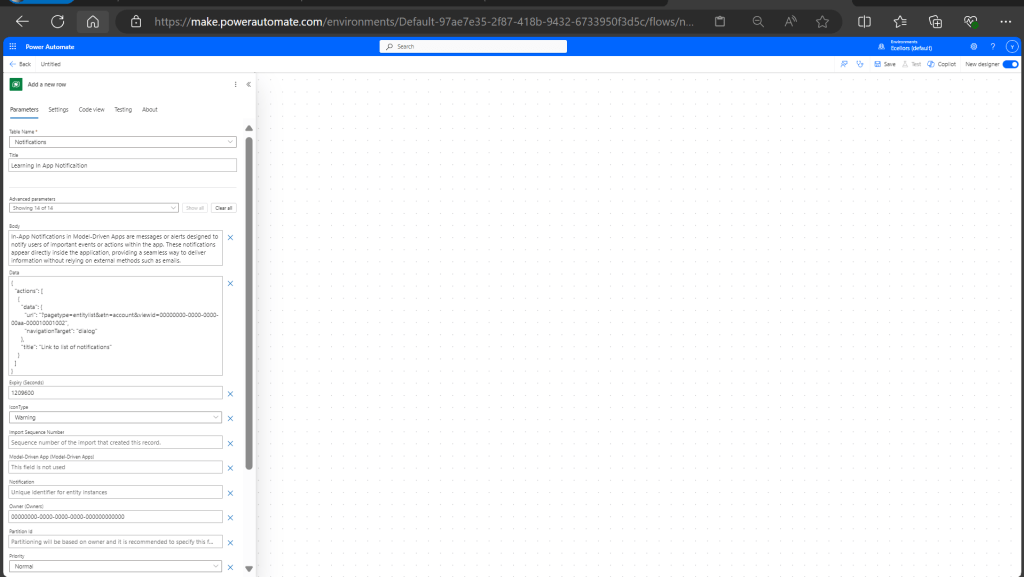
Step 6: You can proceed to give a meaningful title, body for you In App Notification. Also mention the required toast type and specify the expiry duration, Icon. Also Click on Add icon and choose the action required to be performed when In App notification is clicked.
Step 9: You can even choose the type of action to be performed…
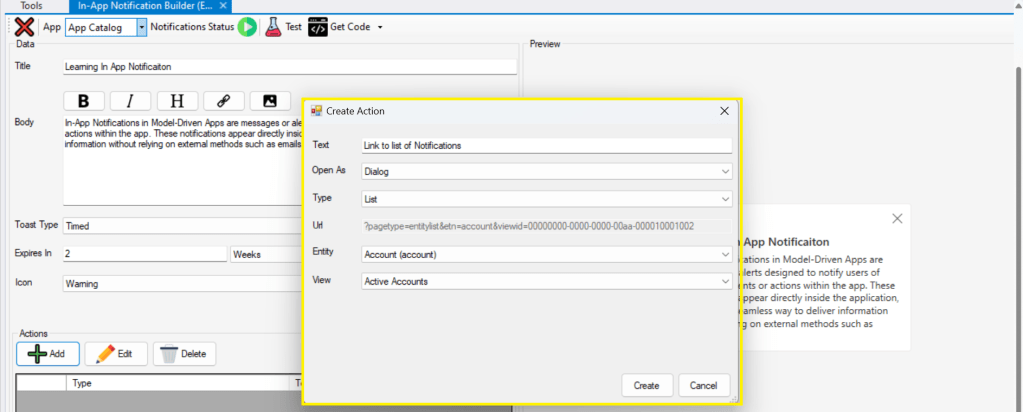
For example, let’s use to open as dialog and show list view
Your screen should look something like below
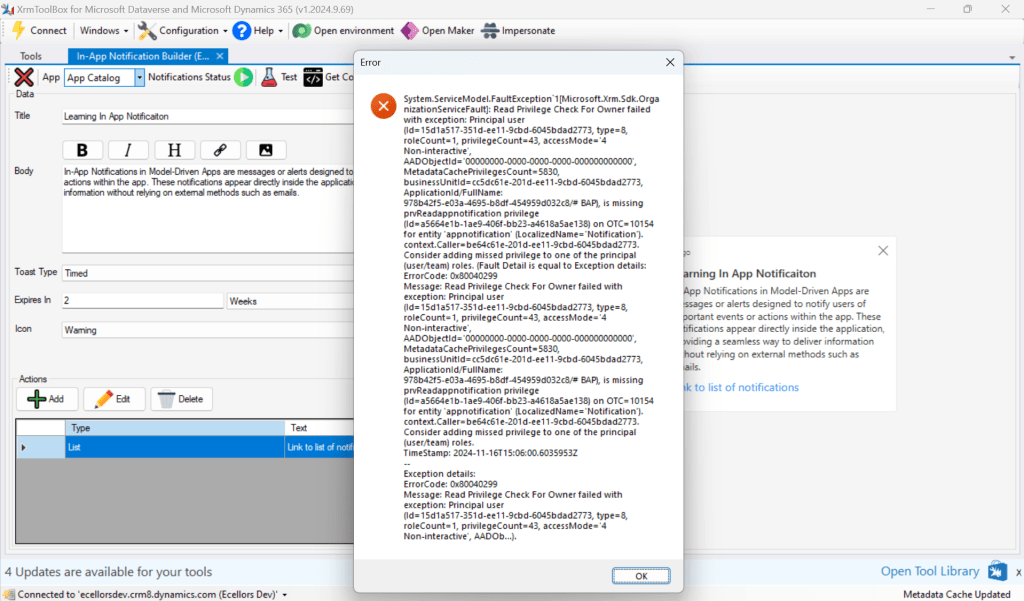
Step 10: Once done, you can click on create and that’s it you have now created In App Notification. Now let’s test this for the user who have priveleges to access this App.
If not, you will face this error..
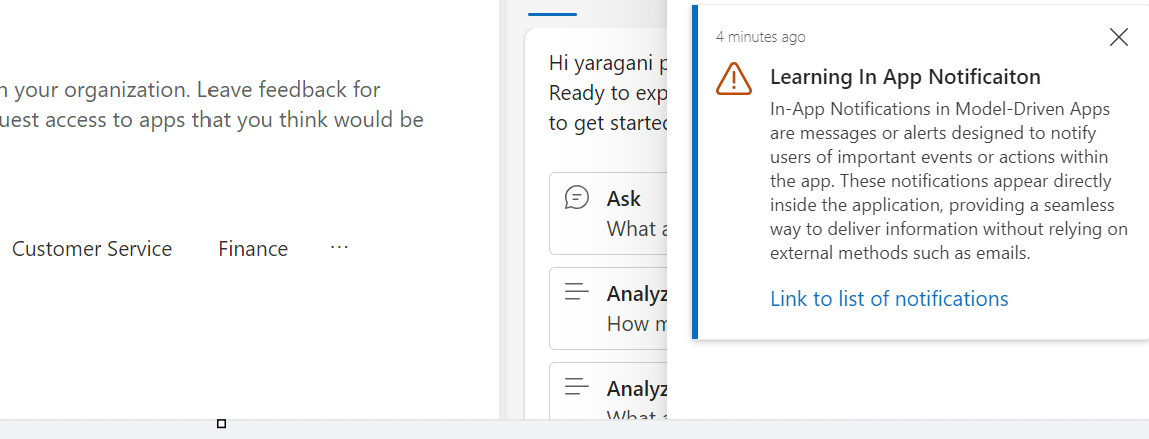
Log in with user account for which the In App Notification is triggered.
Hurray!!!! That’s it, how easy it was to create In App Notification in Low Code manner.
You can even get the code behind this as well…
However, there were other ways to trigger the In App Notification from a Pro Code angle, let’s discuss those as well.
In this case you need to manually turn the In App Notification feature on by going to settings for the Model Driven App as below first.
Notifications can be sent using the SendAppNotification message using SDK.
You can either trigger from and can choose based on your convenience to trigger a similar notification.
Client Scripting
This file contains hidden or bidirectional Unicode text that may be interpreted or compiled differently than what appears below. To review, open the file in an editor that reveals hidden Unicode characters.
Learn more about bidirectional Unicode characters
'body': `In-App Notifications in Model-Driven Apps are messages or alerts designed to notify users of important events or actions within the app. These notifications appear directly inside the application, providing a seamless way to deliver information without relying on external methods such as emails.`,
This file contains hidden or bidirectional Unicode text that may be interpreted or compiled differently than what appears below. To review, open the file in an editor that reveals hidden Unicode characters.
Learn more about bidirectional Unicode characters
["body"] = @"In-App Notifications in Model-Driven Apps are messages or alerts designed to notify users of important events or actions within the app. These notifications appear directly inside the application, providing a seamless way to deliver information without relying on external methods such as emails.",
["ownerid"] = new EntityReference("systemuser", new Guid("00000000-0000-0000-0000-000000000000")),
["icontype"] = new OptionSetValue(100000003), // Warning
["toasttype"] = new OptionSetValue(200000000), // Timed
One of my colleagues asked about Dataverse search, hence I am writing this article on Dataverse Search in Dynamics 365 and in the end, will compare different search options available in Dynamics 365.
Dataverse Search:
In layman terms, Dataverse Search is a powerful search tool that helps you find information quickly across your organization’s data in Microsoft Dataverse, which is the underlying data platform for apps like Power Apps, Dynamics 365, and more, shows you all the related information from across different tables or records in one place.
In short, Dataverse Search is the evolved version of Relevance Search, offering a more robust, faster, and user-friendly search experience including search results for text in documents that are stored in Dataverse such as PDF, Microsoft Office documents, HTML, XML, ZIP, EML, plain text, and JSON file formats. It also searches text in notes and attachments. Before enabling it, just note that once Dataverse search is enabled, it will be affected in all your Model Driven Apps, as of now, just take note.
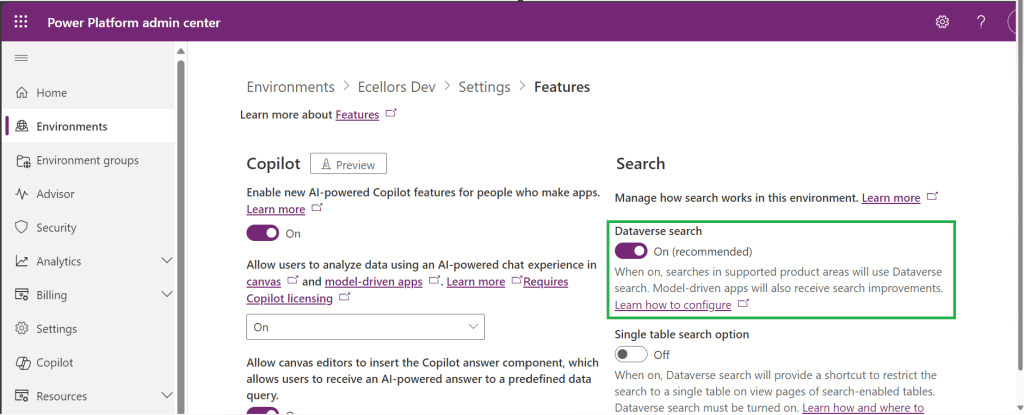
It is on by default, here is where you can now turn off the Dataverse Search:
Click on Environments –> Choose your required environment –> Settings –>Features
3. Disable/Enable the Dataverse search feature.
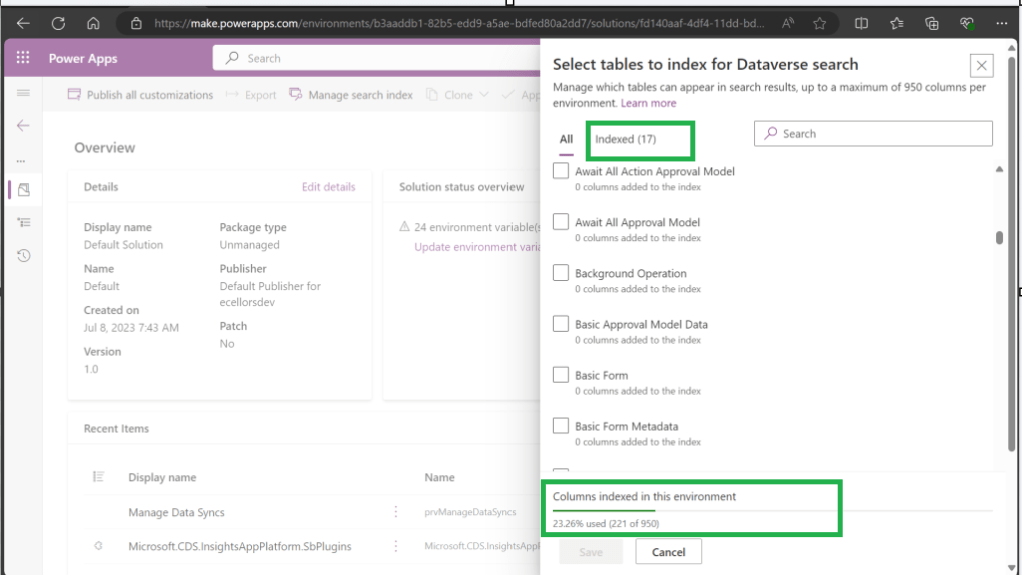
Once enabled, we need to configure the tables for Dataverse Search so that indexing is performed at the backend, in order to do this…
Navigate to https://make.powerapps.com, select your desired solution –> Click on Overview as shown below
Now you need to choose Manage Search Index and you can choose your desired table and fields, there isn’t a limit on the number of tables you can configure, but there is a limit on the number of fields you can configure for an environment, a maximum of 1000 fields are permitted both including system and custom fields, 50 fields are used by system, so you can configure 950 fields.
Just note that some field types are treated as multiple fields in the Dataverse search index as indicated in this table.
Field type
Number of fields used in the Dataverse search index
Lookup (customer, owner, or Lookup type attribute)
3
Option Set (state, or status type attribute)
2
All other types of fields
1
At the bottom of the snap above, you could see the percentage of columns indexed in this environment.
When Dataverse search is enabled, the search box is always available at the top of every page in your app. You can start a new search and quickly find the information that you’re looking for.
When Dataverse search is turned on, it becomes your default and only global search experience for all of your model-driven apps. You won’t be able to switch to quick find search also known as categorized search.
You can also enable Quick actions as shown in the below table
Table
Quick actions
Account
Assign, Share, Email a link
Contact
Assign, Share, Email a link
Appointment
Mark complete, Cancel, Set Regarding, Assign, Email a link
Task
Mark complete, Cancel, Set Regarding, Assign, Email a link
Phone Call
Mark complete, Cancel, Set Regarding, Assign, Email a link
Email
Cancel, Set Regarding, Email a link
Here is the short table comparing all types of searches in Dynamics 365…
Yes. Note: For non-production environments an administrator must manually enable it.
Yes, for the table grid. No, for multiple-table quick find (categorized search). An administrator must first disable Dataverse search before multiple-table grid find can be enabled.
Yes
Single-table search scope
Not available in a table grid. You can filter the search results by a table on the results page.
Available in a table grid.
Available in a table grid.
Multi-table search scope
There is no maximum limit on the number of tables you can search.
Searches up to 10 tables, grouped by a table.
Multi-table search not available.
Search behavior
Finds matches to any word in the search term in any column in the table.
Finds matches to all words in the search term in one column in a table; however, the words can be matched in any order in the column.
Query builder where you can define search criteria for the selected row type. Can also be used to prepare data for export to Office Excel so that you analyze, summarize,or aggregate data, or create PivotTables to view your data from different perspectives.
Searchable columns
Text columns like Single Line of Text, Multiple Lines of Text, Lookups, and Option Sets. Doesn’t support searching in columns of Numeric or Date data type.
All searchable columns.
All searchable columns.
Search results
Returns the search results in order of their relevance, in a single list.
For single-table, returns the search results in a table grid. For multi-table, returns the search results grouped by categories, such as accounts, contacts, or leads.
Returns search results of the selected row type with the columns you have specified, in the sort order you have configured.
Hope you learned something today…if you have any questions, do let me know in the comments…
Thanks for visiting my blog, this post is a continuation of my previous blog post on creating a Copilot, if you haven’t gone through that, I would strongly recommend checking my introductory post on this topic, you can find it here.
Well, so in this blog post, we will see how you can test and publish your bot so your bot development would be complete.
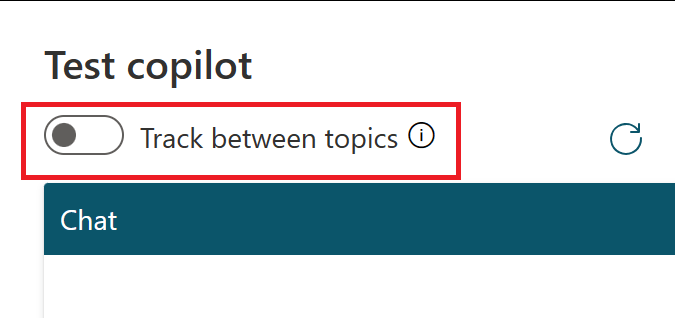
Your bot can be tested, and messages will be displayed on the chat screen.
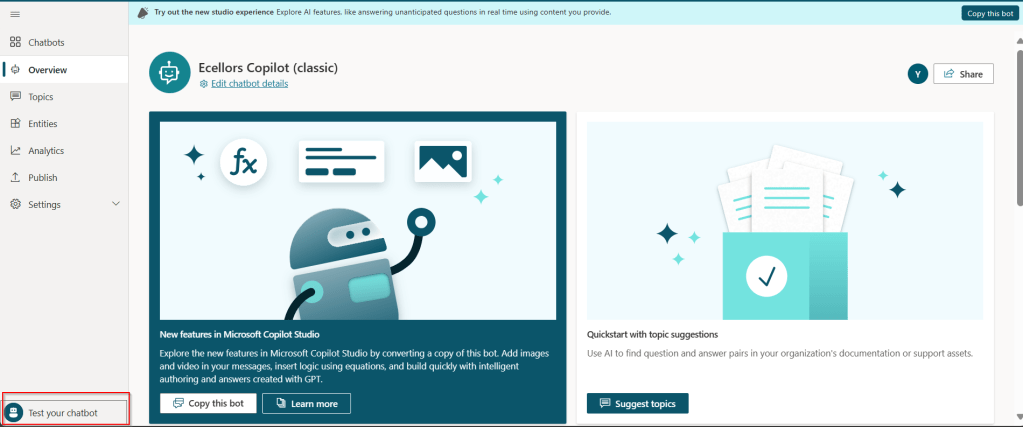
Step 1:Test your Copilot:
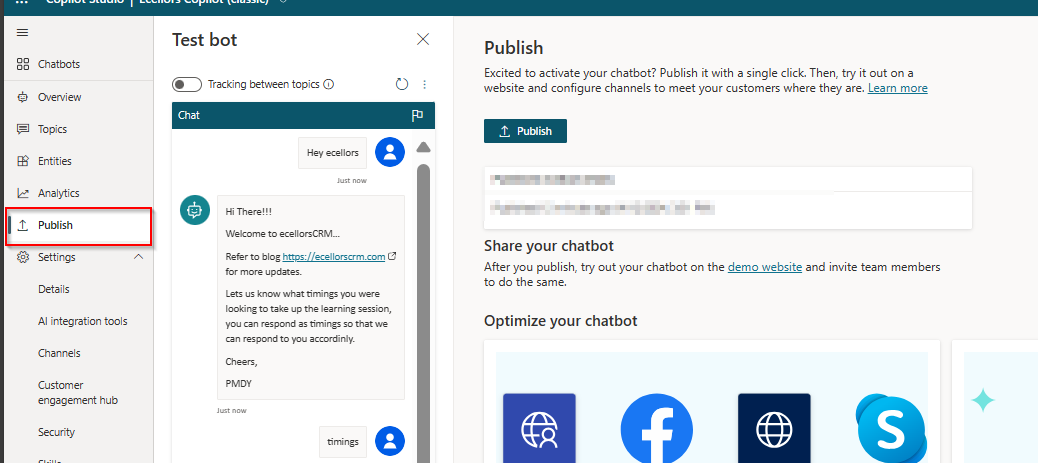
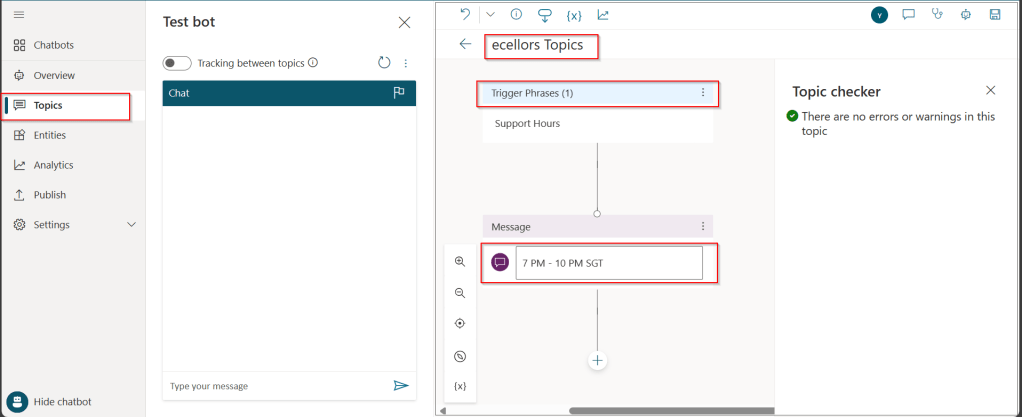
The bot calls the topics based on the trigger phrases you have entered as below.
You can return to the authoring canvas for the topic at any time to revise its conversation path. The Test chat pane will automatically refresh itself when you save changes to a topic.
As you fine-tune your bot, it can be useful to enable tracking between topics so you can follow through the conversation path step by step.
Step 2:Publish your bot
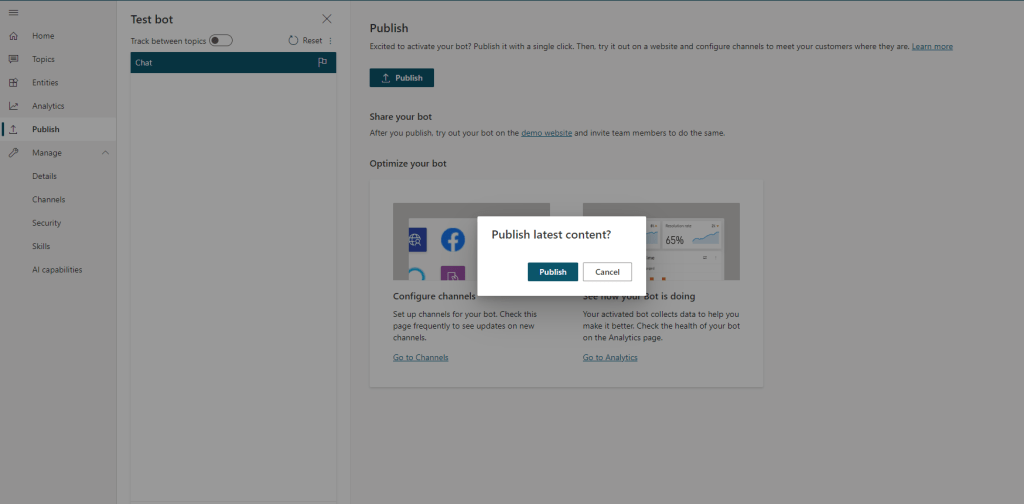
Once you confirm that everything is good and then you can publish your Copilot.
Publishing you bot helps to engage with your customers on multiple platforms or channels.
Each time an update is made, you would need to publish the bot in the Copilot Studio and this will publish the changes to all your respective configured channels. If you haven’t configured any channels, you may proceed to next step to get to know this.
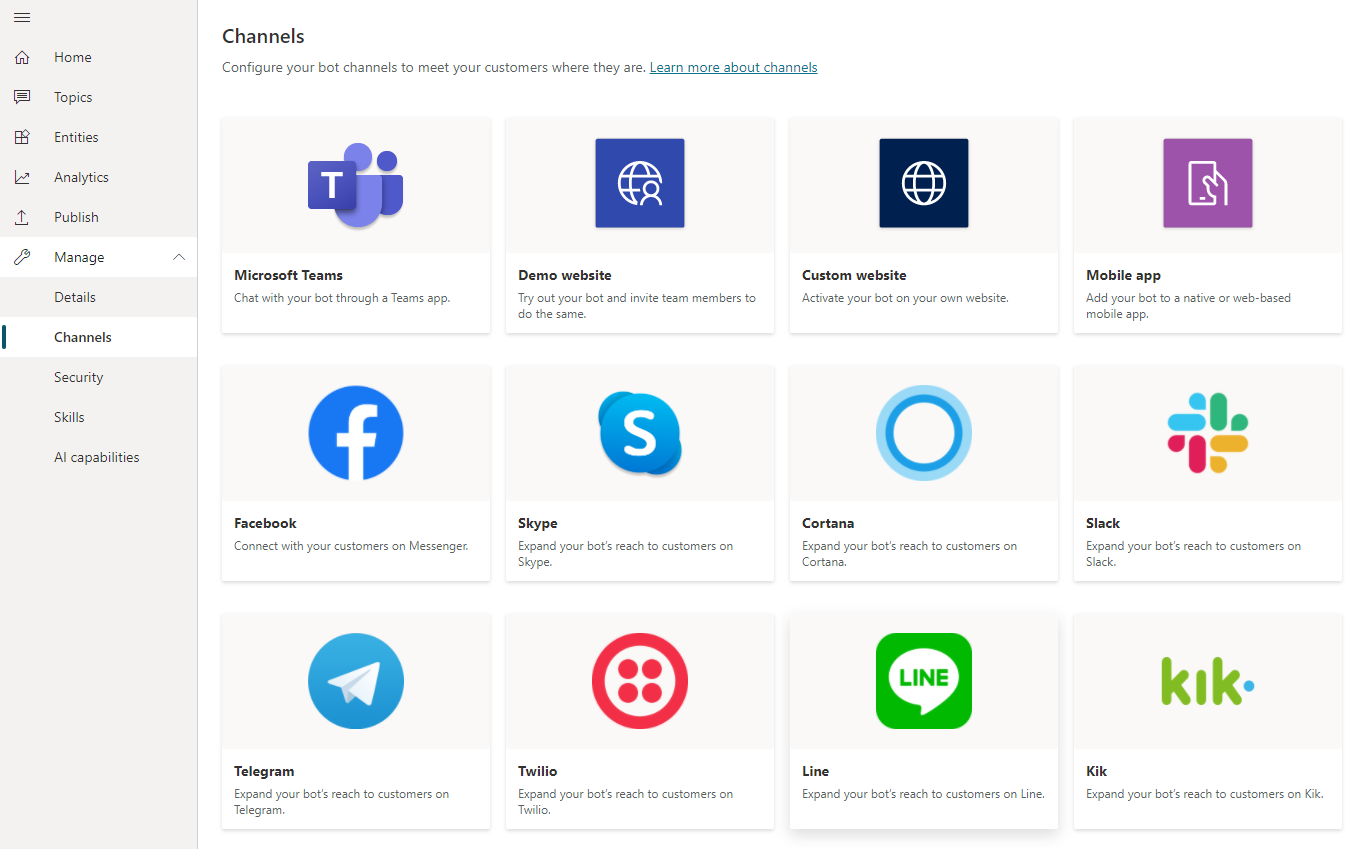
Step 3:Configure Channels
You can see what channels we currently support by selecting Manage and going to the Channels tab in the side navigation pane and each channel may require different setup and configuration.
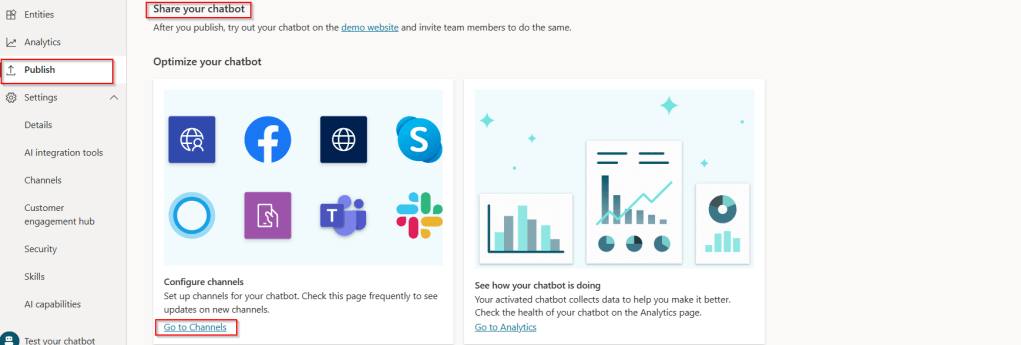
Step 4:Finally let’s see how the Copilot looks like when you embed...
a. Navigate to channels as highlighted from publish tab:
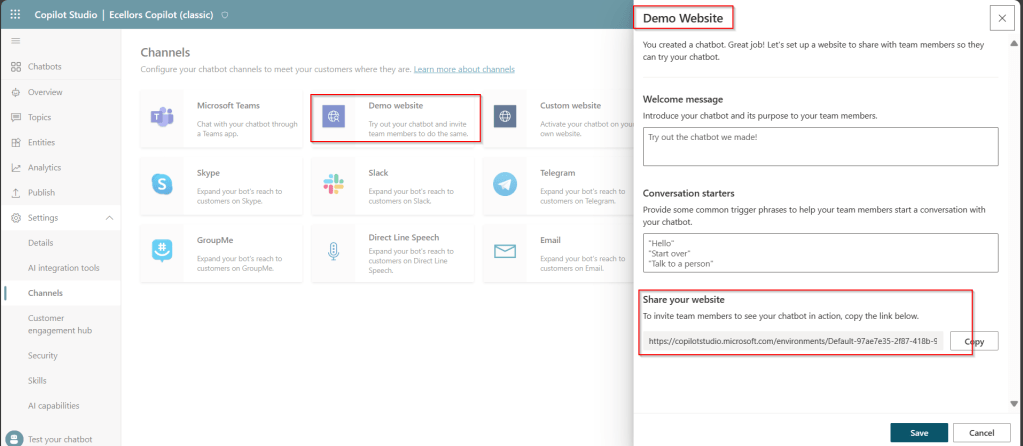
b. Verify if the channels are enabled:
If not enabled, make sure you set the authentication for your Copilot properly for the respective channel to embed your bot. For simplicity, I have chosen No authentication.
c. Find the embed code:
As shown above, you can find the embed code under Share your website.
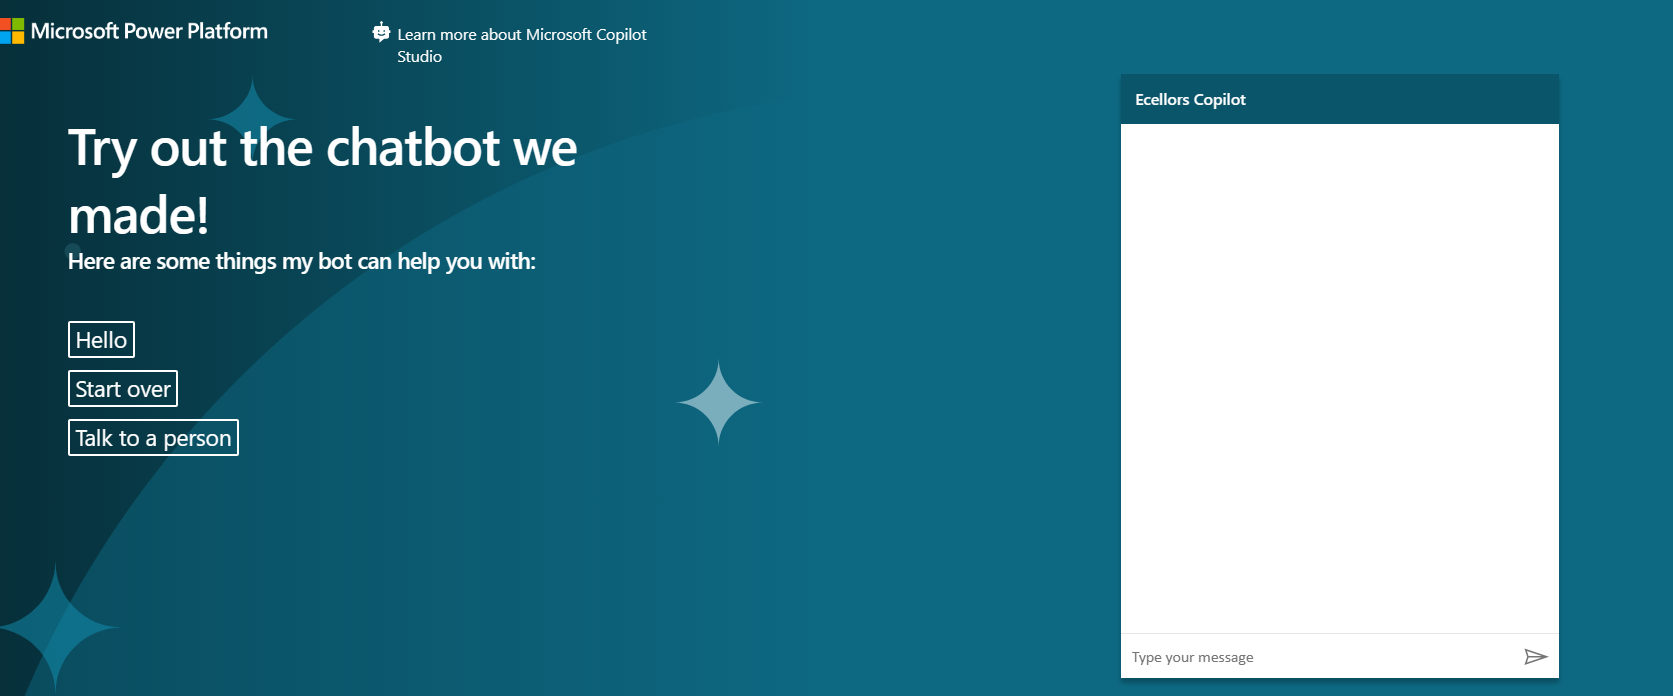
d. Copy the embed code in browser:
You can test out your Copilot in your browser by pasting your embed code and it should look something like below.
Step 5: Bot analytics
a. Do note that there might be one hour of delay between when the conversations occur and when the statistics for those conversations appear in the analytics views
b. All the channels’ analytics will be logged here.
c. You can find the Summary on how your bot is performing, understand how your topics defined are performing and come up with CSAT Scores out of this.
Now that we have learnt how to build a simple Copilot, in the next blog post, I will cover about the Variable Management and Topic Management in Copilots which would help to design your desired topic conversation path for your Chatbot.
In the next few blog posts in this series, I will be talking all about Microsoft Copilot aka Power Virtual Agent from beginner to advanced topics, you might see longer posts but you don’t require any prerequisite knowledge on Copilot to follow.
So, lets’ get started and learn with me in this blog series, let’s dive into the capabilities of Generative AI using #copilot.
Actually, Copilots empowers teams to quickly and easily create powerful bots using a guided, no-code graphical experience.
In this blog post, we will see how you can create a simple Chatbot. Excited? so let’s get started.
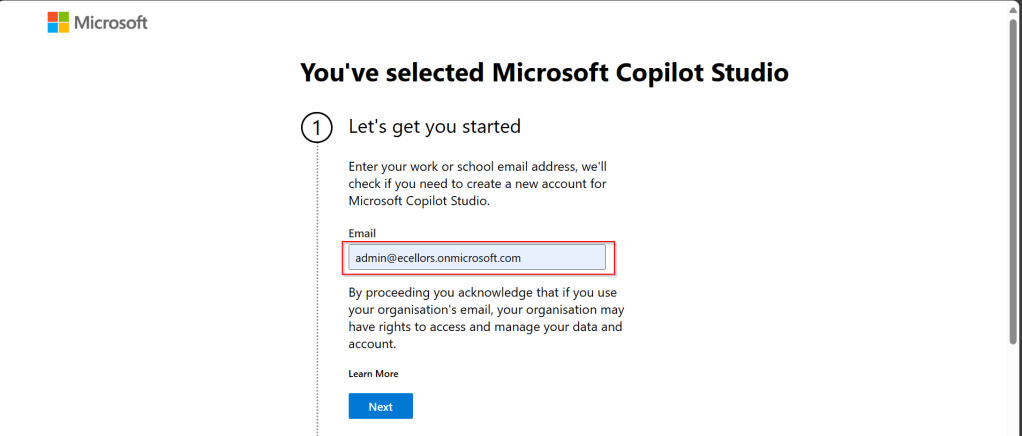
Step 3: Enter your email address and click on Next.
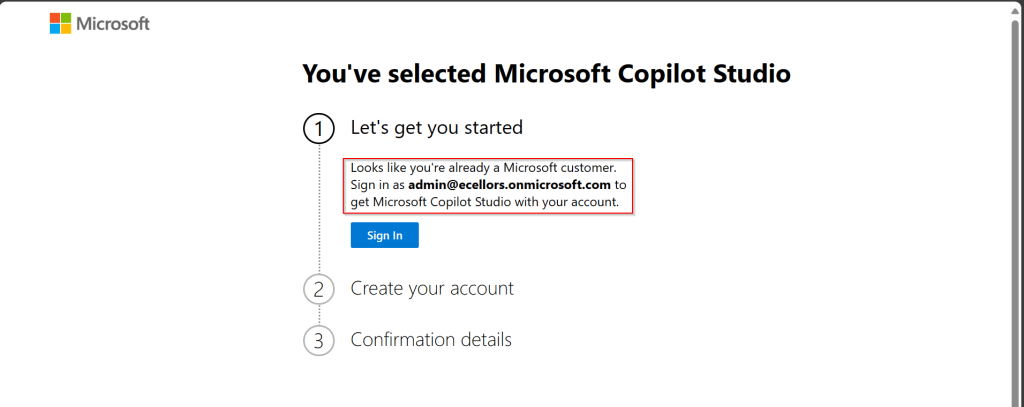
Step 4: In case you have an existing Microsoft 365 Subscription, you will be shown something below.
Step 5: Click on SignIn, I have already had an account in Copilot Studio, in case you don’t have, one will be created.
Step 6:
a. Once you click on Get Started, Copilot Studio opens in a new tab and you will be asked to login once, enter your Signin details.
b. In case you previously logged created a Copilot Studio trial, you can continue using it, else extend it to 30 days if requested. Click on Done at the bottom.
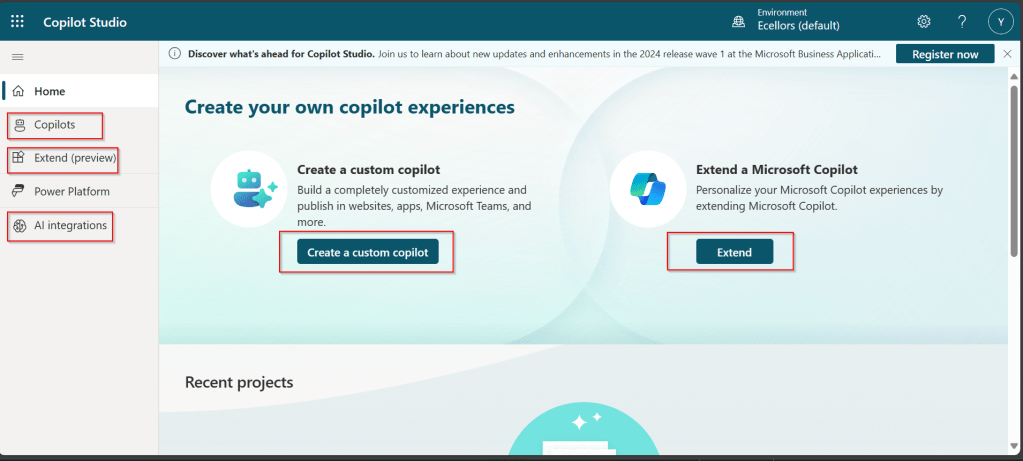
Step 7: Below is the home page of Copilot Studio.
I will be talking about each of the highlighted topics in great detail in the upcoming posts.
Note: Copilots are supported only in certain locations listed in the supported data locations, with data stored in respective data centers. If your company is located outside of the supported data locations, you need to create a custom environment with Region set to a supported data location before you can create your chatbot.
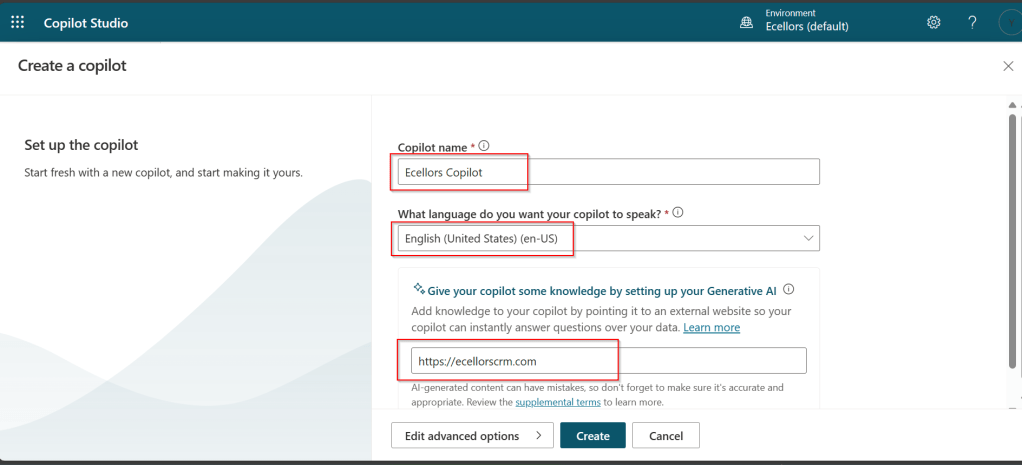
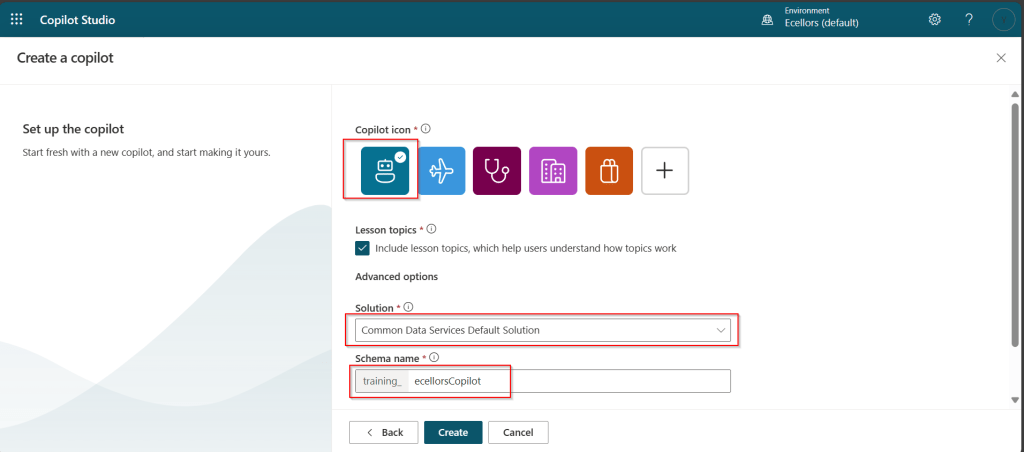
Step 8:In this step, we will create a Copilot, so click on New Copilot
Step 9: I have provided a name; chosen a language and we can provide an existing website to utilize the Generative AI Capabilities built in Copilot Studio.
So, here I have provided my blog address. By using this, Copilot can generate suggested topics which you have option to add to your existing topics.
Step 10:
a. Click on advanced options; you will be able to choose an icon for the Copilot
b. You can optionally include Lesson Topics
c. Choose an existing solution you wish to add this Copilot to
d. Choose appropriate Schema name.
e. You can optionally enable voice capabilities by choosing the language in which your copilot wants to speak to.
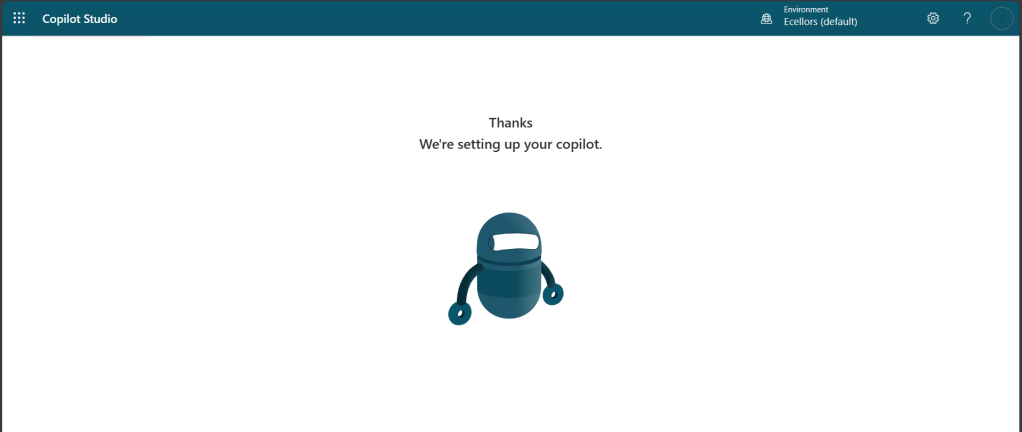
Step 11: You will be shown the below screen and within a few seconds, your Copilot will be ready.
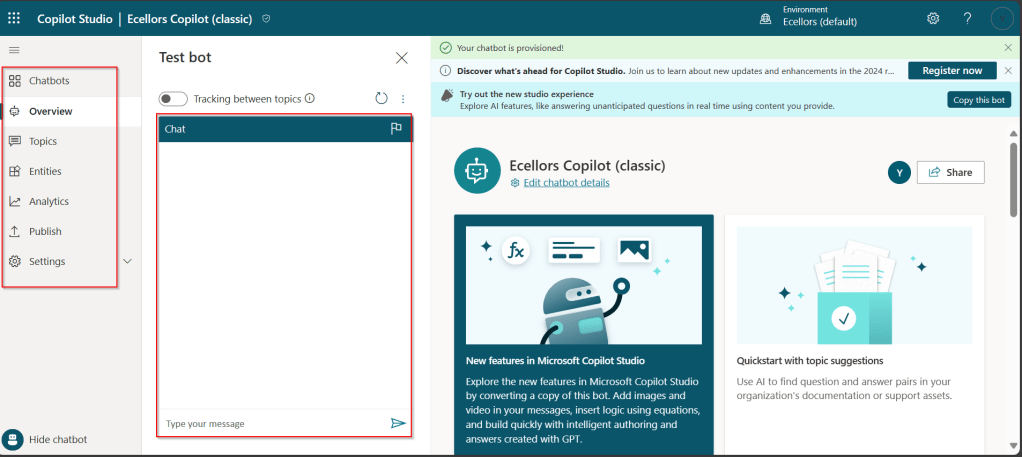
Step 12: This is the main page of your Copilot; you will also be able to add additional Copilots or delete the Copilot.
Step 13: Now, let’s understand Topics what one of the building blocks of Copilot which are nothing but predefined categories or subjects which can help to classify and organize the KB/Support articles.
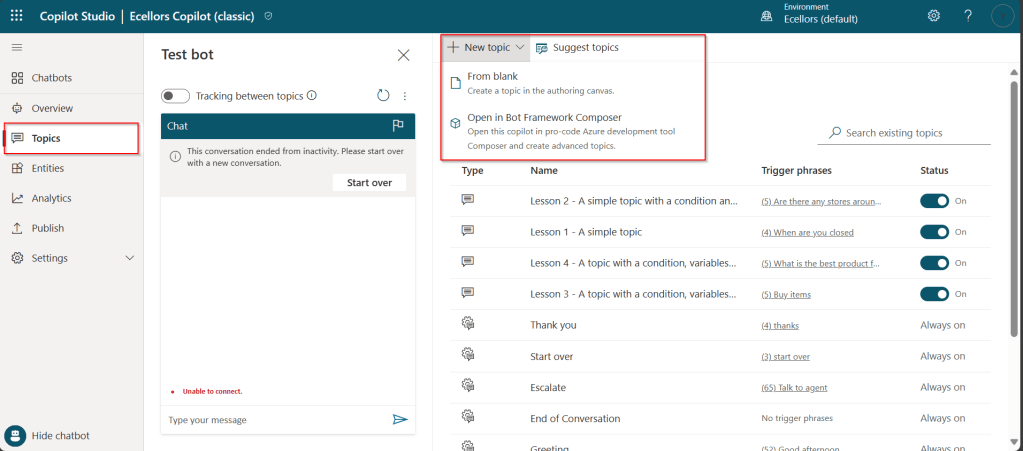
The topics shown on the right are prebuilt topics for the Copilot you have just created. Here you may wish to create new topics as necessary.
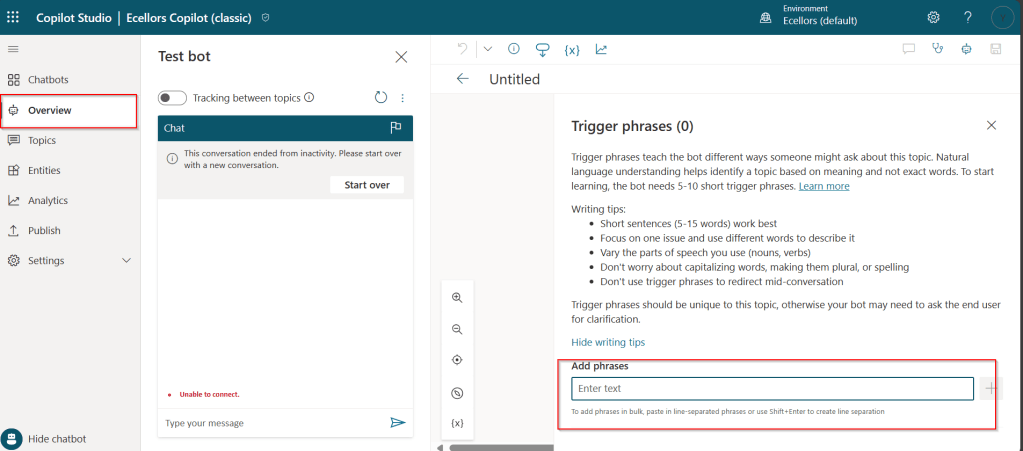
Step 14: Trigger phrases are those which customer enters in the chat window to start the conversation which then calls the relevant topics. There can be multiple trigger phrases for a single topic.
You may click to create a topic which then asks you to provide the trigger phrases, when you click to add a topic, the Trigger phrases node and a blank Message node are inserted for you.
Copilot opens the topic in the authoring canvas and displays the topic’s trigger phrases. You can add up to 1000 topics in a Copilot.
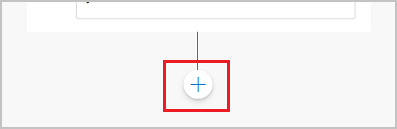
Step 15: You can add additional nodes by selecting the Plus (+) icon on the line or branch between or after a node.
Step 16: When you were adding a new node, you can choose from the below options available.
You can either use any of the available options as above..
a. Ask a question
If you want to ask a question and get response from end user, you may do so by adding a node, click on Ask a question.
For example, I choose Multiple choice options.
Based on what you enter in the Identify field, you can enter what options user may have. You can nodes further to create branching logic
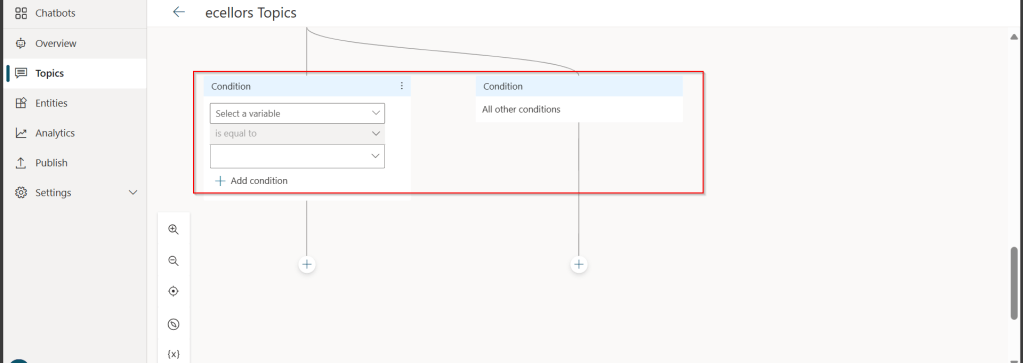
b. Add a condition
You can add a condition in the canvas as below to take your Copilot branch out conditionally.
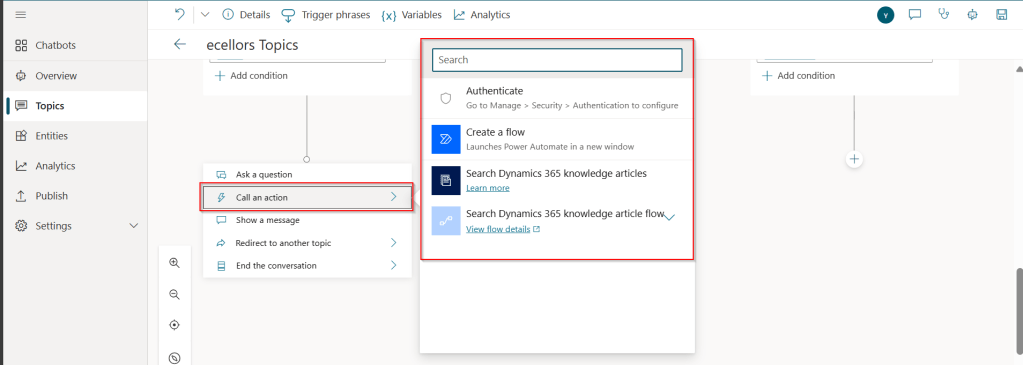
c.Call an action: The options shown below are self explanatory. You can branch out with the possible options.
d. Show a message
You may choose to show a message to the user by entering your message in the text box available.
d. Goto another topic
f. End the conversation:
Finally, you can end the conversation by choosing to end the conversation with the available options or you can transfer to an agent to take the user queries further.
Step 17:
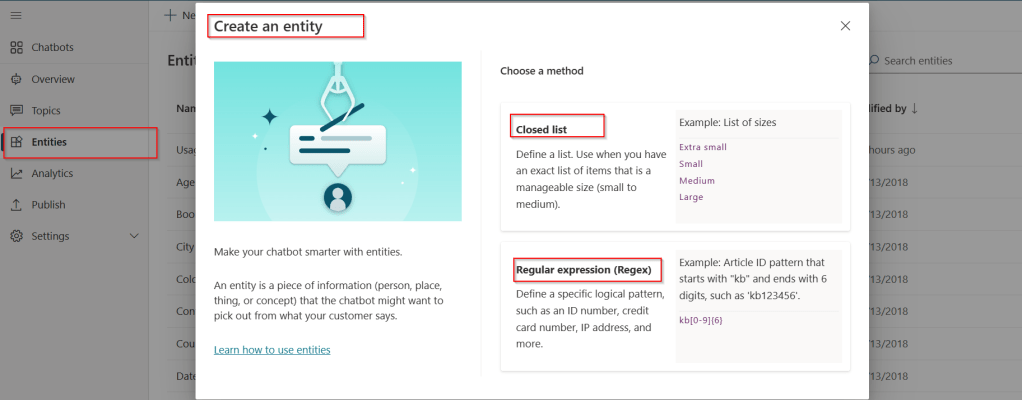
Copilot conversations are all about natural language understanding. Entity is the fundamental aspect which can be recognized from user’s input.
It can be simply can be thought real world subject like Person name, Phone number, Postal Code etc. We have system as well as custom entities while building.
You can also build custom entities you can choose from the options available.
Now that you have seen what are the building blocks of Copilot, in the upcoming blog posts let’s see on how to test and publish your copilots.