Hi Folks,
In this post, I will be talking about the features of Dataverse Accelerator in brief. Actually, the Microsoft Dataverse accelerator is an application that provides access to select preview features and tooling related to Dataverse development, it is based on Microsoft Power Pages. This is totally different from Dataverse Industry Accelerator.
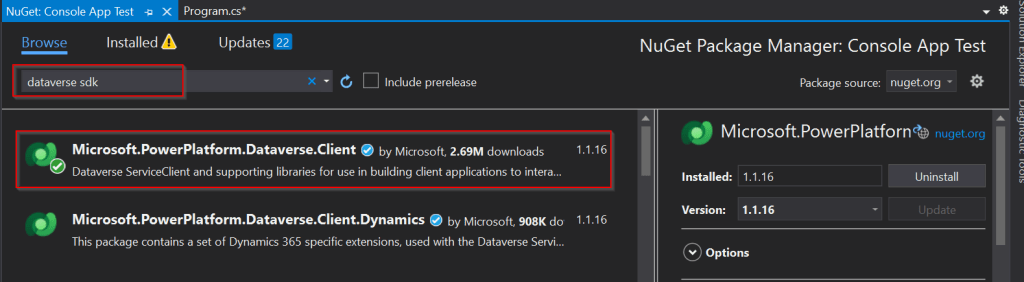
Dataverse accelerator app is automatically available in all new Microsoft Dataverse environments. If your environment doesn’t already have it, you can install the Dataverse accelerator by going to Power Platform Admin Center –> Environments –> Dynamics 365 Apps –> Install App –> Choose Dataverse Accelerator
You can also refer to my previous blog post on installing it here if you prefer
Once installed, you should see something like below under the Apps

On selection of the Dataverse Accelerator App, you should see something like below, do note that you must have App-level access to the Dataverse accelerator model driven app, such as system customizer or direct access from a security role.

Now let’s quickly see what are features available with Dataverse Accelerator
| Feature | Description |
|---|---|
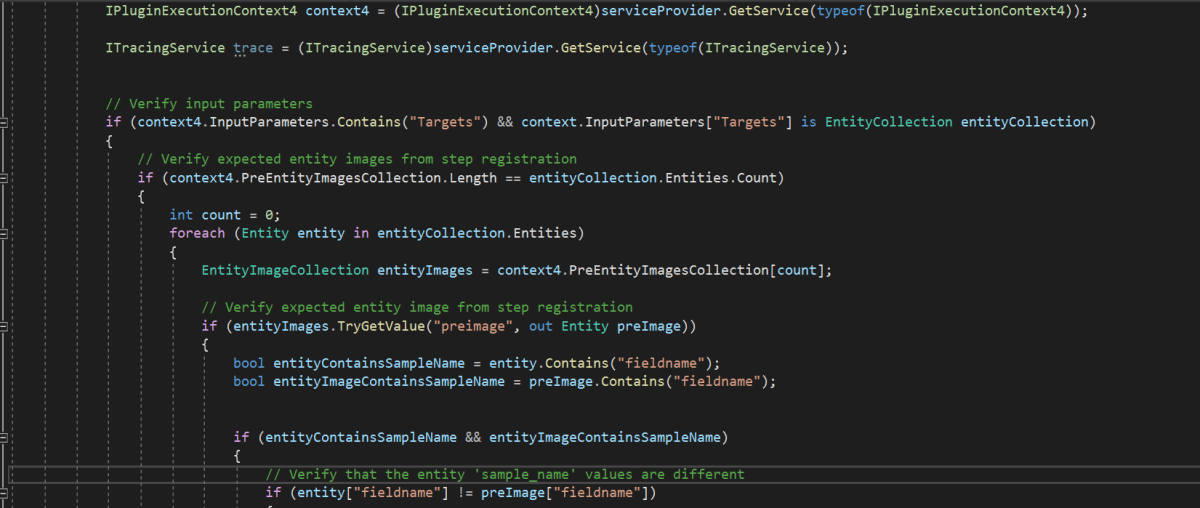
| Low-code plug-ins | Reusable, real-time workflows that execute a specific set of commands within Dataverse. Low-code plug-ins run server-side and are triggered by personalized event handlers, defined in Power Fx. |
| Plug-in monitor | A modern interface to surface the existing plug-in trace log table in Dataverse environments, designed for developing and debugging Dataverse plug-ins and custom APIs. Do you remember viewing Plugin Trace logs from customizations, now you don’t need system administrator role to view trace logs, giving access to this app will do, rest everything remains the same. |
| API Playground | A preauthenticated software testing tool which helps to quickly test and play with Dataverse API’s. |
I wrote a blog post earlier on using Low Code Plugins, you may check it out here, while using Plugin Monitor is pretty straight forward.
You can find my blog post on using Postman to test Dataverse API’s here.
Now let’s see how can use the API Playground, basically you will be able to test the below from API Playground similar to Postman. All you need to open the API Playground from Dataverse accelerator. You will be preauthenticated while using API Playground.
| Type | Description |
|---|---|
| Custom API | This includes any Dataverse Web API actions, functions from Microsoft, or any public user-defined custom APIs registered in the working environment. |
| Instant plug-in | Instant plug-ins are classified as any user-defined workflows registered as a custom API in the environment with a related Power Fx Expressions. |
| OData request | Allows more granular control over the request inputs to send OData requests. |

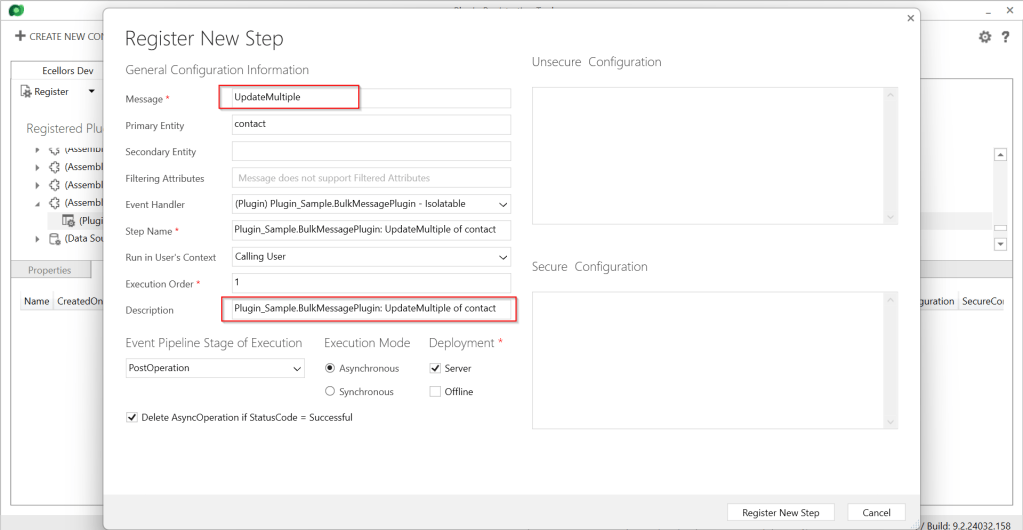
Custom API, Instant Plugin – You select the relevant request in the drop down available in API Playground and provide the necessary input parameters if required for your request
OData request – Select OData as your request and provide the plural name of the entity and hit send
After a request is sent, the response is displayed in the lower half of your screen which would be something like below.

I will update this post as these features get released in my region(APAC), because at the time of writing this blog post, this API Playground feature is being rolled out globally and was still in preview.
The Dataverse accelerator isn’t available in GCC or GCC High environments.
Hope learned something about Dataverse Accelerator.
Cheers,
PMDY