Are you a Power Platform or Dynamics 365 CE Developer, you would definitely need to work on Plugin Registration tool at any given point of time and having a local application for Plugin Registration tool greatly helps…in this post, I will show a little different way to install Plugin registration tool and that too very easily.
Well, this approach is especially useful to me when I got a new laptop and need to work on Plugin Registration Tool where the Plugins already build for the implementation.
First 3 ways might have known to everyone through which you can download Plugin registration tool…do you know there is fourth approach as well…
Because there were limitations to use these approaches at least in my experience, I found the fourth one very useful.
XrmToolBox – Not quite convenient to profile and debug your plugins
https://xrm.tools/SDK – Dlls in the downloaded folder will be blocked and would need to manually unblock the DLL’s for the Tool to work properly
CLI – People rarely use this.
Just do note that the approach is very easy and works only if you have a Plugin Project already. Please follow the steps below
Just open the Plugin project.
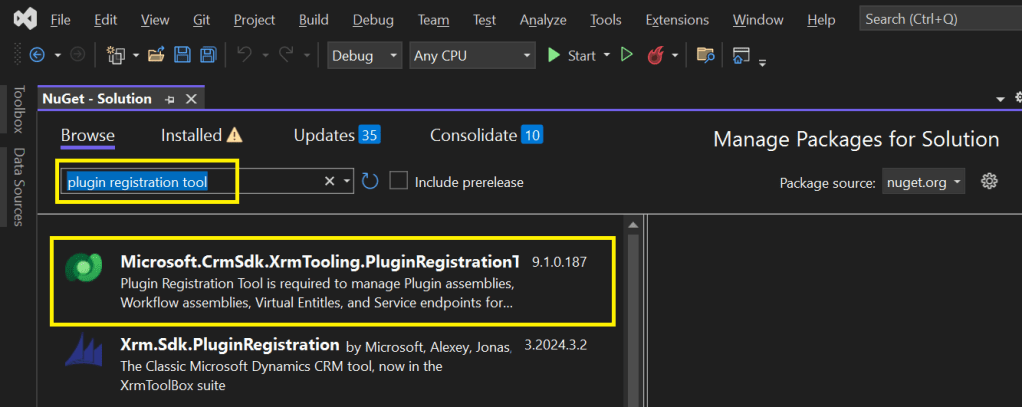
Right click on the solution and choose manage Nuget Packages for the solution
Search for Plugin Registration tool as below
4. Choose the Plugin project and click install, confirm the prompt and agree the license agreement shown
5. Once installed, next go to the Project folder in the local machine.
6. Navigate to Packages folder, you should see a folder for Plugin Registration tool below
7. There you go, you can open the Plugin Registration Application under tools folder. You can undo the changes for the Assembly it is linked to Source control.
That’s it, how easy it was? Hope this would help someone.
In Dynamics 365, a Polymorphic Lookup is a powerful feature that allows you to associate a single lookup field with multiple different entities. This feature is particularly useful when you want a field to reference multiple related entities, providing greater flexibility and efficiency in your CRM applications.
What is a Polymorphic Lookup?
A Polymorphic Lookup is a special type of lookup field that can refer to multiple entities rather than just one. For example, a single “Related Entity” field can refer to either a Contact, Account, or Opportunity, making it versatile for various business scenarios. This capability is referred to as “polymorphism” because the lookup field can resolve to different types of entities at runtime.
Example Scenario:
Consider a sales scenario where a “Related Entity” can be a Customer, but the customer could be either an Account or a Contact. Rather than having two separate lookup fields (one for Account and another for Contact), you can create a polymorphic lookup field, which makes your user interface simpler and more streamlined.
How Does Polymorphic Lookup Work in Dynamics 365?
In Dynamics 365, polymorphic lookup fields are implemented as part of the Relationship between entities. The key concept here is the EntityReference, which dynamically resolves to the appropriate entity type (e.g., Account, Contact, etc.) based on the actual value selected by the user.
Field Definition:
When defining a lookup field, you define a Relationship where the field can refer to multiple target entities.
The system uses the Type and Id to determine the related entity.
Lookup Resolution:
At runtime, when a user selects a value in the polymorphic lookup field, the system dynamically resolves which type of entity to link to.
The field displays the appropriate name (e.g., Account or Contact) based on the entity that the user selects.
Creating Polymorphic Lookups in Dynamics 365
Polymorphic lookup fields are typically used in the following types of scenarios:
Custom Relationships: When you need to create a lookup that can reference multiple different entities.
Shared Relationship: For cases where one relationship applies to more than one entity, such as a lookup that could refer to either a Contact or an Account.
Steps to Create a Polymorphic Lookup Field:
Navigate to the Customization Area:
Go to the Settings area in Dynamics 365 and select Customizations.
Select Customize the System to open the solution where you want to add the polymorphic lookup field.
Create a New Field:
In the relevant entity, click on Fields, and then select New.
Choose the Lookup data type for the field.
Define the Polymorphic Lookup:
Under the Related Entity section, select Custom to define the multiple entities this lookup should support.
Select the Entity Relationships where this lookup should point to multiple entities.
Save and Publish:
Save the field and publish your customizations to apply the changes.
Example: Setting Up Polymorphic Lookup for Customer
Suppose you’re designing a custom Case entity and you want to add a lookup for the Customer. Instead of creating separate lookups for Contact and Account, you can create a polymorphic lookup that links to either an Account or Contact as the Customer.
Steps:
Create a Customer Lookup field in the Case entity.
Define the Customer Lookup field to support both Account and Contact entities.
After publishing the field, the user will see the lookup field and will be able to choose either an Account or Contact as the Customer.
Use Cases for Polymorphic Lookup
Consolidating Related Data:
Polymorphic lookups help streamline user experience by consolidating multiple lookups into a single field, especially when dealing with common relationships across different entities.
Reducing Redundancy:
Rather than having separate lookup fields for Account and Contact in every related form, you can reduce redundancy by using polymorphic lookups, which allows referencing both entities in one field.
Improved Reporting and Analytics:
When data is related across multiple entities, using a polymorphic lookup can make it easier to pull reports and perform analysis without requiring multiple joins or complex queries.
Considerations and Limitations
While polymorphic lookups are powerful, they come with certain limitations:
Limited to Certain Fields: Polymorphic lookups are supported only in certain system fields (like Regarding in activities), but may not be available for every custom scenario.
API Handling: When working with the Dynamics 365 Web API, the polymorphic lookup is handled through special attributes that require careful parsing to identify the correct entity type.
UI Considerations: Although polymorphic lookups streamline the user interface, they can also confuse users who are unfamiliar with the concept. It’s important to have clear documentation and training for users on how to use these fields.
Conclusion
Polymorphic lookups in Dynamics 365 provide an elegant solution for scenarios where a lookup field needs to refer to multiple entity types. By understanding and using polymorphic lookups effectively, you can streamline your CRM solutions, reduce redundancy, and improve your application’s flexibility. It’s important to consider the limitations and ensure that users are properly guided in utilizing these fields within your system.
You can easily create this Polymorphic Lookup from XrmToolBox as well…
Understanding Screens and Navigation – How to structure an app with multiple screens.
Working with Data Sources – Connecting to SharePoint, Dataverse, Excel, and other sources.
Forms and Galleries – Displaying and capturing data effectively.
Mastering Power Fx – Key formulas and best practices.
User Experience and UI Design – Creating a responsive and user-friendly interface.
Using Components for Reusability – Making apps scalable and maintainable.
Working with Media and Attachments – Adding images, videos, and file uploads.
Performance Optimization Tips – Best practices to make apps faster.
Offline Capabilities in Canvas Apps – How to work with apps when offline.
Integrating Power Automate with Canvas Apps – Automating processes.
AI and Copilot Features in Canvas Apps – Adding intelligence to apps.
Advanced Security and Role-Based Access – Controlling user access and permissions.
Publishing and Managing Your Canvas Apps – Deployment, versioning, and governance.
Firstly, let’s start with some simple introduction for this post…
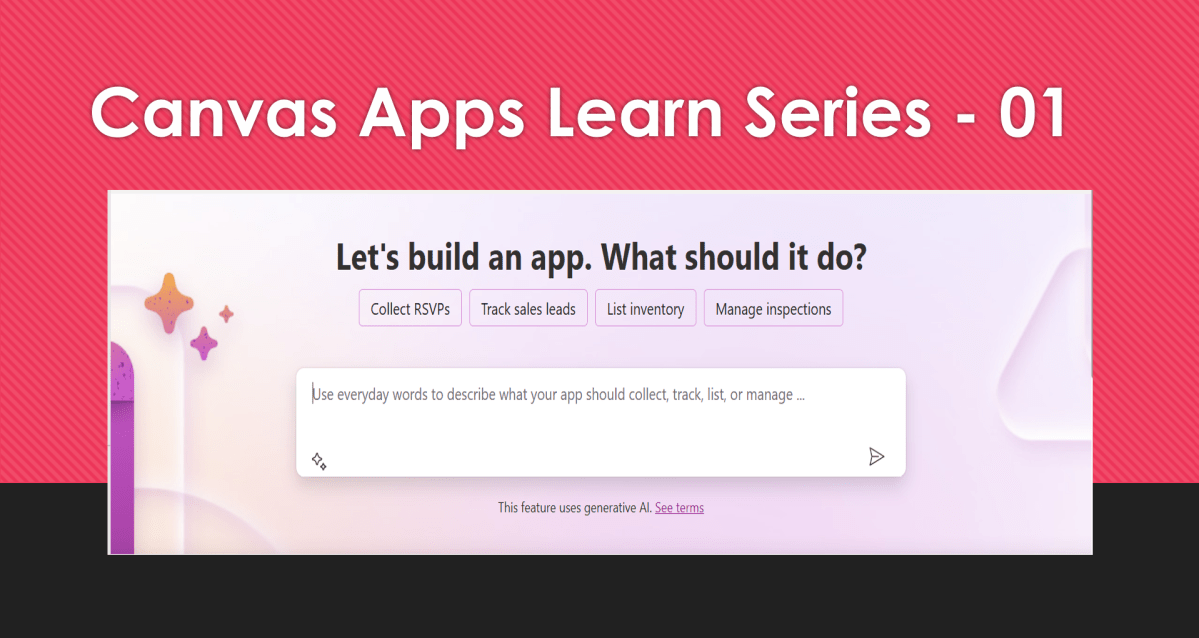
What Are Canvas Apps?
Canvas Apps are a powerful low-code development tool within Microsoft Power Platform that allows users to build custom business applications with a drag-and-drop interface. Unlike model-driven apps, which rely on structured data models, Canvas Apps provide full control over the user interface, enabling developers and business users to design highly customized applications tailored to specific business needs.
Canvas Apps can be used to create simple applications for internal business processes or sophisticated applications with multiple screens, data interactions, and integrations with other Microsoft and third-party services. Users can design these apps using Power Apps Studio, a web-based development environment that provides a range of components, such as buttons, galleries, forms, and media controls, to create intuitive and responsive applications.
Why Are Canvas Apps Important?
Canvas Apps bring significant value to businesses and developers by providing:
Low-Code Development – Build applications with minimal coding, making app development accessible to both developers and non-developers. Power Fx, a formula-based language, enables business logic implementation with ease.
Customization & Flexibility – Unlike model-driven apps that follow a predefined data structure, Canvas Apps allow users to freely design screens, layouts, and controls, ensuring the app meets unique business requirements.
Seamless Data Integration – Connect to over 800+ data sources, including SharePoint, Dataverse, Excel, SQL Server, and third-party APIs, ensuring seamless access to enterprise data.
Cross-Platform Compatibility – Run apps on web browsers, mobile devices (iOS & Android), and embedded within Microsoft Teams, SharePoint, and Dynamics 365.
Integration with Power Platform – Enhance apps with Power Automate for automation workflows, Power BI for data visualization, and AI Builder for AI-driven insights and intelligent automation.
Rapid Prototyping & Deployment – With the drag-and-drop interface and prebuilt templates, businesses can quickly prototype and deploy applications without long development cycles.
Security & Compliance – Apps built using Canvas Apps inherit Microsoft’s security infrastructure, allowing role-based access control (RBAC) and compliance with enterprise security standards.
Real-World Use Cases
Canvas Apps can be leveraged across industries to improve efficiency and streamline operations. Some common real-world use cases include:
Expense Management App – Employees can submit expenses with receipts, managers can approve them, and finance teams can generate reports.
Inventory Management System – Track stock levels, reorder inventory, and generate reports in real-time.
Incident Reporting App – Employees can report workplace incidents with photos, location, and real-time status updates.
Customer Feedback App – Collect customer feedback through mobile-friendly forms and analyze responses with Power BI.
Field Service Management – Field workers can access work orders, update job statuses, and capture customer signatures through mobile devices.
HR Onboarding App – Manage the onboarding process for new employees with guided forms, policy documents, and task checklists.
Getting Started with Canvas Apps
To start building a Canvas App, follow these steps:
Click on ‘Create’ and select ‘Canvas App from Blank’
Choose a layout (Tablet or Mobile) based on your app’s intended use
Design your app using Power Apps Studio:
Add Screens: Home screen, forms, galleries, etc.
Insert Controls: Buttons, text inputs, dropdowns, and images
Connect Data Sources: Link to Dataverse, SharePoint, SQL, etc.
Apply Business Logic: Use Power Fx formulas to create dynamic interactions
Test the App: Use Preview mode to validate functionality
Publish and Share Your App: Deploy the app and control access using Microsoft Entra ID (Azure AD)
Best Practices for Building Canvas Apps
Plan Your App Structure – Define screens, navigation, and key functionalities before starting.
Optimize Performance – Reduce unnecessary data calls and use delegation-friendly queries.
Use Components for Reusability – Create custom components for commonly used UI elements.
Ensure Responsive Design – Design layouts that work across multiple device sizes.
Leverage Power Automate for Automation – Automate approvals, notifications, and data processing.
What’s Next?
In the next post, we’ll walk through setting up your first Canvas App from scratch, covering app layout, adding controls, and connecting to a data source.
In this post, I will be talking about the features of Dataverse Accelerator in brief. Actually, the Microsoft Dataverse accelerator is an application that provides access to select preview features and tooling related to Dataverse development, it is based on Microsoft Power Pages. This is totally different from Dataverse Industry Accelerator.
Dataverse accelerator app is automatically available in all new Microsoft Dataverse environments. If your environment doesn’t already have it, you can install the Dataverse accelerator by going to Power Platform Admin Center –> Environments –> Dynamics 365 Apps –> Install App –> Choose Dataverse Accelerator
You can also refer to my previous blog post on installing it here if you prefer
Once installed, you should see something like below under the Apps
On selection of the Dataverse Accelerator App, you should see something like below, do note that you must have App-level access to the Dataverse accelerator model driven app, such as system customizer or direct access from a security role.
Now let’s quickly see what are features available with Dataverse Accelerator
Reusable, real-time workflows that execute a specific set of commands within Dataverse. Low-code plug-ins run server-side and are triggered by personalized event handlers, defined in Power Fx.
A modern interface to surface the existing plug-in trace log table in Dataverse environments, designed for developing and debugging Dataverse plug-ins and custom APIs. Do you remember viewing Plugin Trace logs from customizations, now you don’t need system administrator role to view trace logs, giving access to this app will do, rest everything remains the same.
A preauthenticated software testing tool which helps to quickly test and play with Dataverse API’s.
I wrote a blog post earlier on using Low Code Plugins, you may check it out here, while using Plugin Monitor is pretty straight forward.
You can find my blog post on using Postman to test Dataverse API’s here.
Now let’s see how can use the API Playground, basically you will be able to test the below from API Playground similar to Postman. All you need to open the API Playground from Dataverse accelerator. You will be preauthenticated while using API Playground.
Instant plug-ins are classified as any user-defined workflows registered as a custom API in the environment with a related Power Fx Expressions.
OData request
Allows more granular control over the request inputs to send OData requests.
Custom API, Instant Plugin – You select the relevant request in the drop down available in API Playground and provide the necessary input parameters if required for your request
OData request – Select OData as your request and provide the plural name of the entity and hit send
After a request is sent, the response is displayed in the lower half of your screen which would be something like below.
I will update this post as these features get released in my region(APAC), because at the time of writing this blog post, this API Playground feature is being rolled out globally and was still in preview.
The Dataverse accelerator isn’t available in GCC or GCC High environments.
Hope learned something about Dataverse Accelerator.
This sounds good for those who are Pro Dev and also those working on Fusion teams (Pro + Low Code), as well. Just note, all these features are in preview or experimental features and are available in US Preview Region now as they were just released in the Microsoft Build 2024 last week. Public preview of these features is expected to be released in June 2024, so you can then try out in your region as well. If you want to check these out now, spin up a trial in US Preview region.
These are the top new features
View the Code behind the Canvas Apps
Use Copilot to generate comments and expressions for your Canvas Apps
Integrate Canvas Apps with GitHub
Feature #1:View the Code behind the Canvas Apps
Now you can view the code behind your Canvas Apps, besides the screen where the components reside, click on the ellipses as below
You should be able to see the YAML source code for your Canvas App, the code is currently read only, you can click on Copy code option in the above screen at the bottom of page.
Make the necessary changes to the YAML code, create a new blank screen and you can then copy the YAML code to recreate the previous screen for which you copied the YAML code into a new screen if you wish you.
Here I will copy the code for the container inside, then I will create a new Blank screen
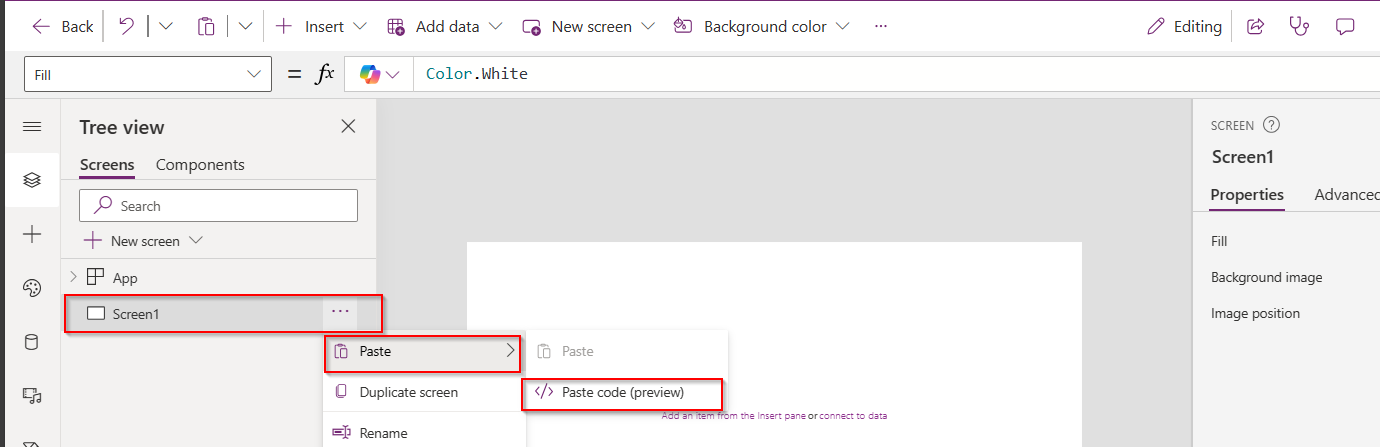
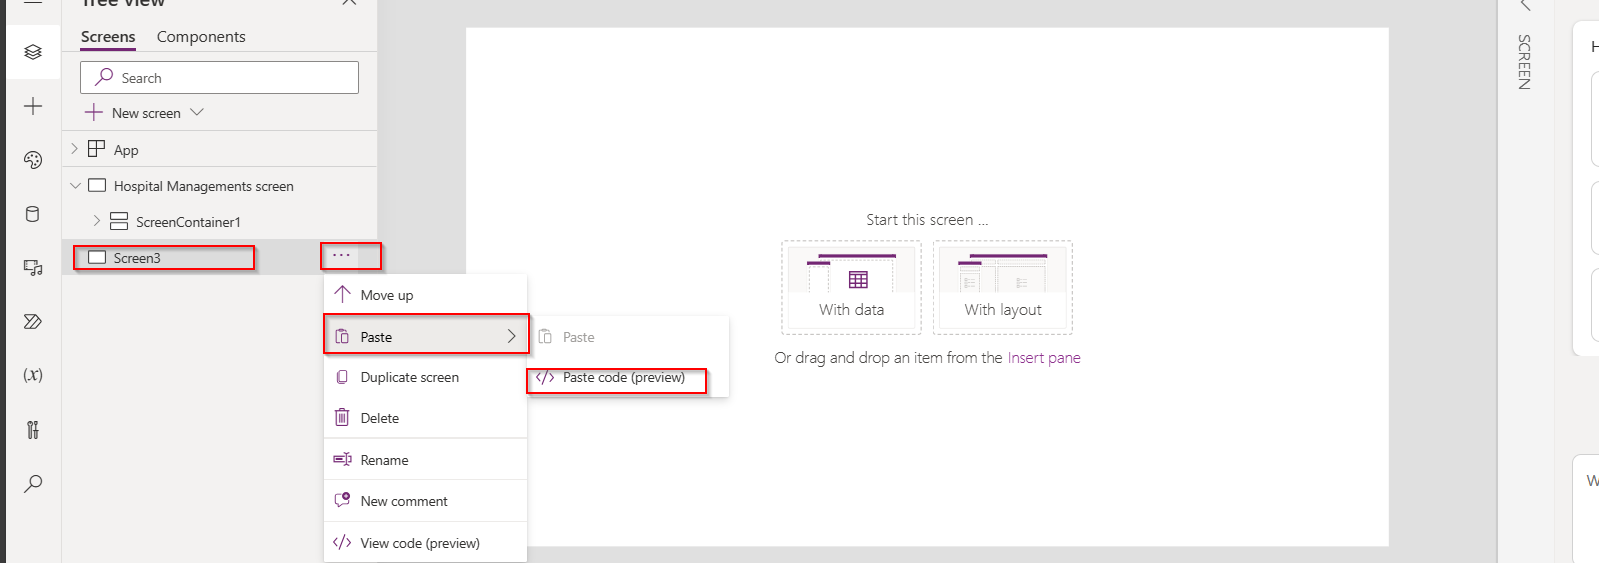
Once blank screen is added, expand it so that it occupies the entire size of the App, then click on Paste as below
Give it a minute, your new screen is now ready with container inside as below e.g here it was Screen3, just rename this accordingly.
How easy it was…. make sure you copy it to relevant item, meaning if you copied the code of container, you could only copy it to another container and not a screen.
Feature #2: Use Copilot to generate comments and expressions for your Canvas Apps
Do you want to generate comments for the expressions you wrote. Or have you forgot the logic which you have written for Canvas Apps long time back, don’t worry, use this approach.
Let’s say, I am choosing OnSelect Property, I have the below formula
Let’s ask Copilot what this mean, click on the Copilot icon available as below
Choose to explain the formula
So now you click on Copy option available and paste it above your command, this serves as a comment for your expression, you can try for any complex expression you wrote in your App. This improves the readability of your app and also makers can use existing knowledge to quickly get up to speed, minimize errors, and build—fast next time you were working on the same App
Now you can generate Power Fx using Copilot, you can start typing in natural language what you need in comments and as soon you stop typing, it shows as generating as below…you could use either // and /* */, comments can remain in the formula bar as documentation, just like with traditional code.
It generates the Power Fx command for your input as below and then you need to click on Tab key on your keyboard, it will show something like below
And finally, you can see the output as below.
You can apply these two tips for complex formulas as well.
Feature 3:Integrate Canvas Apps with GitHub
Did you ever notice that if the canvas app was opened by one user, when another user tries to open the same Canvas app, you would see a warning message and you need to explicitly click on override to take it forward, meaning at any point of time, only one person could be able to work on the Canvas App.
Now we can use first class Devops with the GitHub Integration feature enabled, many people can work on the same canvas app at the same time and also commit the code for Canvas Apps to Git, let’s see this.
Prerequisites:
You need to have a GitHub Repo created, creating branches is optional, we can use main branch otherwise.
Enable the experimental feature as below
Then you should see
Next thing is you need to configure Git version control as below, you can either use GitHub or Azure DevOps for this, I want to create a new Directory for storing my canvas app like GitHub Test which is not yet in my GitHub Account.
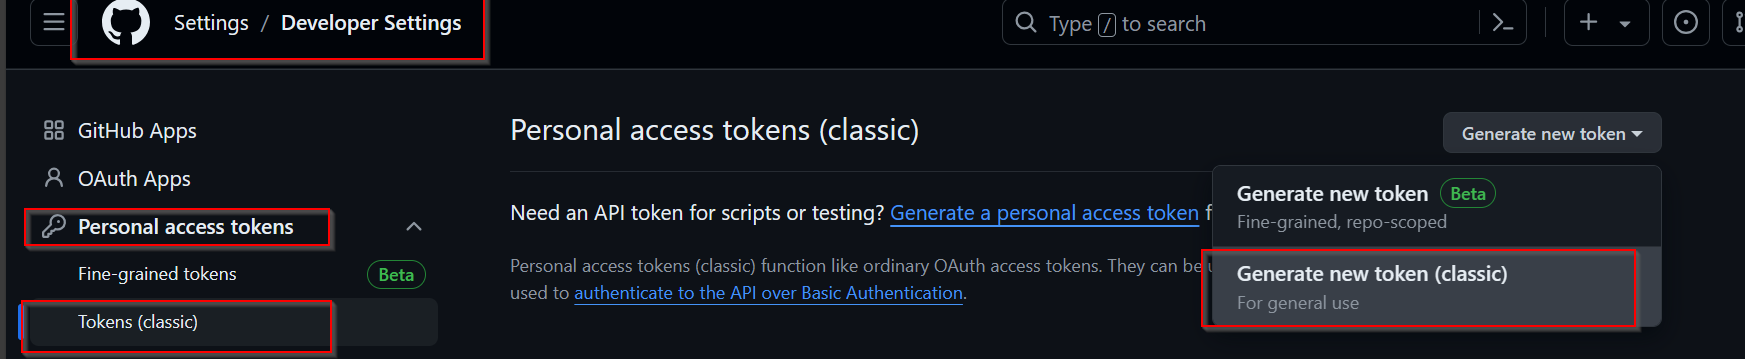
You need to your GitHub Account settings to create a new token as below.
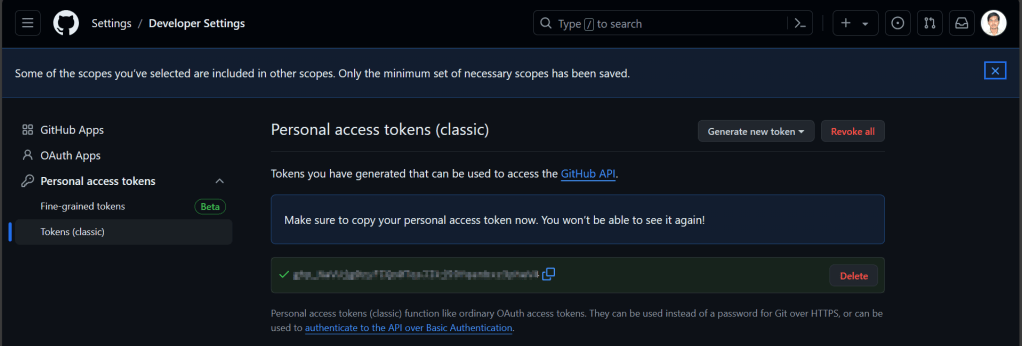
For the personal access token, give repo level scope and click generate token.
Copy the personal access token in the connect to a Git Repository window, once authenticated, you should see a message like below.
Click Yes, you should see something like below
Within a minute, you should the below screen w
So, you should the code files being created in your GitHub Account as below
Now, your team can make the changes in the GitHub, since GitHub allows multiple people to work on it, latest commit will be reflected whenever you try to open the Canvas App from the maker portal. This helps developers build and deploy to source control without leaving the maker portal. Whenever you try to open this app, it will ask your Git Account credentials.
Do note that these features are currently available in US Preview region as they are just released last week in Build and would be released to other regions in near future, possibly in June 2024.
Hope you learned something new coming up next month or sooner…
Wondering how you can enable Copilot in Dynamics 365 Model Driven App …? Then you come to the right place, few days ago, I was trying to use it few days back but couldn’t. Hence this blog post is from my experience.
There were few things to configure for your Copilot to respond to your queries. So, I will be taking about that in this blog post today. Let’s get started…
Copilot in model-driven Power Apps was in Preview since July 2023.
Prerequisite: You must have a non-production environment with Dataverse database, apps, and data.
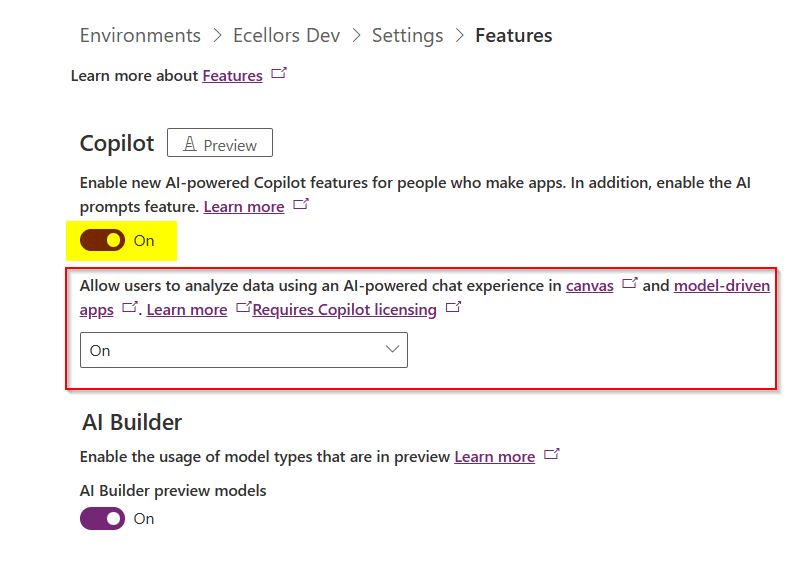
Step 1: Go to Power Platform Admin Center –> Select the environment –> Settings –> Product –> Features –> Select On for AI-powered experience as highlighted below, if you were App maker and want to try it for yourself, you would also need to check the option in yellow below.
Step 2: Go to Power Platform Admin Center –> Select the environment –> Settings –> Product –> Behaviour –> Select Monthly channel or Auto for Model-driven app release channel option and click save.
Step 3: Well, this step is important, in this task, we configure a Dataverse table and columns for Copilot.
Go to Power Apps and make sure that you have the correct environment.
Select tables and navigate to the respective table for which you want to enable Copilot capability.
Step 4: Here I am using OOB Account entity, you can choose whichever entity you wish to setup.
Step 5: Navigate to Properties for the Account table as below
Step 6: Choose settings as highlighted below and click on save.
Step 8: Open the Account table and go views
Step 9: Here in this step, would need configure the Quick Find View, add the necessary fields to the view for it to be searchable for Copilot. Add in the fields which your users would be searching for in the Copilot.
Step 10: Here we have to make sure the fields are added to the view and then save and publish.
That’s it, the configuration is done.
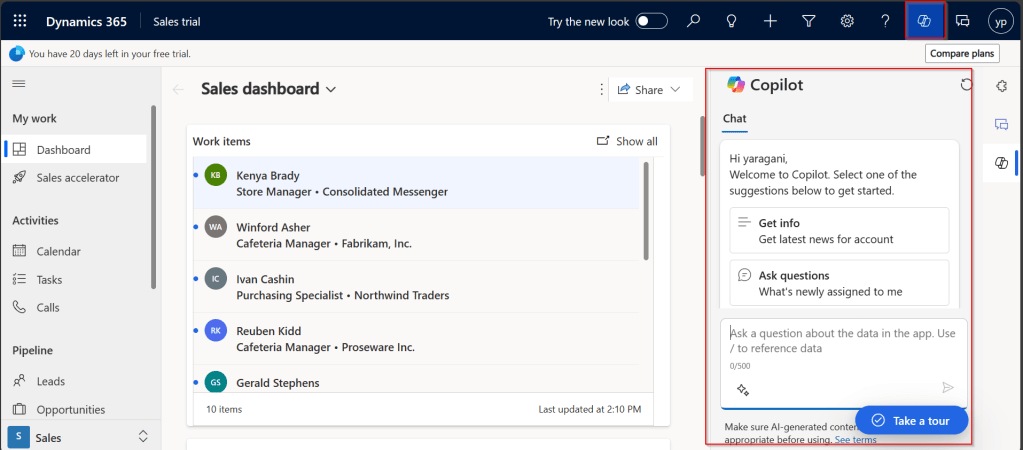
Step 11: In this step, we will test the Copilot by opening the App in which the configured entity is available. Click on the Copilot icon as highlighted below, this shows the Chat window for Copilot
Step 12:
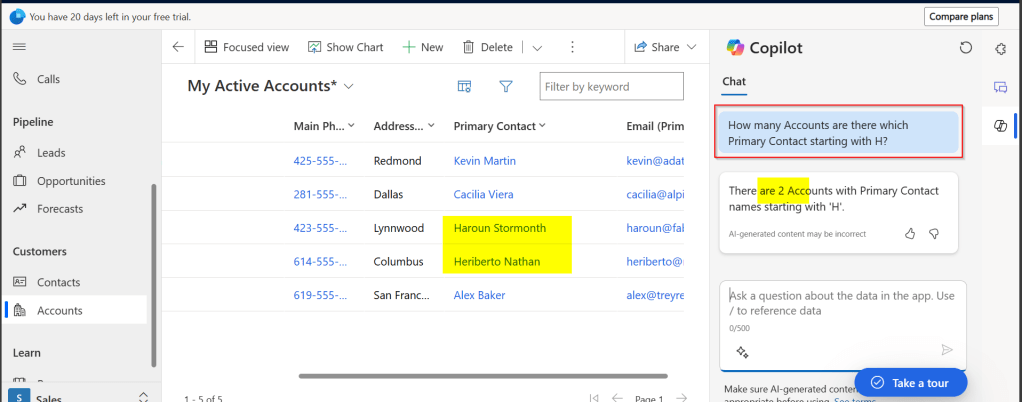
Test 1: Prompt: How many Accounts are there which Primary Contact starting with H? Well, it showed correctly as below.
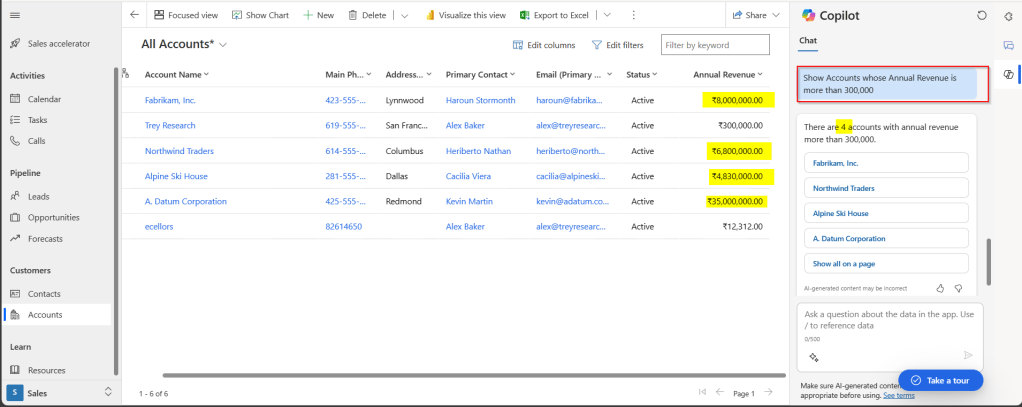
Test 2: Prompt: Show Accounts whose Annual Revenue is more than 300,000? It showed correctly as below.
Hope this helps you to setup Copilot for your Model Driven Apps. I will leave it to yourself to try this out.
Make sure, you give all the details in the prompt itself, it will not be able to store the previous response, meaning you can’t continue your conversation providing information in bits and pieces. You can setup the same for your Custom entity also, make sure you add the fields to the quick find view of that entity.
It is not recommended for Production environments as it is still a preview feature. In case, the response is not accurate, you can report this to Microsoft by hitting thumbs up or thumbs down and provide the relevant feedback.
Lot more to come in the upcoming days, learning different aspects of Copilot became a necessity these days.
Have you or your user ever mistakenly deleted records in Model Driven Apps..? Do you remember we can recover the deleted records from recycle bin in your PC, now similarly we can also do this in Dataverse also.
In this blog post, I will discuss about how you can retrieve a deleted record in Dataverse.
To use this, just enable this feature from Power Platform Admin Center, you can optionally set the recovery interval if you wish to.
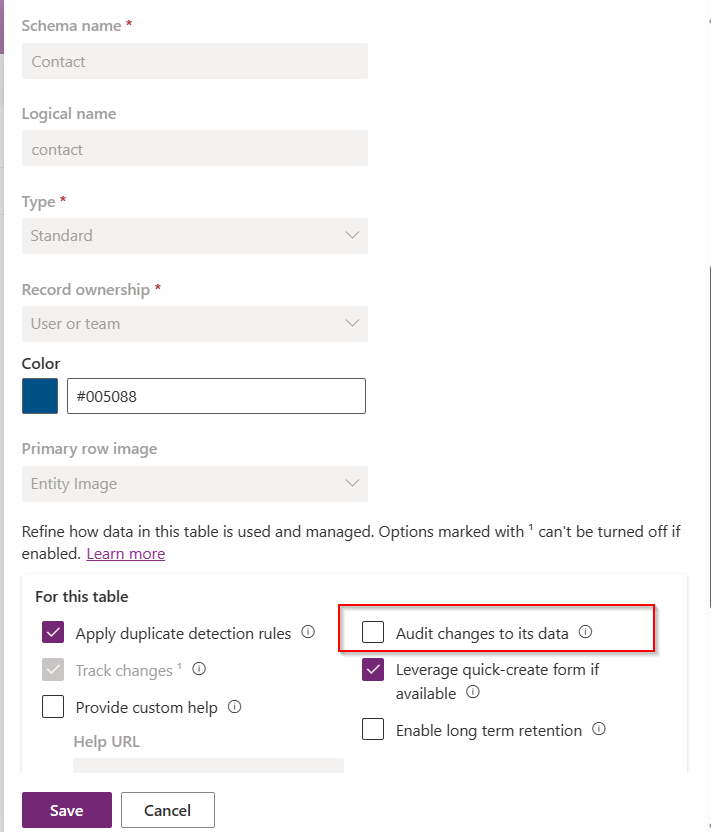
For this, we take Contact table as example, now let’s check the audit setting of the contact table..well, it’s turned off.
Even the auditing is not enabled for the contact entity, with this Recycle Bin Preview feature, we should be able to recover the records, let’s see this in action.
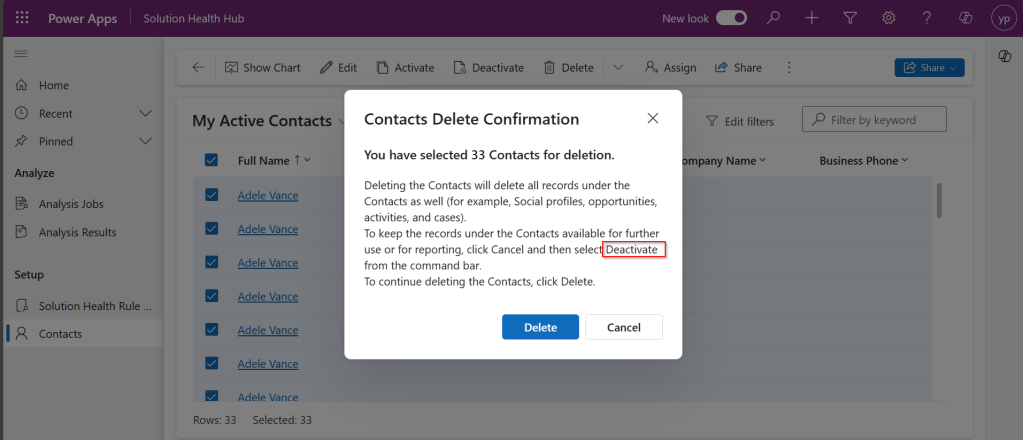
Now try deleting the contact records, I have 33 contact records in my environment, let me delete all of them.
It suggests you deactivate rather than delete, still let’s delete them.
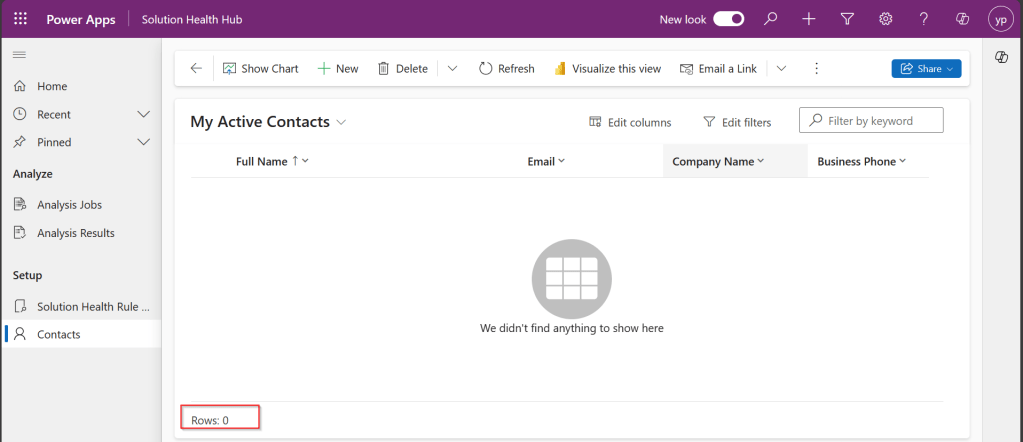
All the records are now deleted.
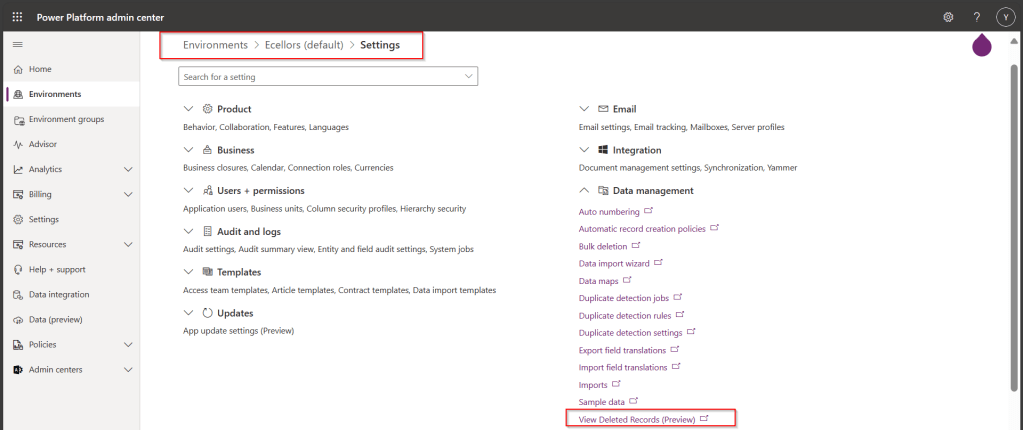
Now, let’s see how to recover them back…. just go to Power Platform Admin Center –> Environments –> Settings –> Data Management
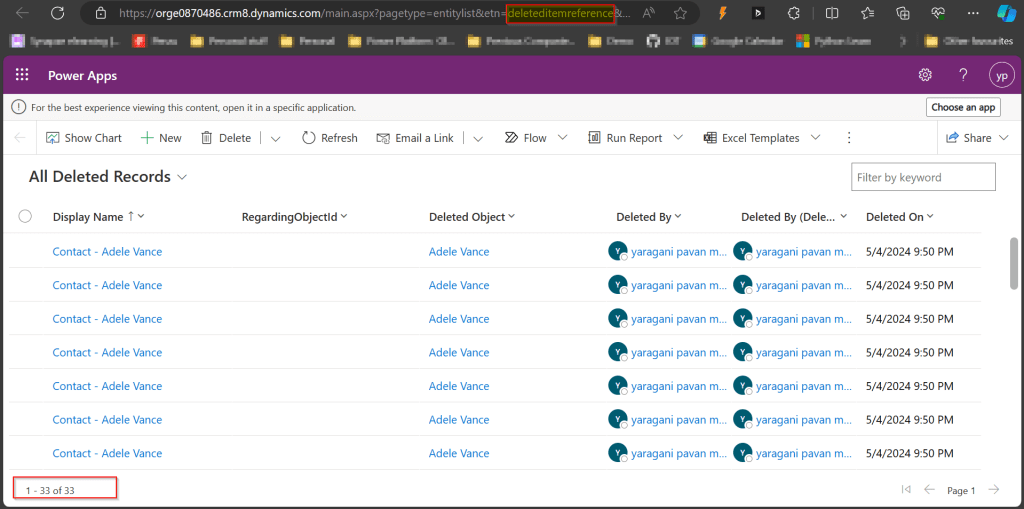
As you click on View Deleted Records, you will be navigated to a view from a new table called DeletedItemReference which stores the deleted records just like recycle bin.
Just select the records, you should see a restore button available on the command bar, here I choose All Deleted Records.
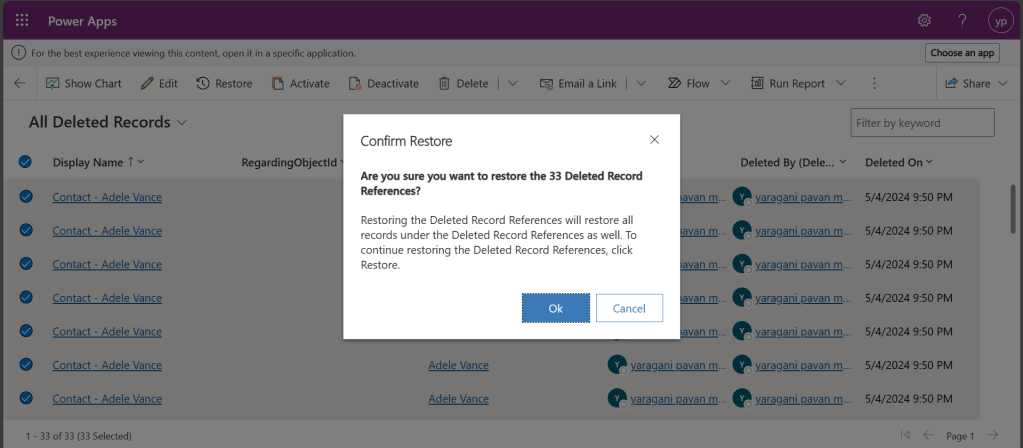
Once you click on restore, you will be shown a confirmation dialog, click on Ok.
You should see the records back in the respective table i.e. Contact here.
In this post, we saw recovering records which were deleted manually…the same thing works for records deleted using Bulk Delete jobs or whatever way you try to delete.
Note:
This is a preview feature and not recommended to use in Production environments right away.
You will not be able to recover the deleted records when you have custom business logic applied to delete the records from deleteditemreference table also, moreover this still a preview feature and not recommended for Production use.
You will be able to recover records which were deleted by the Cascading behavior, like record Child records alone when Parent is still deleted.
You can only recover up to the time frame you have set above and maximum up to 30 days from date of deletion.
Hope you learned something new…that’s it for today…
With this post I will show you how you can quickly add classes for your JSON and XML in Power Platform using Visual Studio.
Sometimes, there will be requirements where you need to convert and replace your Power Automate Flows with custom code either usingPlugins or Actions. In this case, you may definitely need to parse the response returned by REST API calls and you might need to create relevant classes to hold the parameters and attributes, creating these manually would be cumbersome and takes few minutes of time even for a good developer.
Here I am taking the example using JSON.
So, without further due, let’s see in this in action.
Step 1: So, just copy using Cntrl + C shortcut, this is mandatory, else you will not able to see the Paste JSON as Classes and Paste XML as classes under edit..
This file contains hidden or bidirectional Unicode text that may be interpreted or compiled differently than what appears below. To review, open the file in an editor that reveals hidden Unicode characters.
Learn more about bidirectional Unicode characters
In the next few blog posts in this series, I will be talking all about Microsoft Copilot aka Power Virtual Agent from beginner to advanced topics, you might see longer posts but you don’t require any prerequisite knowledge on Copilot to follow.
So, lets’ get started and learn with me in this blog series, let’s dive into the capabilities of Generative AI using #copilot.
Actually, Copilots empowers teams to quickly and easily create powerful bots using a guided, no-code graphical experience.
In this blog post, we will see how you can create a simple Chatbot. Excited? so let’s get started.
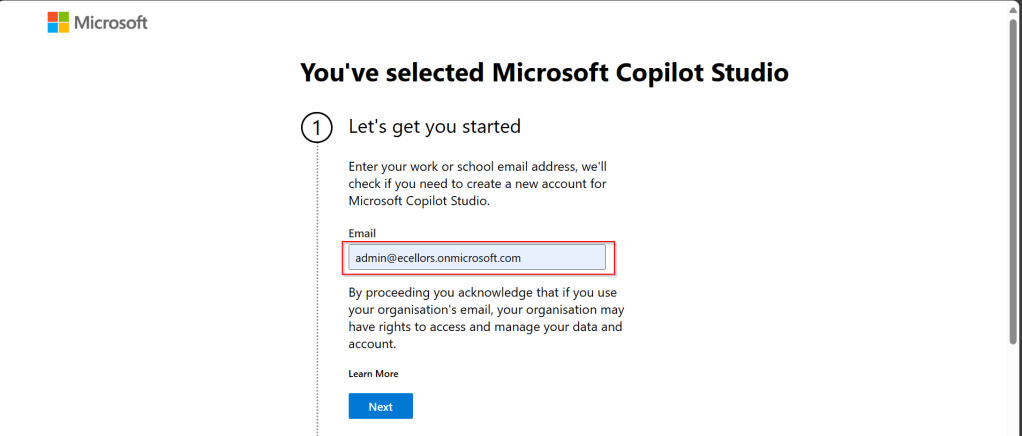
Step 3: Enter your email address and click on Next.
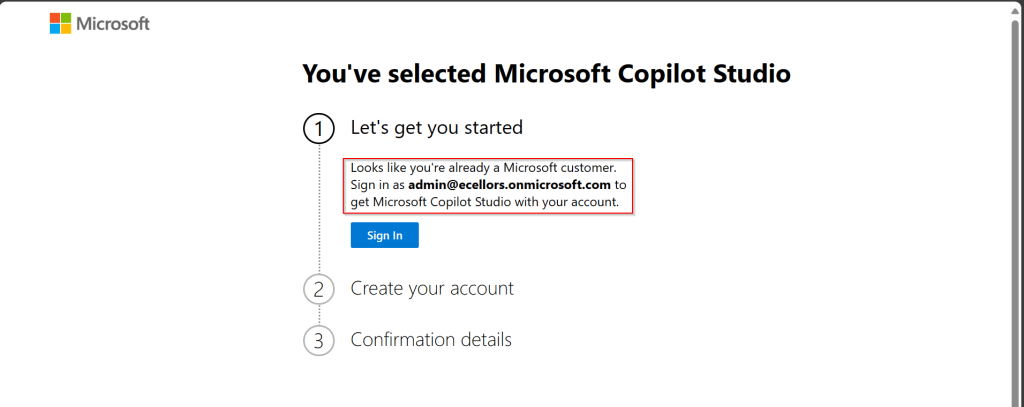
Step 4: In case you have an existing Microsoft 365 Subscription, you will be shown something below.
Step 5: Click on SignIn, I have already had an account in Copilot Studio, in case you don’t have, one will be created.
Step 6:
a. Once you click on Get Started, Copilot Studio opens in a new tab and you will be asked to login once, enter your Signin details.
b. In case you previously logged created a Copilot Studio trial, you can continue using it, else extend it to 30 days if requested. Click on Done at the bottom.
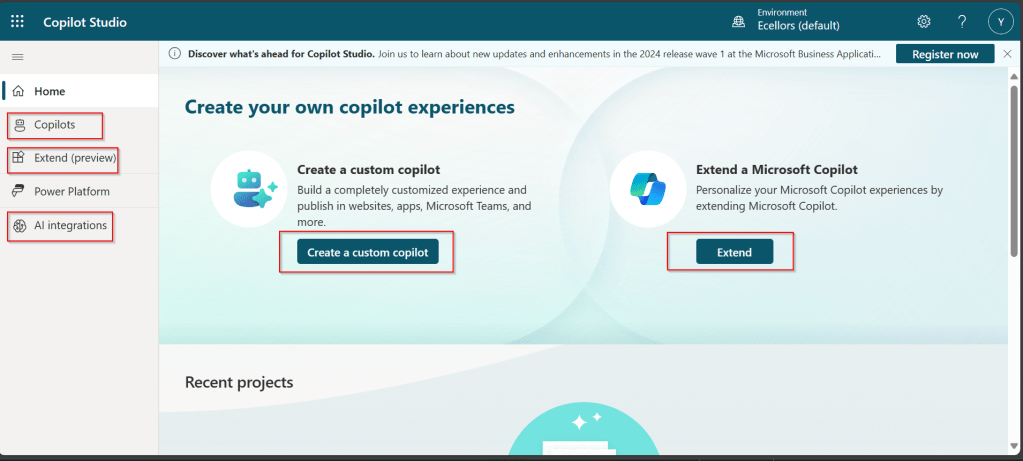
Step 7: Below is the home page of Copilot Studio.
I will be talking about each of the highlighted topics in great detail in the upcoming posts.
Note: Copilots are supported only in certain locations listed in the supported data locations, with data stored in respective data centers. If your company is located outside of the supported data locations, you need to create a custom environment with Region set to a supported data location before you can create your chatbot.
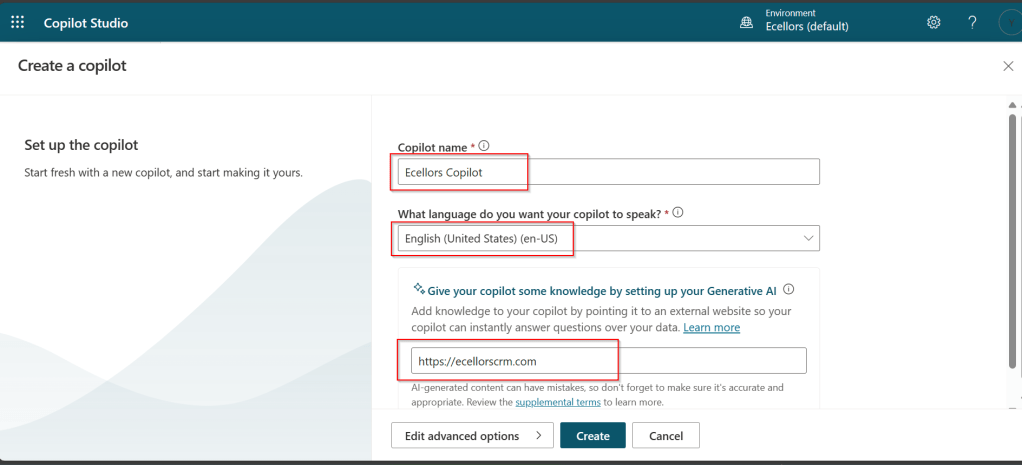
Step 8:In this step, we will create a Copilot, so click on New Copilot
Step 9: I have provided a name; chosen a language and we can provide an existing website to utilize the Generative AI Capabilities built in Copilot Studio.
So, here I have provided my blog address. By using this, Copilot can generate suggested topics which you have option to add to your existing topics.
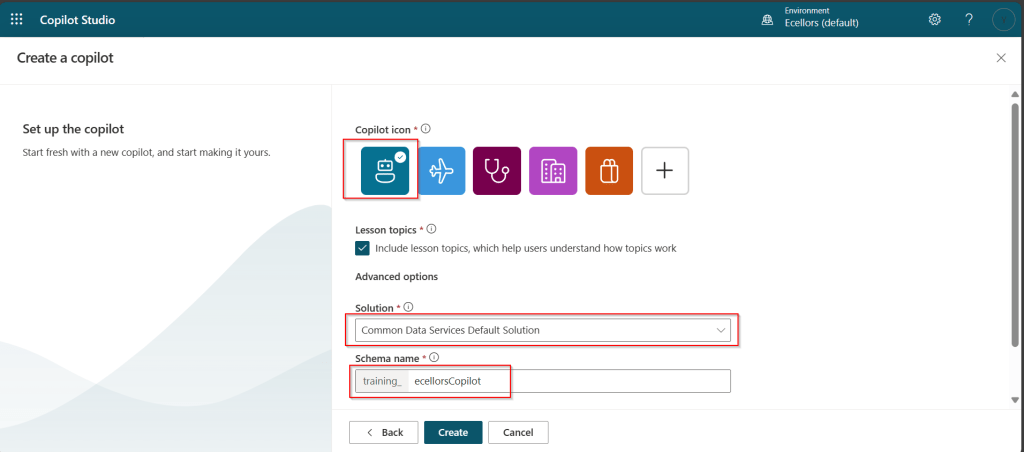
Step 10:
a. Click on advanced options; you will be able to choose an icon for the Copilot
b. You can optionally include Lesson Topics
c. Choose an existing solution you wish to add this Copilot to
d. Choose appropriate Schema name.
e. You can optionally enable voice capabilities by choosing the language in which your copilot wants to speak to.
Step 11: You will be shown the below screen and within a few seconds, your Copilot will be ready.
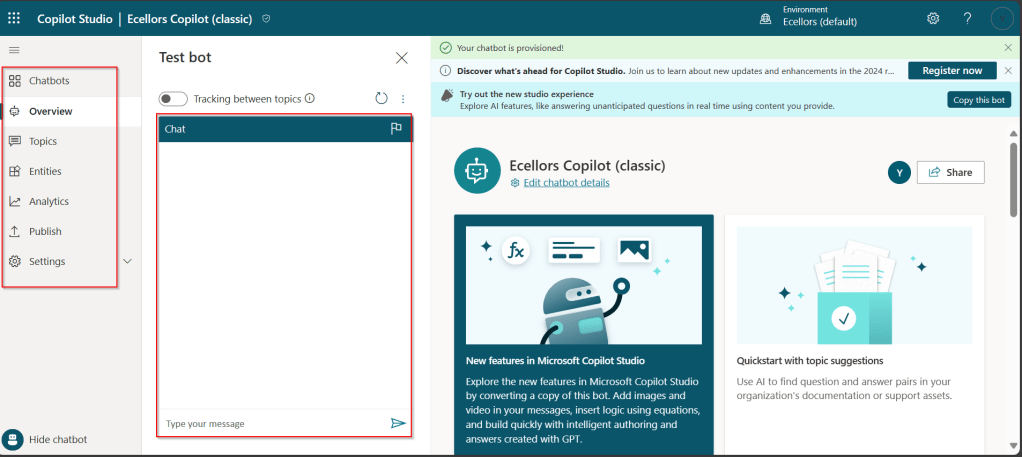
Step 12: This is the main page of your Copilot; you will also be able to add additional Copilots or delete the Copilot.
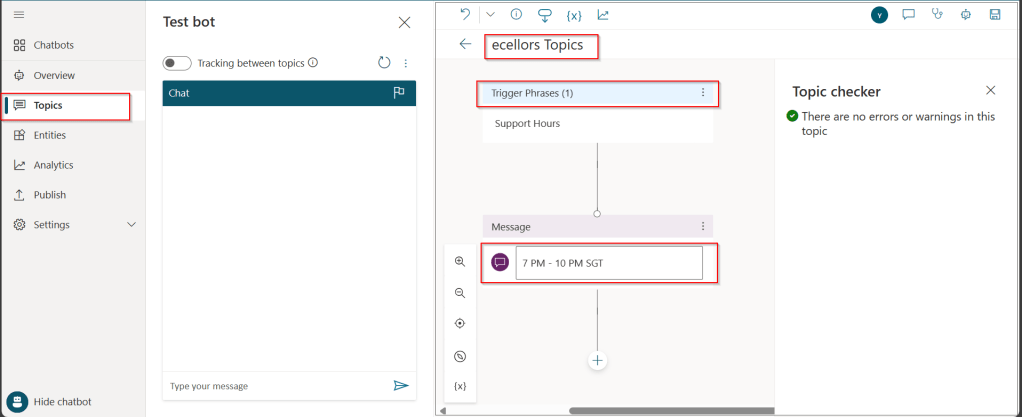
Step 13: Now, let’s understand Topics what one of the building blocks of Copilot which are nothing but predefined categories or subjects which can help to classify and organize the KB/Support articles.
The topics shown on the right are prebuilt topics for the Copilot you have just created. Here you may wish to create new topics as necessary.
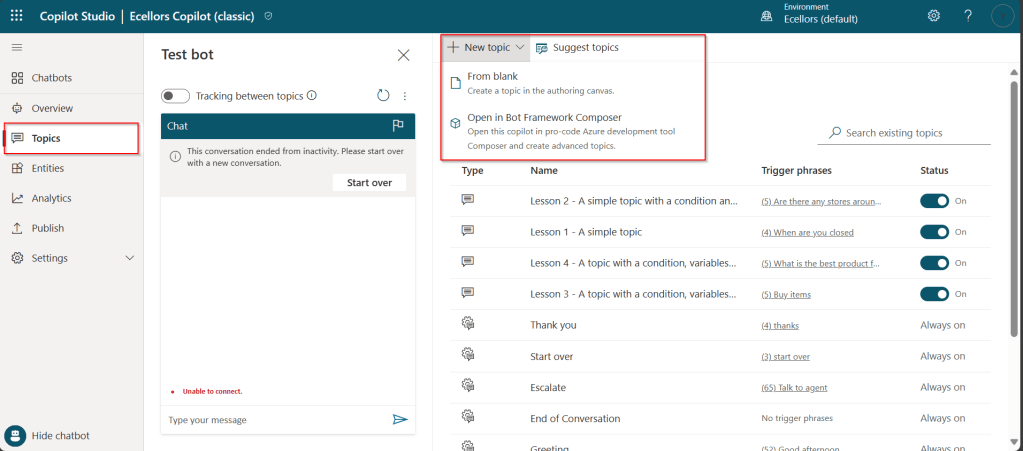
Step 14: Trigger phrases are those which customer enters in the chat window to start the conversation which then calls the relevant topics. There can be multiple trigger phrases for a single topic.
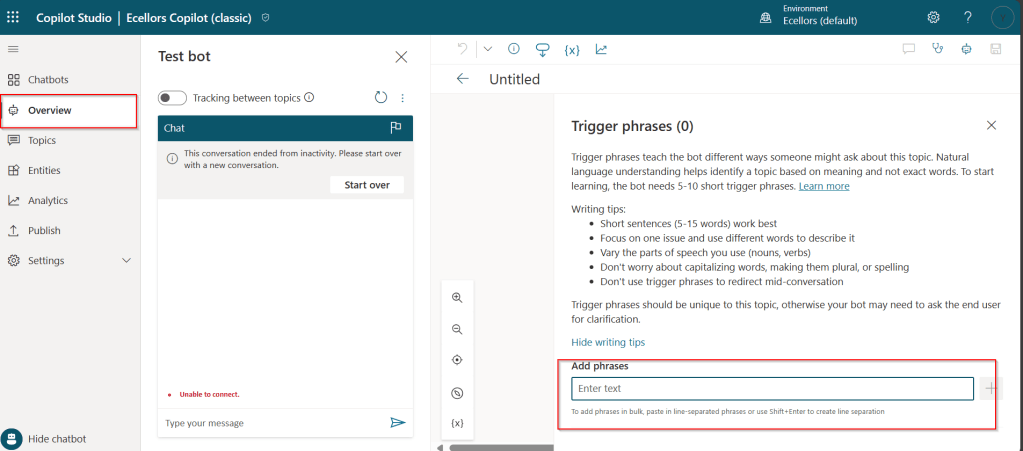
You may click to create a topic which then asks you to provide the trigger phrases, when you click to add a topic, the Trigger phrases node and a blank Message node are inserted for you.
Copilot opens the topic in the authoring canvas and displays the topic’s trigger phrases. You can add up to 1000 topics in a Copilot.
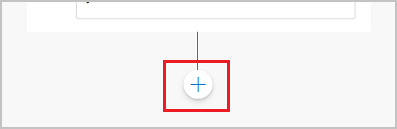
Step 15: You can add additional nodes by selecting the Plus (+) icon on the line or branch between or after a node.
Step 16: When you were adding a new node, you can choose from the below options available.
You can either use any of the available options as above..
a. Ask a question
If you want to ask a question and get response from end user, you may do so by adding a node, click on Ask a question.
For example, I choose Multiple choice options.
Based on what you enter in the Identify field, you can enter what options user may have. You can nodes further to create branching logic
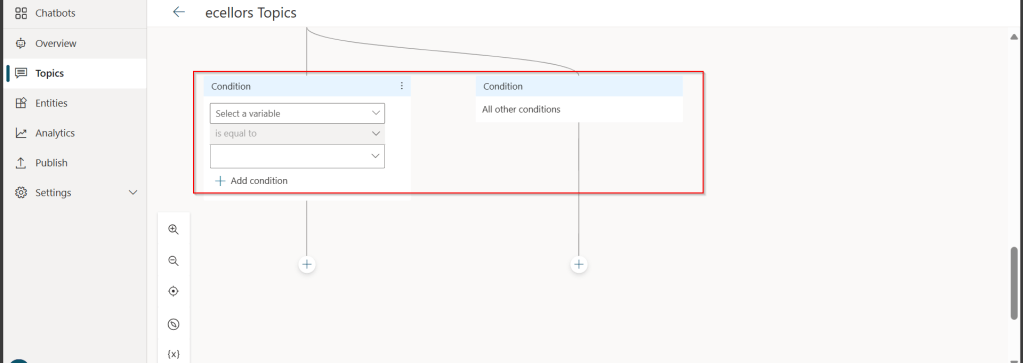
b. Add a condition
You can add a condition in the canvas as below to take your Copilot branch out conditionally.
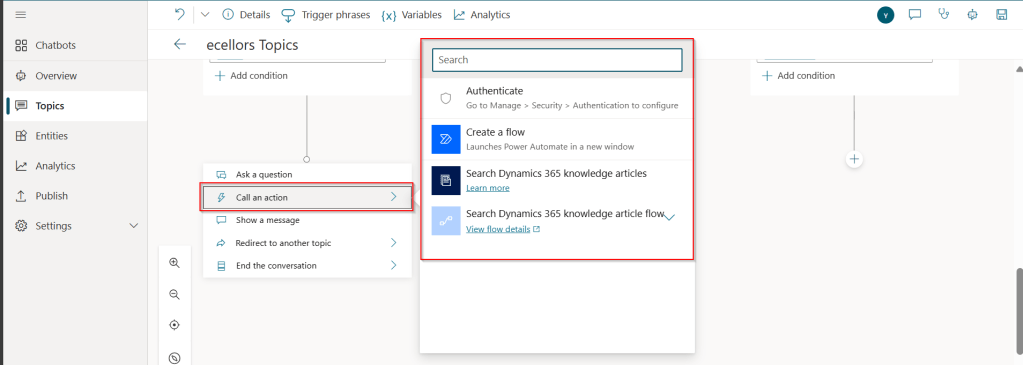
c.Call an action: The options shown below are self explanatory. You can branch out with the possible options.
d. Show a message
You may choose to show a message to the user by entering your message in the text box available.
d. Goto another topic
f. End the conversation:
Finally, you can end the conversation by choosing to end the conversation with the available options or you can transfer to an agent to take the user queries further.
Step 17:
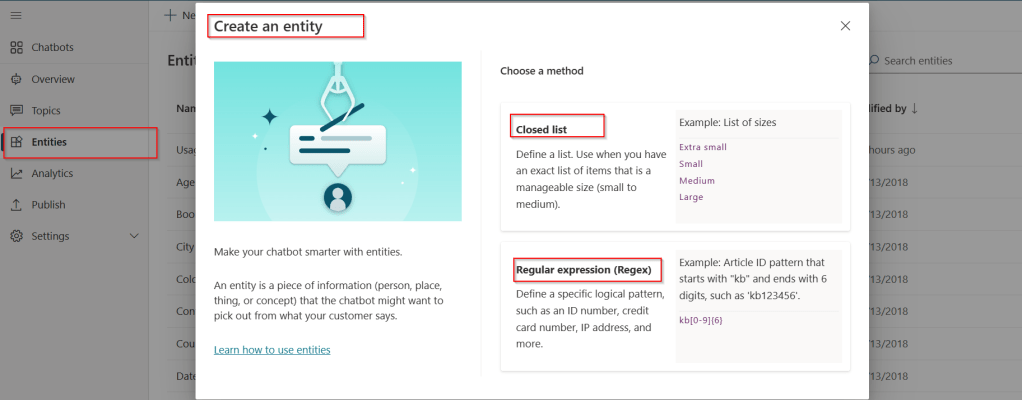
Copilot conversations are all about natural language understanding. Entity is the fundamental aspect which can be recognized from user’s input.
It can be simply can be thought real world subject like Person name, Phone number, Postal Code etc. We have system as well as custom entities while building.
You can also build custom entities you can choose from the options available.
Now that you have seen what are the building blocks of Copilot, in the upcoming blog posts let’s see on how to test and publish your copilots.
Well, this could be a very interesting post as we talk about optimizing the Dataverse performance using bulk operation messages and too using Dataverse plugin customizations but wait, this post is not complete because of an issue which I will talk later in the blog. First let’s dig into this feature by actually trying out. Generally, every business wants improved performance for any logic tagged out to out of box messages and so developers try to optimize their code in various ways when using Dataverse messages.
Firstly, before diving deeper into this article, let’s first understand the differences between Standard and Elastic tables, if you want to know a bit of introduction to elastic tables which were newly introduced last year, you can refer to my previous post on elastic tables here.
The type of table you choose to store your data has the greatest impact on how much throughput you can expect with bulk operations. You can choose out of two types of tables in Dataverse, below are some key differences you can refer to:
Standard Tables
Elastic Tables
Data Structure
Defined Schema
Flexible Schema
Stores data in Azure SQL
Stores data in Azure Cosmos DB
Data Integrity
Ensured
Less Strict
Relationship model
Supported
Limited
Performance
Predictable
Variable, preferred for unpredictable and spiky workloads
Agility
Limited
High
Personalization
Limited
Extensive
Standard and Elastic Table Differences
Plugins:
With Bulk Operation messages, the APIs being introduced are Create Multiple, UpdateMultiple,DeleteMultiple (only for Elastic tables), Upsert Request(preview). As of now you’re not required to migrate your plug-ins to use CreateMultiple and Update Multiple instead of Create and Update messages. Your logic for Create and Update continues to be applied when applications use CreateMultiple or UpdateMultiple.
This is mainly done to prevent two separate business logics for short running and long duration activities. So, it means Microsoft have merged the message processing pipelines for these messages (Create, Create Multiple; Update, Update Multiple) that means Create, Update messages continue to trigger for your existing implemented scenarios, when you update to use Create Multiple, Update Multiple still the Create, Update will behave.
Few points for consideration:
While I have tested and still could see IPluginExecutionContext only provides the information and still I have noted Microsoft Documentation suggests using IPluginExecutionContext4 for Bulk Messages in Plugins where it is being shown as null yet.
While you were working with Create, Update, Delete, you could have used Target property to get the input parameters collection, while working with Bulk Operation messages, you need to use Targets instead of Target.
Instead of checking whether the target is Entity you need to use Entity Collection, we need to loop through and perform our desired business logic
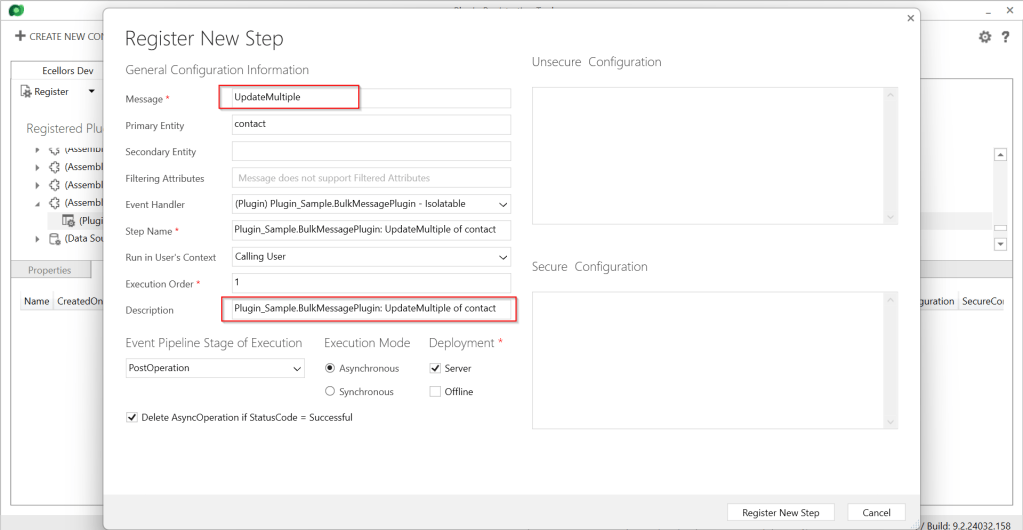
Coming to Images in plugin, these will be retrieved only when you have used IPluginExecutionContext4.
Below is the image from Plugin Registration Tool to refer(e.g. I have taken UpdateMultiple as reference, you can utilize any of the bulk operation messages)
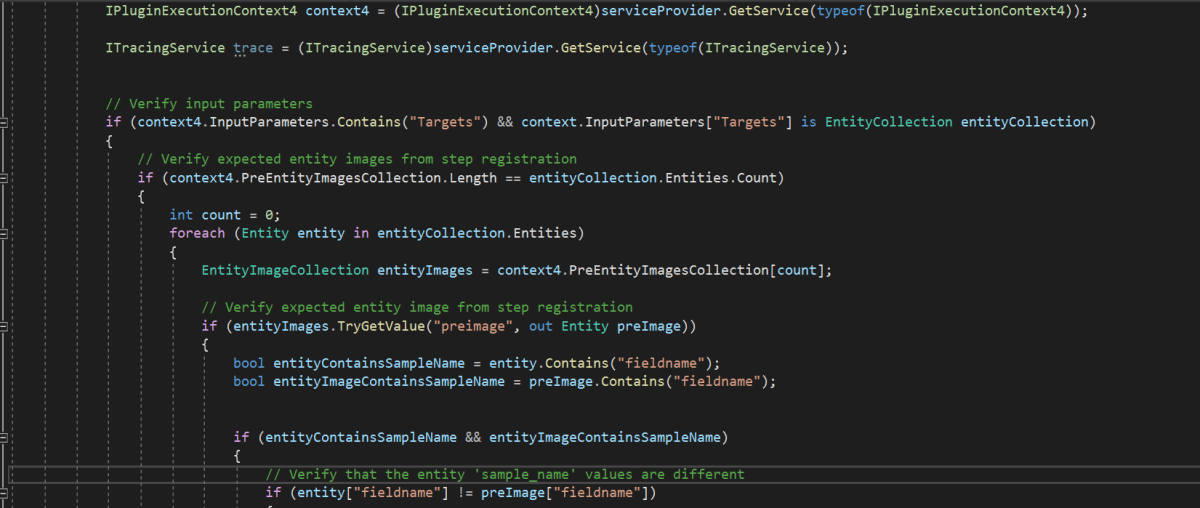
Sample:
Below is the sample, how your Bulk operation message plugin can look like…you don’t need to use all the contexts, I have used to just check that out.
This file contains hidden or bidirectional Unicode text that may be interpreted or compiled differently than what appears below. To review, open the file in an editor that reveals hidden Unicode characters.
Learn more about bidirectional Unicode characters
I have posted this question to Microsoft regarding the same to know more details on this why the IPluginExecutionContext4 is null , while still I am not sure if this is not deployed to my region, my environment is in India.
Recommendations for Plugins:
Don’t try to introduce CreateMultiple, UpdateMultiple, UpsertMultiple in a separate step as it would trigger the logic to be fired twice one for Create operation and another for CreateMultiple.
Don’t use batch request types such as ExecuteMultipleRequest, ExecuteTransactionRequest, CreateMultipleRequest, UpdateMultipleRequest, UpsertMultipleRequest in Plugins as user experiences are degraded and timeout errors can occur.
Instead use Bulk operation messages like CreateMultipleRequest, UpdateMultipleRequest, UpsertMultipleRequest
No need to use ExecuteTransactionRequest in Synchronous Plugins as already they will be executed in the transaction.
Hope this guidance will help someone trying to customize their Power Platform solutions using Plugins.
I will write another blog post on using Bulk operation messages for Client Applications…